| How To Braid Wire |
| Forgot again, eh? Well here it is, all spelled out for you.. |
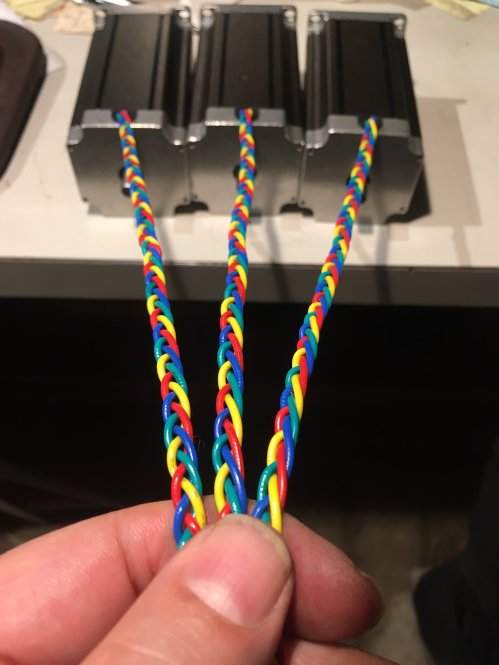
| 6 WIRE BRAIDING | |
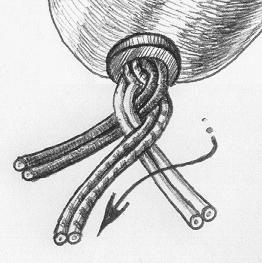
| Take the 6 wires from the motor, and arrange them into 3 pairs. To braid them, first consider there's a center pair, and two outer pairs. Basically, the outer pairs alternate crossing over the center pair. For example... | |

|
Grab the left outer pair, and cross them over the center pair, so they become the new center pair. Now grab the right outer pair.. |
|
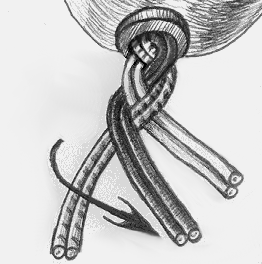
..and cross them over the center pair,
so they become the new center pair.
Now grab the left outer pair.. |
|
..and cross them over the center pair,
so they become the new center pair.
Repeat as necessary. |
Tips
|
|

|
8 WIRE "FLAT" BRAIDING (Works with 4 wire motors too) |
|
|
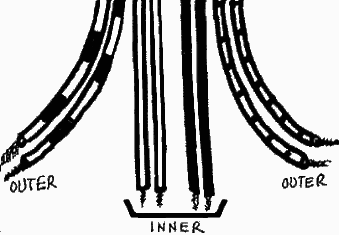
Start out with 4 pairs of wires.
Consider the inner pairs and the outer pairs. |
|
The inner pairs cross each other and jump over
and around the outer pairs, thus becoming the new outer pairs.
Repeat as necessary. Be consistent in how you do the cross overs. |
Tips
|
|
|
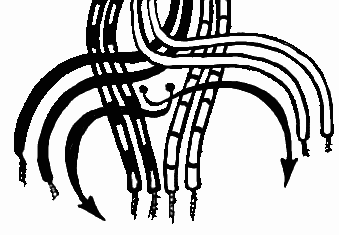
8 WIRE "3D" BRAIDING (I like this best - works with 4 wire motors too) |
|

| |
|
Start with the left-outer wire. Cross it under in the inner two, then up, and back over to the left, leaving it to the right of the new outer-left wire (ending up "in one" from where it was). Repeat this same technique on the right-outer wire; cross it under the inner two, then up, and back over to the right, but leaving it to the left of the new outer-right wire (ending up "in one" from where it was). Keep track of which side you're on at all times; you're either working on the left-outer wire, or the right-outer wire, getting it under the inner two, then up and over them, landing in one from where it was.
My mantra is to say outloud the wire color I'm working on and its position before and after I twist it, e.g.
"Red on the outside, Red on the inside.." This helps keep track of things incase the wires slip around,
and keeps track of which side you're working on as you alternate from left to right.
| |
Tips
| |
The end result of the above for a four wire motor ends up looking like this:
| |