RUSH LOGO Rush Render Queue - www-rush Web GUI
(C) Copyright 1995,2000 Greg Ercolano. All rights reserved.
V 102.43 10/12/07
Strikeout text indicates features not yet implemented


www-rush Overview


** NOTE: This tutorial is in progress ***

Use the software's online help, which is fully functional.
Just right click on any irush buttons or inputs for pop-up help.


   Installing www-rush  

www-rush is a simple perl script that you can install in the cgi-bin directory of your internal web server as a means for users to monitor and/or manage rush jobs.

Follow the instructions specific to your web server's platform:

   Main Screen  

When you first connect to the www-rush server page, you see a panel containing several sub-panels of buttons. Pressing these buttons will let you view reports and otherwise control your job.

Reports will show up in a screen below the button panel, from which you can often make selections that let you focus on controlling individual elements in the report.

  • The 'Reports' buttons all generate various rush reports, such as frame lists, job lists, cpus, etc.

  • The 'Job Modification' buttons all bring you to other screens that let you modify settings for the 'current job'.

  • The 'Job Control' buttons all affect the current job, letting you pause/continue/dump the job.

  • The 'Job Info' lets you change the 'current jobid', which affects the buttons in this panel.

All the buttons in the upper panel affect the 'current jobid', which is shown in the upper right Jobid input field. (That is why all the buttons are grouped together in the black box) You can change the Jobid value at any time by just typing in a new jobid, and then selecting one of the buttons to control the new jobid.

The blank gray screen below is where the output of operations appears. Often, the system will let you click on report's text output, letting you control the selected items with buttons that would appear below the text window.

    Note: www-rush does not currently support submitting jobs, it only lets you control jobs that have already been submitted.

   The Jobid  

Assuming you have one or more jobs running, the first thing you'll want to do is set the Jobid in the Job Info subpanel, so you can work with it.

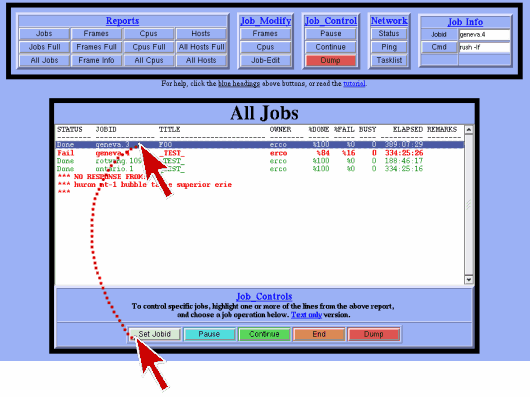
Another way to set the jobid is to hilight jobs from a Jobs report. The following shows you how to do that.

At very least, enter a hostname in the Jobid input window that is the 
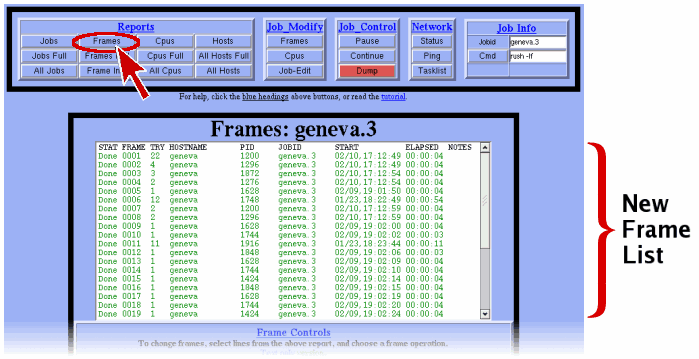
name of your job server, then hit the Jobs button.

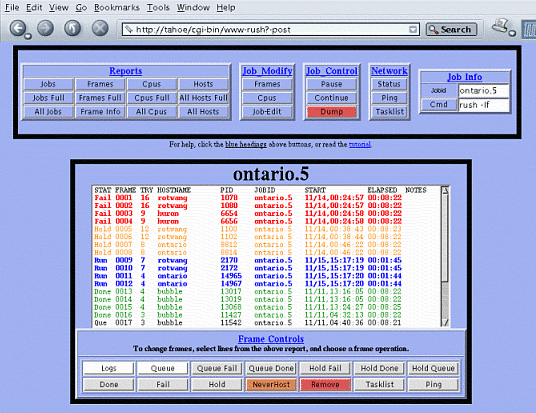
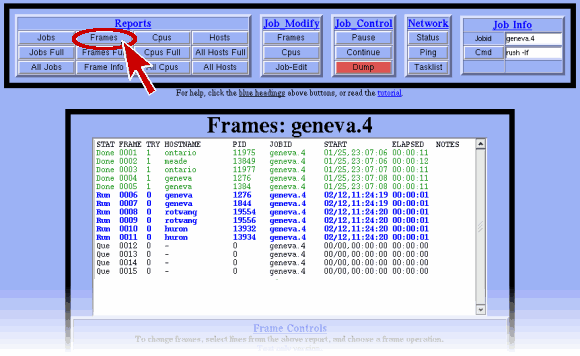
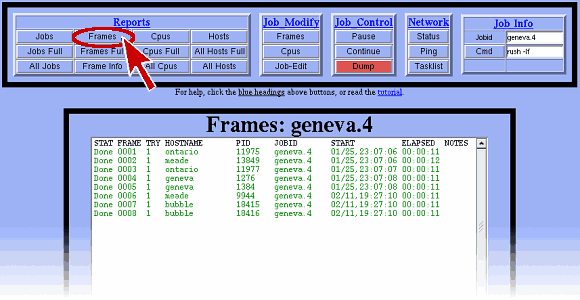
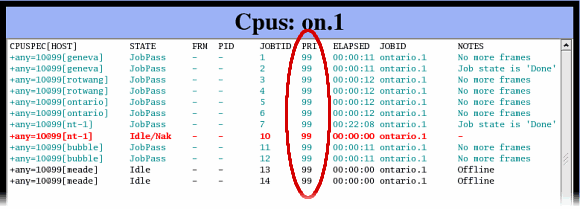
This will give you a report showing all the jobs being served by that machine. 
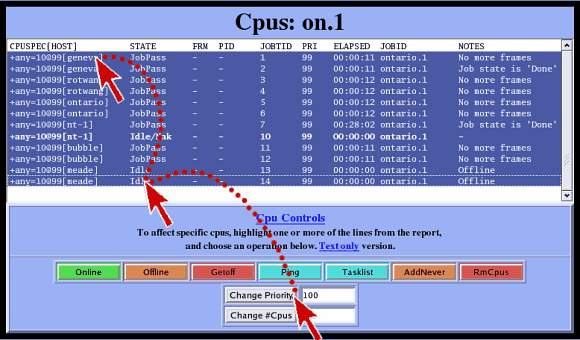
When the screen updates, you'll see a jobs report in the text window, followed by buttons that will let you control jobs.

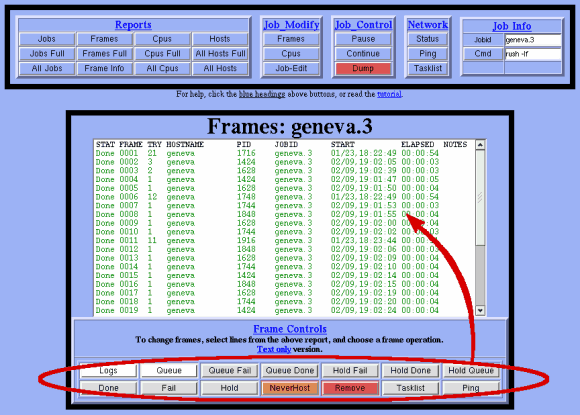
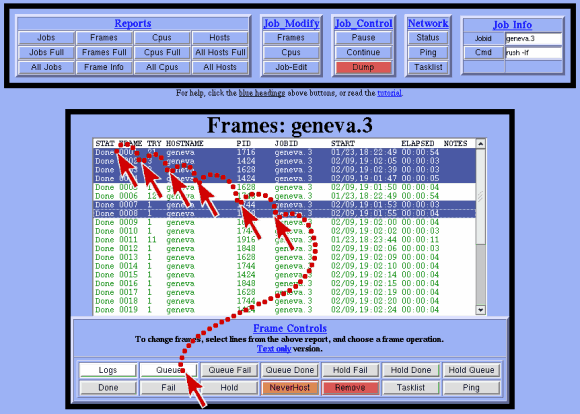
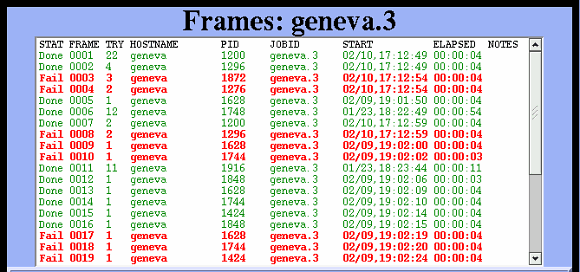
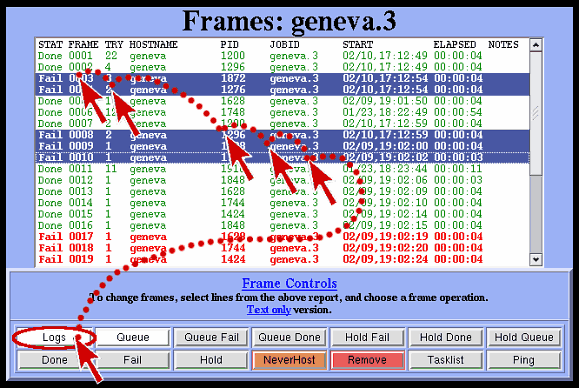
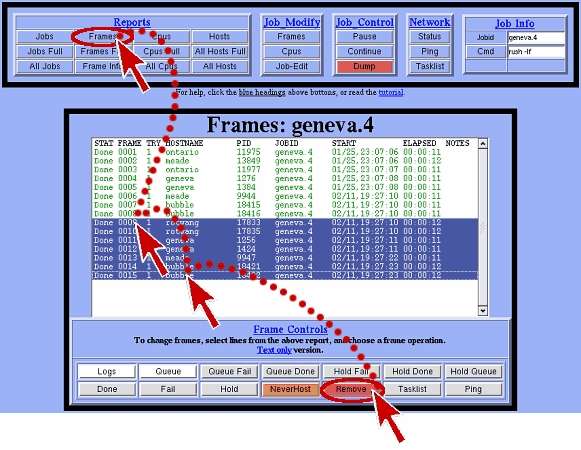
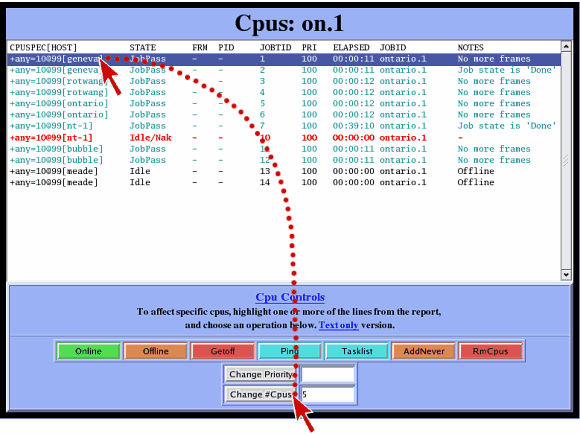
Select the job you want to control by clicking on it in the text window, then hit the Set Jobid button below, to make that the new 'current job':

    Note: Similar to the grouping in the upper panel, all the buttons below the text window are grouped with the text window in a black box to show these buttons are tied to selections made in the text window. Anything you hilight in the window will be affected by the operation buttons below.

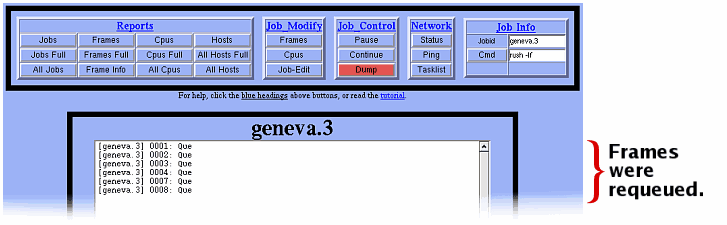
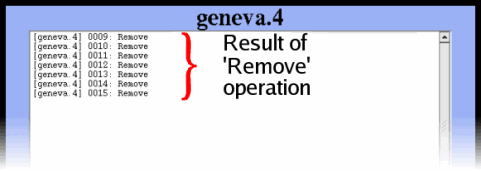
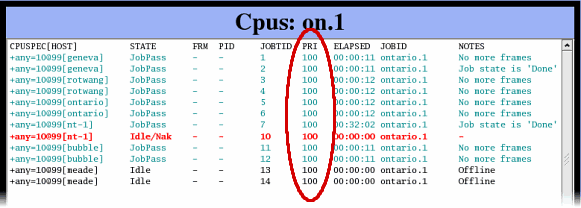
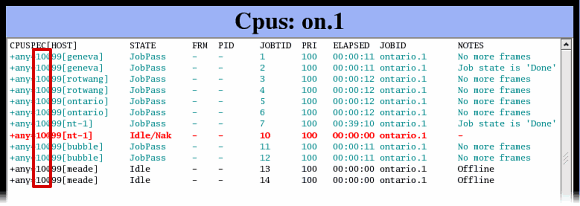
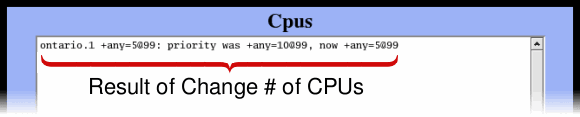
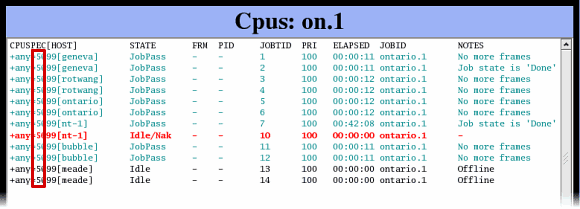
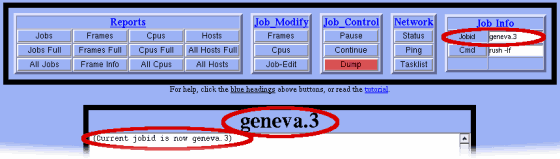
When the screen updates, the Jobid field will now show the 'va-222' jobid, and a message indicating the new jobid has been set.

   Frames Reports  
Once a jobid has been selected, you can use any of the buttons in the upper panel to pull reports from the job, or even control the job. Hit the Frames button to get a frames report.

When the screen updates, you will see a frame report for the job. Below that will be a series of 'Frame Control' buttons. By selecting frames from the frame list, you can use these buttons to change the frames selected.

As before, the buttons grouped below the text window all affect which ever items you select in the text window. Since this is a frame report, buttons relevant to controlling frames are shown.

In this case, all the frames are marked 'Done'. So we select a few of the frames, and requeue them by hitting the Queue button..

   Requeuing Frames  

When the screen updates, it will show the output of the Queue operation.

Hit the Frames button, and a new frames report will appear.

   Viewing Frame Logs  
Similar to requeing frames, you can view the frame logs for particular frames. Consider a frame report that looks like:

Click on a few 'Fail' frames and hit the Logs button to see their error logs.

When the screen updates, we might see:

In this case, the logs shows there's a disk space problem. Once we clear that up, we can requeue the frames in any number of ways:

  • Hit Frames to get a new report, select the frames by hand and hit Queue
      -- or --
  • Hit the Back button to re-use your selected frame list, and click on Queue.
      -- or --
  • Hit Frames to get a frames report, and hit Queue Fail to requeue all Fail frames
      -- or --
  • Go to the Cmd window, type rush -que fail and hit Cmd to requeue all Fail frames.

Note that each frame log has the format:

Rush prints a header into the log file, indicating all the information relevant to that frame. Below the header is the output of your render script.

Learn to look at your logs carefully when debugging problems; most renderers will print very useful errors that will clue you in on what may have gone wrong when rendering bad frames.

   Adding Frames  
You can add frames to an existing job at any time by choosing the 'Frames' button in the "Job Edit" section of the Control Panel:

This will open up the "Frames Modify" screen, where you can type in the frame range you want to add to the current job:

When you hit the "Add Frames" button, the result of the add operation (rush -af) will be shown on the next screen:

To see an updated version of the frames report, hit the "Frames" button:

..where you can see the new frames 6-15 have been added, and have immediately started rendering.

   Removing Frames  

You can easily remove frames by highlighting the frames in the "Frames" report that you want to remove, then hit 'Remove'.

When you hit the "Remove" button, the result of the remove operation (rush -rf) will be shown on the next screen:

To see an updated version of the frames report, hit the "Frames" button:

..where you can see the frames have been removed.

   Change Priority  

You can change the priority for the cpus in an existing job at any time (even while the job is rendering) through the Cpus report screen. To display the CPUs and their current priorities, hit the "Cpus" button under Reports.

This example shows all CPUs with a priority of 99.

To change the priority of any given group of Cpus, multiple-select the group (using Shift-select), enter the new value of 100 in the "Change Priority" box, and finally hit the "Change Priority" button:

The result:

To view an updated version of the Cpus report, hit "Cpus" again to see the priorities have now been changed.

   Change #Cpus  

You can change the cpu caps for the cpus of an existing job at any time (even while the job is rendering) through the Cpus report screen. To display the CPUs and their current cpu caps, hit the "Cpus" button under Reports.

In the following example, we see the +any group is capped at 10; no more than 10 cpus will be used for rendering at any given time for this group of cpus:

Let's change the number of cpus from 10 to 5.

Select the first CPU entry in that group (it is only necessary to select one), and enter a new value of 5 in the "Change #Cpus" box, then hit the "Change #Cpus" button to apply the change.

The result:

To view an updated version of the Cpus report, hit "Cpus" again to see the cpu caps have now been changed.