Erco's FLTK Cheat Page |
These are some common FLTK code snippets I often find hard to remember how to do when looking at the docs. Besides, I like having working code examples handy that I can cut + paste from to get started with right away. I often start with these mini-programs and turn them into working programs.This is always a work in progress; I add examples as I encounter the need for them.
Table Of Contents Fl_Browser Tricks for using a browser Right-Click Context Menu Simple example of a right-click context menu Fl_Text_Display Simple example of Fl_Text_Display Fl_Text_Display with colors Simple example of Fl_Text_Display with color styles Fl_Multiline_Output Simple example of Fl_Multiline_Output Fl_Menu_Bar: Changing Labels Shows how to access and change menu item labels at runtime Fl_Menu_Bar: Toggling menu items Shows how to toggle a menu item procedurally Fl_Menu_Bar callbacks One callback for all menu items, w/out userdata! Fl_Menu_Bar: Miscellaneous Miscellaneous techniques to manipulate Fl_Menu_Bar/Fl_Menu's Fl_Radio_Button How to handle radio buttons Fl_JPG_Image Simple example to display a JPEG image Fl_Image How to walk pixels of an Fl_Image Fl_Wizard How to make a 'wizard' using Fl_Wizard Animate Image How to animate images in FLTK Animate Line Drawing How to animate line drawing in FLTK Fltk Event Names How to print FLTK event names from within your program (for debugging) popen() + add_fd() How to use popen() with add_fd() Fltk + Fifos How to use fifos to control a console program from fltk, showing output in Fl_Browser Slider+Input How to tie an Fl_Slider to an Fl_Int_Input Slider+Tooltip An Fl_Slider with a floating 'tooltip' to show the current value Fltk-tty Shows how to fork() child processes and display their real-time output Draw An X Simple FLTK custom widget to draw an 'X' Scrollable Canvas Shows how to make a scrollable custom canvas Custom Bar Graph Shows how to draw a customized 'trigger' shaped bar graph Table Of Widgets Shows how to make a resizable 'table' of widgets, using Fl_Scroll and Fl_Tile Draggable Boxes Simple app shows user can drag boxes on scrollable 'desk' Popup Menu Shows how to make a popup menu appear Right-Click Popup Copy/Paste Menu Shows how to add a copy/paste popup menu to Fl_Input Popup Text Window Shows how to make a borderless text window pop up Draw Coordinates How to draw mouse coordinates w/out redrawing screen Progress Bar Demo How to update a progress bar in fltk Scrollable Resizable Widget Browser Demonstrates a scrollable browser of widgets that are resizable. Scrollable Image Viewer How to display an image in a scrollable viewer Disable Symbols How to disable '@' symbols throughout your FLTK application OpenGL Simple Example Simple OpenGL example showing how to draw an 'X' OpenGL App with FLTK Widgets Simple OpenGL app with FLTK widget controls OpenGL Shape Interpolation Shows how to animate simple shape interpolation in opengl OpenGL Sphere With Light Simple OpenGL Shaded Sphere with Light Fl_File_Browser Shows how to use the very sparse Fl_File_Browser Fl_File_Chooser Shows how to use Fl_File_Chooser (simple, and full test) Clicks on Scrollable Box How to get the coordinates for mouse clicks on scrollable box Fl_Browser with Columns How to use the Fl_Browser methods column_widths() and column_char() Fl_Browser Sorting How to sort an Fl_Browser Strike Through Text Demonstrate how to draw strike through text Fl_Gl_Window + Cursor Demonstrate how to change the mouse cursor for an Fl_Gl_Window Fl_Resize_Browser How to extend Fl_Browser to have interactively resizable columns Fl_Tile (4) Port Fl_Gl_Window How to make a 4 port proportionally resizable OpenGL window using Fl_Tile OpenGL with Dynamic Popup Menu How to make a dynamic popup menu for an OpenGL window Drop Shadow Box Example How to make text with a drop shadow effect OpenGL 2D Text on 3D Object How to make text appear on a spinning OpenGL object Simple Fl_Tabs Example Simple demo of how to use the Fl_Tabs widget Making a Mac "Bundle" (.app) How to turn a Mac FLTK application into an ".app bundle" Making icons for Mac "Bundles" How to make icons for your Mac application Touch Pad How to make a pop-up numeric keypad for touch screens Drawing into overlay planes Two examples on drawing into the overlay planes Thumbnails In Scroller How to show a scroller of thumbnail images with labels Drag And Drop How to use Drag+Drop fl_draw_image() How to draw into a pixel buffer, and display it using fl_draw_image() FLTK/WIN32 File Chooser How to open a WIN32 File Chooser directly from FLTK Fl_Group Event vs. Draw Clipping Fl_Group xywh clips children of events, but not graphics Vertical Tabs How to use Fl_Browser to implement a 'vertical tab' dialog Fl_Chart How to use Fl_Chart Fl_Scrollbar How to use Fl_Scrollbar How to draw text over an image How to derive a class that draws text over an image. OpenGL Texture Mapped Cube A texture mapped cube with perspective. OpenGL Image Textured Cube A PNG image texture mapped to a cube with lighting model, materials, and perspective. UTF8 Japanese Font Test An test program using Japanese UTF8 (fltk-1.3.x and up) Alpha Blending Example of alpha blending with PNG images Simple Terminal Emulator Example of how to make a scrolling terminal for executing commands using Fl_Text_Editor. A Toolbar Widget with Fl_Pack Example of how to make an icon toolbar using an Fl_Pack of Fl_Button's. Key Press/Release demo Use Fl_Button to visualize keyboard up/down events. Multiple Selections in Fl_Table Show how to make a secondary selection with Fl_Table Multilanguage Menubar Shows how to make a multilanguage menu bar. Dynamic "Open Recent.." Submenu Demonstrate a Dynamic "File/Open Recent../" Submenu Application Icons How to make an application icon for the different platforms. Double Click Detection How to mutually exclusively detect single and double clicks Demonstrate Fl_RGB_Image How to use Fl_RGB_Image to display an inline image. PNG hex dump of pixel data A useful program that dumps a PNG file in hex, suitable for inline C/C++ use A multicolored bargraph Demonstrate how to use alpha channel images to construct a curved bargraph widget Synchronized Knobs Demonstrate how to lock two (or more) volume knobs (like an audio mixing console) Resizer Bar Widget Demonstrate how to make a resizer bar that can be dragged to resize widgets Simple FLTK Timer Demonstrate how to use FLTK timers. A Justified Input Widget Demonstrate an input widget that supports various justifications. Spreadsheet w/Header Editing Fl_Table spreadsheet editor demo that includes editing row/col headers A resizable thumbnail viewer A browser of thumbnails+text that auto-wrap as the browser is resized. DND reordering of Fl_Browser items Drag and drop reordering of Fl_Browser items Aircraft altimeter widget A commercial aircraft altimeter widget with FLTK Mandelbox viewer A very rudimentary 2D mandelbox algorithm viewer Fl_SVG_Image Simple example to display a SVG image Simplex SVG Clock A working analog Simplex clock using FLTK's nanoSVG support Fl_Center Keeps a fixed sized widget "centered" Tree With Columns Demonstrate an Fl_Tree with columns of hierarchical data (a table) Tree with clickable custom icons Demonstrate an Fl_Tree with right justified clickable custom icons NTSC Waveform Monitor Sim Simulates an NTSC waveform monitor using simple FLTK line drawing and slider widgets. Image With Rounded Corners Show an image with rounded corners using SVG to make antialiased corners. Also, some of my other fltk related stuff; videos, LGPL widgets, and GPL apps:
- Fltk Videos -- Video tutorials on how to use fltk
- Fl_Tree -- A tree widget (this has been added to fltk 1.3)
- Fl_Table -- A table widget (this has been added to fltk 1.3)
- Fl_OpDesk -- A fancy shmancy "node graph" or "node tree" widget (like "ShadeTree"!)
- Fl_Input_Choice -- A combo of Fl_Input and Fl_Choice (this has been added to fltk 1.1.7)
- Fl_Native_File_Chooser -- A widget for accessing native OS file browsers (this has been added to fltk 1.3)
- Fl_Gel_Tabs -- A 'Mac OSX' style tab widget
- Fl_Matte_Button -- A 'matte finish' button widget
- Fl_Fixed_Group -- A fixed sized group whose edges can be attached to a parent
- nixieclock -- A Nixietube Clock (application and widget)
- flruler -- A desktop ruler (GUI debugging tool)
- Fl_Browser Ansi Patch -- A patch to Fl_Browser adding ANSI escape sequence support
| Fl_Browser |
One thing I use a lot is browsers, which often involves remembering certain programming techniques to manipulate them.
Fl_Browser "How To" Code Snippets Fl_Browser browser(10,10,500,500,"Test"); // CLEAR BROWSER browser.clear(); // ADD LINES TO BROWSER browser.add("One"); // fltk does strdup() internally browser.add("Two"); browser.add("Three"); // FORMAT CHARACTERS: CHANGING TEXT COLORS IN LINES // Warnings: Format chars only work at the beginning of lines and columns. // Format chars are also returned back to you via ::text() // @C# - text color @b - bold // @B# - background color @i - italic // @F# - set font number @f - fixed pitch font // @S# - set point size @u - underline // @. - terminate '@' parser @- - strikeout // browser.add("Black"); browser.add("@C1Red text"); browser.add("@C2Green text"); browser.add("@C3Yellow text"); // DISABLING FORMAT CHARACTERS browser.format_char(0); // ACCESS ALL SELECTED ITEMS IN BROWSER // Note: browser's text() array is 1 based..! // for ( int t=1; t<=browser->size(); t++ ) { if ( browser->selected(t) ) { printf("%d) '%s'\n", t, browser->text(t)); } } // PRE-SELECT ALL LINES IN BROWSER // Note: index numbers are 1 based..! // for ( int t=1; t<=browser->size(); t++ ) { browser->select(t); } // DE-SELECT ALL LINES IN BROWSER browser->deselect(); // GET SINGLE SELECTED ITEM FROM BROWSER int index = browser->value(); // USING INDEX NUMBER, RETURN TEXT // Note: index numbers are 1 based..! // if ( index > 0 ) { const char *s = browser->text(index); .. }Here's an older example that shows how to implement a swap() method for older versions of Fl_Browser (Fltk 1.1.5 or less)
| Simple right-click context menu |
This shows how to setup a simple right-click context menu for an area of a window.When you right-click on the window, a popup menu appears letting you choose different options.
There's several other ways to do context or 'popup' menus (this for example), but this is the simplest if you don't want to derive a class and use event handlers.
Simple right-click context popup menu #include <FL/Fl.H> #include <FL/Fl_Window.H> #include <FL/Fl_Menu_Button.H> #include <FL/Fl_Multiline_Input.H> #include <FL/fl_message.H> #include <stdlib.h> /* exit() */ #include <string.h> /* strcmp() */ Fl_Window *G_win = 0; Fl_Menu_Button *G_menu = 0; Fl_Multiline_Input *G_input = 0; // POPUP MENU CALLBACK static void Menu_CB(Fl_Widget*,void*) { // DETERMINE WHICH ITEM USER PICKED const char *text = G_menu->text(); // get label of item user picked if ( !text ) return; if ( strcmp(text, "Do thing#1") == 0 ) { fl_message("You chose to do a thing"); } if ( strcmp(text, "Do thing#2") == 0 ) { fl_message("You chose to do a different thing"); } if ( strcmp(text, "Quit") == 0 ) { exit(0); } } int main(int argc, char *argv[]) { G_win = new Fl_Window(640,480,"Simple popup menu"); G_win->tooltip("Use right-click for popup menu.."); { // SETUP RIGHT-CLICK CONTEXT MENU // Entire background area within 0,0,640,480 will be // sensitive to right-clicks for popup. // G_menu = new Fl_Menu_Button(0,0,640,480,"Popup Menu"); G_menu->type(Fl_Menu_Button::POPUP3); // pops menu on right click G_menu->add("Do thing#1", "^1", Menu_CB, 0); // ctrl-1 hotkey G_menu->add("Do thing#2", "^2", Menu_CB, 0); // ctrl-2 hotkey G_menu->add("Quit", "^q", Menu_CB, 0); // ctrl-q hotkey } // ADD INPUT WIDGET // Helps demonstrate other widgets can coexist /within/ invisible // menu button's xywh area. // G_input = new Fl_Multiline_Input(100,200,350,50,"Input"); G_input->value("Right-click anywhere on gray window area\nfor popup menu"); G_win->end(); G_win->show(); return(Fl::run()); }Note: 'hotkeys' are optional; if you don't want to use them, just use '0', e.g.
    G_menu->add("Do a thing",         0, Menu_CB, (void*)"thing1");
    G_menu->add("Do different thing", 0, Menu_CB, (void*)"thing2");
    G_menu->add("Quit",               0, Menu_CB, (void*)"quit");
For more about the hotkey string format (e.g. "^q"), see the fltk docs for Fl_Menu_::shortcut(). Some simple examples:
     "q"    -- 'q' key (no modifiers)
     "#q"   -- alt-q
     "+q"   -- shift-q
     "^q"   -- control-q
     "^113" -- control-q (113 is the decimal ascii number for 'q')
| Fl_Multiline_Output |
Making windows that display multiple lines of text is another common thing I find myself doing.
Displaying Multiple Lines Of Text - "How To" Code Snippets Fl_Multiline_Output output(0,0,500,500); // CLEAR OUTPUT output->value(""); // SET OUTPUT output->value("one\ntwo"); // fltk does strdup() internally // APPENDING OUTPUT // Would be nice if this were an add() method in fltk ;) // char *news = "Add this text"; char *cat = (char*)malloc(strlen(output->value()) + i strlen(news) + 1); strcpy(cat, output->value()); strcat(cat, news); output->value(cat); free(cat);
| Fl_Menu_Bar: Changing Menu Item's Labels At Runtime |
Shows how to access and change menu items at run time.
Shows how to use add() to dynamically add items to a menu bar, and find_item() to find + modify items.
In this example, clicking the Edit | Change menu item will change the Edit | Submenu's name into "New Submenu Name", and changes the label of the 'Aaa' item in it to "New Aaa Name'.
Access and Change Menu Item's Labels #include <FL/Fl.H> #include <FL/Fl_Window.H> #include <FL/Fl_Menu_Bar.H> #include <stdlib.h> // // Show how to change submenu names and menu item names // Click on Edit -> Change to change the contents of the Edit menu. // void Change_CB(Fl_Widget *w, void *) { Fl_Menu_Bar *menu = (Fl_Menu_Bar*)w; Fl_Menu_Item *p; // Change submenu name p = (Fl_Menu_Item*)menu->find_item("Edit/Submenu"); if ( p ) p->label("New Submenu Name"); // Change item name p = (Fl_Menu_Item*)menu->find_item("Edit/New Submenu Name/Aaa"); if ( p ) p->label("New Aaa Name"); } void Quit_CB(Fl_Widget *, void *) { exit(0); } int main() { Fl_Window *win = new Fl_Window(400,400); Fl_Menu_Bar *menu = new Fl_Menu_Bar(0,0,400,25); menu->add("File/Quit", FL_CTRL+'q', Quit_CB); menu->add("Edit/Change", FL_CTRL+'c', Change_CB); menu->add("Edit/Submenu/Aaa"); menu->add("Edit/Submenu/Bbb"); win->end(); win->show(); return(Fl::run()); }
| Fl_Menu_Bar: Toggling A Menu Item At Runtime |
Shows how to toggle menu items at run time.Uses add() to create toggle items, find_item() to find the item, and set() and clear() methods to change the item's toggle state.
Toggle Menu Items #include <stdio.h> #include <FL/Fl.H> #include <FL/Fl_Double_Window.H> #include <FL/Fl_Menu_Bar.H> // // Demonstrate how to toggle a menu item procedurally -- erco 05/14/09 // // SET A MENU ITEM'S STATE // Find the menuitem by name, and change its state. // Returns -1 if named menu item not found. // int SetMenuItemState(Fl_Menu_Bar *menubar, const char *name, int state) { Fl_Menu_Item *m = (Fl_Menu_Item*)menubar->find_item(name); if ( ! m ) return(-1); if ( state ) { m->set(); } else { m->clear(); } return(0); } int main(int argc, char **argv) { Fl_Double_Window *win = new Fl_Double_Window(720,486); Fl_Menu_Bar *menubar = new Fl_Menu_Bar(0,0,720,25); menubar->add("Options/One", 0, 0,0, FL_MENU_TOGGLE); menubar->add("Options/Two", 0, 0,0, FL_MENU_TOGGLE); menubar->add("Options/Three", 0, 0,0, FL_MENU_TOGGLE); win->end(); win->show(); // TEST THE STATE CHANGES -- TURN 'ONE' OFF, OTHERS 'ON' if ( SetMenuItemState(menubar, "Options/One", 0) < 0 ) { fprintf(stderr, "FAILED[1]\n"); } if ( SetMenuItemState(menubar, "Options/Two", 1) < 0 ) { fprintf(stderr, "FAILED[2]\n"); } if ( SetMenuItemState(menubar, "Options/Three", 1) < 0 ) { fprintf(stderr, "FAILED[3]\n"); } return(Fl::run()); }
| Fl_Menu_Bar Single Callback Example |
Here's an example program showing a neat trick that lets the menubar's callback determine the full menu item's 'pathname' (eg. "File/Quit") without using any userdata.
Accessing Menu Items Without Using Callback Data // Show the use of item_pathname() in a custom class. #include <stdio.h> #include <string.h> #include <stdlib.h> #include <FL/Fl.H> #include <FL/Fl_Window.H> #include <FL/Fl_Menu_Bar.H> class MyApp { Fl_Window *win; Fl_Menu_Bar *menubar; // Static menu callback static void Menu_CB(Fl_Widget*w, void*data) { MyApp *o = (MyApp*)data; o->Menu_CB2(); } // Callback method with class access void Menu_CB2() { char picked[80]; menubar->item_pathname(picked, sizeof(picked)-1); printf("CALLBACK: You picked '%s'\n", picked); // How to handle callbacks.. if ( strcmp(picked, "File/Quit") == 0 ) exit(0); if ( strcmp(picked, "Help/Help") == 0 ) printf("Help goes here\n"); } public: MyApp() { // Make the app window and menu bar w/callbacks win = new Fl_Window(720, 486); menubar = new Fl_Menu_Bar(0, 0, win->w(), 25); menubar->add("File/Open", 0, Menu_CB, (void*)this); // userdata is always 'this' menubar->add("File/Quit", 0, Menu_CB, (void*)this); menubar->add("Help/Help", 0, Menu_CB, (void*)this); win->end(); win->show(); } }; // MAIN int main() { MyApp app; return(Fl::run()); }Here's an older example that works with fltk 1.1.5 and back that doesn't have item_pathname() built in.
| Fl_Menu_Bar |
Dynamically creating/clearing submenus in the main menu bar is something I often need to do. Since it's not well documented how this is done, this is what I've figured out.WARNING: when creating or modifying menus using add(), beware that if you name items in fluid, the pointers may become invalid, since dynamic manipulation of the menus can cause the array to be realloc()ed, causing menu item pointers to become STALE. The submenus and all their contents in the menu bar are really all part of a single linear internal array to the Fl_Menu_Bar class, and are accessed as:
Accessing Menu Items In Fl_Menu_Bar for ( int t=0; t < menubar->size(); t++ ) { Fl_Menu_Item *m = (Fl_Menu_Item*)&(menubar->menu()[t]); : : }Given the above on how the menus are arranged in the array, here are some guides for how to write routines to work with FLTK menus dynamically.
Dynamic Manipulation Of Menus in FLTK // FIND MENU ITEM INDEX, GIVEN MENU PATHNAME // eg. "Edit/Copy" // Will also return submenus, eg. "Edit" // Returns -1 if not found. // int GetIndexByName(Fl_Menu_Bar* menubar, const char *findname) { char menupath[1024] = ""; // File/Export for ( int t=0; t < menubar->size(); t++ ) { Fl_Menu_Item *m = (Fl_Menu_Item*)&(menubar->menu()[t]); if ( m->submenu() ) { // Submenu? if ( menupath[0] ) strcat(menupath, "/"); strcat(menupath, m->label()); if ( strcmp(menupath, findname) == 0 ) return(t); } else { if ( m->label() == NULL ) { // End of submenu? Pop back one level. char *ss = strrchr(menupath, '/'); if ( ss ) *ss = 0; else menupath[0] = '\0'; continue; } // Menu item? char itempath[1024]; // eg. Edit/Copy strcpy(itempath, menupath); if ( itempath[0] ) strcat(itempath, "/"); strcat(itempath, m->label()); if ( strcmp(itempath, findname) == 0 ) { return(t); } } } return(-1); } // FIND A MENU ITEM BY MENU PATHNAME // eg. "Edit/Copy" // Will also return submenus, eg. "Edit" // Returns NULL if not found. // Fl_Menu_Item *GetMenuItemByName(Fl_Menu_Bar* menubar, const char *findname) { int index = GetIndexByName(menubar, findname); if ( index == -1 ) return(NULL); Fl_Menu_Item *m = (Fl_Menu_Item*)&(menubar->menu()[index]); return(m); } // TURN ON RADIO BUTTON GIVEN MENU PATHNAME // eg. SetRadioByName(menubar, "File/Radio-1") // void SetRadioByName(Fl_Menu_Bar *menubar, const char *menuname) { Fl_Menu_Item *m = GetMenuItemByName(menubar, menuname); if ( m == NULL ) return; m->setonly(); } // SET TOGGLE BUTTON ON OR OFF, GIVEN MENU PATHNAME // eg. SetToggleByName("File/Toggle-1", "on") // void SetToggleByName(Fl_Menu_Bar *menubar, const char *menuname, int val ) { Fl_Menu_Item *m = GetMenuItemByName(menubar, menuname); if ( m == NULL ) return; if ( val ) m->set(); else m->clear(); } // ACTIVATE MENU ITEM, GIVEN MENU ITEM PATHNAME // eg. SetActivateByName("File/Radio-1") // void SetActivateByName(Fl_Menu_Bar *menubar, const char *menuname, int val) { Fl_Menu_Item *m = GetMenuItemByName(menubar, menuname); if ( m == NULL ) return; if ( val ) m->activate(); else m->deactivate(); } // GET TOGGLE BUTTON STATE, GIVEN MENU PATHNAME // eg. GetToggleByName("Edit/Preferences/Toggle-1") // int GetToggleValueByName(Fl_Menu_Bar *menubar, const char *menuname) { Fl_Menu_Item *m = GetMenuItemByName(menubar, menuname); if ( m == NULL ) return; return(m->value()); } // CLEAR ALL ITEMS IN SUBMENU BELOW THE NAMED ITEM // eg. ClearItemsBelow("File/Save As"); // where menu looks like: // // File..New // Open // Save // Save As // ------- __ // /usr/tmp/foo.st |__ Clear all these so they // /usr/tmp/bar.st | can be recreated later. // /usr/tmp/bla.st __| // __ // Edit..Cut | // Copy | These are unaffected. // Paste __| // static void ClearItemsBelow(Fl_Menu_Bar *menubar, const char *menuname) { int index = GetIndexByName(menubar, menuname); if ( index == -1 ) return; int level = 0; ++index; // skip the item itself, so we delete stuff _below_ it while ( index <= menubar->size() ) { Fl_Menu_Item *m = (Fl_Menu_Item*)&(menubar->menu()[index]); if ( m->label() == NULL ) { // Pop out of submenu, keep track of level if ( --level < 0 ) return; } else { // Descending into a submenu? Keep track of leveL if ( m->submenu() ) ++level; } // Remove all menu items *and* submenus menubar->remove(index); } }
| Fl_Radio_Button |
Dealing with radio buttons in menus is fairly easy, using the Fl_Menu_Bar routines described above. I guess fltk groups radio buttons together based on dividers and submenus.
Using Radio Buttons In Menus int index = GetIndexByName(menubar, "Edit/Preferences/Radio 1"); Fl_Menu_Item *m = menubar->menu(); m[index]->setonly(); // set radio on, turns other(s) off int onoff = m[index]->value(); // get radio button's state
| Fl_Text_Display |
A simple example of how to use Fl_Text_Display, a read only viewer.If you want to make it an editor, change all instances of the string "Fl_Text_Display" to "Fl_Text_Editor".
Simple Example of How To Use Fl_Text_Display // Fl_Text_Display example. -erco #include <FL/Fl.H> #include <FL/Fl_Window.H> #include <FL/Fl_Text_Display.H> int main() { Fl_Window *win = new Fl_Window(640, 480); Fl_Text_Buffer *buff = new Fl_Text_Buffer(); Fl_Text_Display *disp = new Fl_Text_Display(20, 20, 640-40, 480-40, "Display"); disp->buffer(buff); win->resizable(*disp); win->show(); buff->text("line 0\nline 1\nline 2\n" "line 3\nline 4\nline 5\n" "line 6\nline 7\nline 8\n" "line 9\nline 10\nline 11\n" "line 12\nline 13\nline 14\n" "line 15\nline 16\nline 17\n" "line 18\nline 19\nline 20\n" "line 21\nline 22\nline 23\n"); return(Fl::run()); }
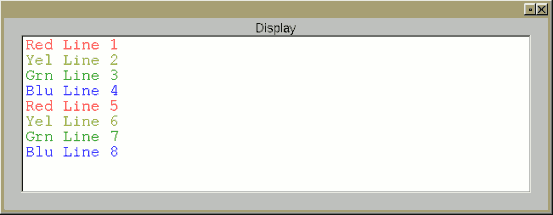
| Fl_Text_Display with colors |
A simple example of how to use Fl_Text_Display with colors.This example shows how to add text with different colors by creating a 'style buffer', where each character in the style buffer corresponds to a character in the text buffer, and the contents of the style buffer specifies characters (A, B, C.. ) that correspond to entries in your pre-defined 'style table', that defines the actual attributes of each character.
This scheme is similar to a 'color map' in images, where the image data is not an RGB color, but an index into a color table.
This example should work equally well with Fl_Text_Editor. (Just change all instances of "Fl_Text_Display" in the code to "Fl_Text_Editor")
Simple Example of Fl_Text_Display with colors // Fl_Text_Display example with color styles . -erco #include <FL/Fl.H> #include <FL/Fl_Window.H> #include <FL/Fl_Text_Display.H> int main() { // Style table Fl_Text_Display::Style_Table_Entry stable[] = { // FONT COLOR FONT FACE FONT SIZE // --------------- ----------- -------------- { FL_RED, FL_COURIER, 18 }, // A - Red { FL_DARK_YELLOW, FL_COURIER, 18 }, // B - Yellow { FL_DARK_GREEN, FL_COURIER, 18 }, // C - Green { FL_BLUE, FL_COURIER, 18 }, // D - Blue }; Fl_Window *win = new Fl_Window(640, 480); Fl_Text_Display *disp = new Fl_Text_Display(20, 20, 640-40, 480-40, "Display"); Fl_Text_Buffer *tbuff = new Fl_Text_Buffer(); // text buffer Fl_Text_Buffer *sbuff = new Fl_Text_Buffer(); // style buffer disp->buffer(tbuff); int stable_size = sizeof(stable)/sizeof(stable[0]); disp->highlight_data(sbuff, stable, stable_size, 'A', 0, 0); // Text tbuff->text("Red Line 1\nYel Line 2\nGrn Line 3\nBlu Line 4\n" "Red Line 5\nYel Line 6\nGrn Line 7\nBlu Line 8\n"); // Style for text sbuff->text("AAAAAAAAAA\nBBBBBBBBBB\nCCCCCCCCCC\nDDDDDDDDDD\n" "AAAAAAAAAA\nBBBBBBBBBB\nCCCCCCCCCC\nDDDDDDDDDD\n"); win->resizable(*disp); win->show(); return(Fl::run()); }
| Fl_JPG_Image: A simple example |
A simple example of how to load and display a JPEG image.For PNG's, just substitute all occurances of "Fl_JPEG_Image" with "Fl_PNG_Image". Same for GIFs, and other supported image formats.
Simple example to display a JPEG image #include <FL/Fl.H> #include <FL/Fl_Window.H> #include <FL/Fl_Shared_Image.H> #include <FL/Fl_JPEG_Image.H> #include <FL/Fl_Box.H> // COMPILE: fltk-config --use-images --compile load-jpeg.cxx int main() { fl_register_images(); // initialize image lib Fl_Window win(720,486); // make a window Fl_Box box(10,10,720-20,486-20); // widget that will contain image Fl_JPEG_Image jpg("/var/tmp/foo.jpg"); // load jpeg image into ram box.image(jpg); // attach jpg image to box win.show(); return(Fl::run()); }Here's the same example, but with some error checking added, shown in red.
I believe error checking of this kind is available fltk 1.3.x and up, IIRC.
Display a JPEG image (with error checking) #include <errno.h> #include <FL/fl_ask.H> #include <FL/Fl.H> #include <FL/Fl_Window.H> #include <FL/Fl_Shared_Image.H> #include <FL/Fl_JPEG_Image.H> #include <FL/Fl_Box.H> // COMPILE: fltk-config --use-images --compile load-jpeg.cxx int main() { const char *filename = "/var/tmp/foo.jpg"; fl_register_images(); // initialize image lib Fl_Window win(720,486); // make a window Fl_Box box(10,10,720-20,486-20); // widget that will contain image Fl_JPEG_Image jpg(filename); // load jpeg image into ram // Error checking switch ( jpg.fail() ) { case Fl_Image::ERR_NO_IMAGE: case Fl_Image::ERR_FILE_ACCESS: fl_alert("%s: %s", filename, strerror(errno)); // shows actual os error to user return 1; case Fl_Image::ERR_FORMAT: fl_alert("%s: couldn't decode image", filename); return 1; } box.image(jpg); // attach jpg image to box win.show(); return(Fl::run()); }
| Fl_Image |
An example of how to walk the r/g/b pixel data of an Fl_BMP_Image image.NOTE: There are faster ways of coding this to avoid recalculating 'index' at every pixel. This is just to make a clear example of how pixel indexes should be calculated, eg. for random access. Optimization is left as an exercise to the reader.
Accessing Raw RGB Data from Fl_Image #include <stdio.h> #include <FL/Fl_BMP_Image.H> int main() { Fl_BMP_Image *img = new Fl_BMP_Image("tiny.bmp"); if ( img->d() == 0 ) { perror("tiny.bmp"); exit(1); } char r,g,b; for ( int y=0; y<img->h(); y++ ) { // X loop for ( int x=0; x<img->w(); x++ ) { // Y loop long index = (y * img->w() * img->d()) + (x * img->d()); // X/Y -> buf index switch ( img->count() ) { case 1: { // bitmap const char *buf = img->data()[0]; switch ( img->d() ) { case 1: { // 8bit r = g = b = *(buf+index); break; } case 3: // 24bit r = *(buf+index+0); g = *(buf+index+1); b = *(buf+index+2); break; default: // ?? printf("Not supported: chans=%d\n", img->d()); exit(1); } break; } default: // ?? pixmap, bit vals printf("Not supported: count=%d\n", img->count()); exit(1); } printf("%2x %2x %2x\n", // hex dump r/g/b (unsigned char)r, (unsigned char)g, (unsigned char)b); } } }
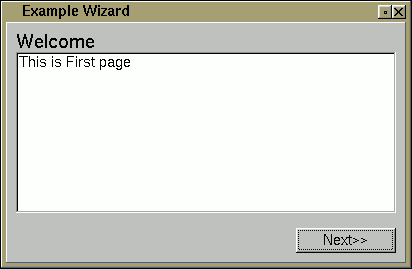
| Fl_Wizard Example |
A simple 3 screen 'wizard' using Fl_Wizard, showing how groups can be used to move through the 'pages' of the wizard.
FLTK's Wizard #include <stdlib.h> #include <FL/Fl.H> #include <FL/Fl_Window.H> #include <FL/Fl_Group.H> #include <FL/Fl_Wizard.H> #include <FL/Fl_Button.H> #include <FL/Fl_Multiline_Output.H> // Simple 'wizard' using fltk's new Fl_Wizard widget Fl_Window *G_win = 0; Fl_Wizard *G_wiz = 0; void back_cb(Fl_Widget*,void*) { G_wiz->prev(); } void next_cb(Fl_Widget*,void*) { G_wiz->next(); } void done_cb(Fl_Widget*,void*) { exit(0); } int main(int argc, char **argv) { G_win = new Fl_Window(400,300,"Example Wizard"); G_wiz = new Fl_Wizard(0,0,400,300); // Wizard: page 1 { Fl_Group *g = new Fl_Group(0,0,400,300); Fl_Button *next = new Fl_Button(290,265,100,25,"Next"); next->callback(next_cb); Fl_Multiline_Output *out = new Fl_Multiline_Output(10,30,400-20,300-80,"Welcome"); out->labelsize(20); out->align(FL_ALIGN_TOP|FL_ALIGN_LEFT); out->value("This is First page"); g->end(); } // Wizard: page 2 { Fl_Group *g = new Fl_Group(0,0,400,300); Fl_Button *next = new Fl_Button(290,265,100,25,"Next"); next->callback(next_cb); Fl_Button *back = new Fl_Button(180,265,100,25,"Back"); back->callback(back_cb); Fl_Multiline_Output *out = new Fl_Multiline_Output(10,30,400-20,300-80,"Terms And Conditions"); out->labelsize(20); out->align(FL_ALIGN_TOP|FL_ALIGN_LEFT); out->value("This is the Second page"); g->end(); } // Wizard: page 3 { Fl_Group *g = new Fl_Group(0,0,400,300); Fl_Button *done = new Fl_Button(290,265,100,25,"Finish"); done->callback(done_cb); Fl_Button *back = new Fl_Button(180,265,100,25,"Back"); back->callback(back_cb); Fl_Multiline_Output *out = new Fl_Multiline_Output(10,30,400-20,300-80,"Finish"); out->labelsize(20); out->align(FL_ALIGN_TOP|FL_ALIGN_LEFT); out->value("This is the Last page"); g->end(); } G_wiz->end(); G_win->end(); G_win->show(argc, argv); return Fl::run(); }
| Image Animation Example |
Shows how to animate some JPG files. Here are some jpgs you can use for playback.
Animating Images in FLTK #include <FL/Fl.H> #include <FL/Fl_Double_Window.H> #include <FL/Fl_Shared_Image.H> #include <FL/Fl_JPEG_Image.H> #include <FL/Fl_Box.H> // animate.cxx -- Animate playback of three jpg images (0001.jpg, 0002.jpg..) // Hold each image for RATE seconds // #define RATE 0.1 // how long to hold each image #define TOTAL 3 // total images: /var/tmp/000{1,2,3}.jpg Fl_Window *win = 0; // main window Fl_JPEG_Image *jpgs[TOTAL]; // loaded images Fl_Group *grp = 0; // group in which images are displayed // SHOW NEXT IMAGE // Slaps next image up on screen, resets frame timer. // void ShowNextImage_CB(void*) { static int x = 0; grp->image(jpgs[x++ % TOTAL]); win->redraw(); // Fl::repeat_timeout(RATE, ShowNextImage_CB); // steady rate Fl::repeat_timeout(((x%TOTAL)==0)?2.0:RATE, ShowNextImage_CB); // eye blink: hold 0003.jpg for 2 secs } // LOAD ALL IMAGES INTO MEMORY int LoadImages() { for ( int t=0; t<TOTAL; t++ ) { char filename[80]; sprintf(filename, "%04d.jpg", t+1); // 0001.jpg, 0002.jpg.. jpgs[t] = new Fl_JPEG_Image(filename); if ( jpgs[t]->w() == 0 ) { perror(filename); return(1); } } return(0); } // MAIN -- OPEN DOUBLE BUFFERED WINDOW, LOAD IMAGES, START PLAYBACK int main() { fl_register_images(); // initialize image lib win = new Fl_Double_Window(720,486); // make a window grp = new Fl_Group(0,0,win->w(),win->h()); grp->align(FL_ALIGN_CENTER | FL_ALIGN_INSIDE | FL_ALIGN_CLIP); win->show(); if ( LoadImages() ) return(1); Fl::add_timeout(RATE, ShowNextImage_CB); return(Fl::run()); }I've also made a tar file that includes the above code along with 45 jpeg images here:
smooth-animation--45x.tar.gz
The images are all 720x720 in size, and the animate.cxx file (included) is modified to load all 45 images and play them back at 30fps. It includes a Makefile which will build and run the program with:make clean; make; ./animate
The animation it plays back is a great CGI animation made by Friedrich A. Lohmuller he calls Penrose Triangle.
| Line Drawing Animation Example |
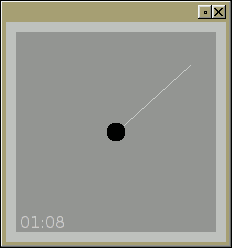
Shows how to animate line drawing, showing a simple timer application that animates the 'second hand'.
Animating Line Drawing in FLTK // // FLTK drawing example showing simple line drawing animation // erco 03/22/07 // #include <FL/Fl.H> #include <FL/Fl_Double_Window.H> #include <FL/Fl_Box.H> #include <FL/fl_draw.H> #include <math.h> #include <stdio.h> #include <time.h> #define BG_COLOR 45 #define TICK_COLOR 50 #define CIRC_COLOR 0 class MyTimer : public Fl_Box { void draw() { // COMPUTE NEW COORDS OF LINE static long start = time(NULL); long tick = time(NULL) - start; char secs[80]; sprintf(secs, "%02ld:%02ld", tick/60, tick%60); float pi = 3.14 - (((tick % 60) / 60.0) * 6.28); int radius = h() / 2; int x1 = (int)(x() + w()/2), y1 = (int)(y() + h()/2), x2 = (int)(x1 + (sin(pi) * radius)), y2 = (int)(y1 + (cos(pi) * radius)); // TELL BASE WIDGET TO DRAW ITS BACKGROUND Fl_Box::draw(); // DRAW 'SECOND HAND' OVER WIDGET'S BACKGROUND fl_color(TICK_COLOR); fl_line(x1, y1, x2, y2); fl_color(CIRC_COLOR); fl_pie(x1-10, y1-10, 20, 20, 0.0, 360.0); // DRAW TIMER TEXT STRING fl_color(TICK_COLOR); fl_font(FL_HELVETICA,16); fl_draw(secs, x()+4, y()+h()-4); } static void Timer_CB(void *userdata) { MyTimer *o = (MyTimer*)userdata; o->redraw(); Fl::repeat_timeout(0.25, Timer_CB, userdata); } public: // CONSTRUCTOR MyTimer(int X,int Y,int W,int H,const char*L=0) : Fl_Box(X,Y,W,H,L) { box(FL_FLAT_BOX); color(BG_COLOR); Fl::add_timeout(0.25, Timer_CB, (void*)this); } }; // MAIN int main() { Fl_Double_Window win(220, 220); MyTimer tim(10, 10, win.w()-20, win.h()-20); win.show(); return(Fl::run()); }
| Printing FLTK Event Names |
Update 06/01/2011: my eventnames.h has been adopted by the FLTK project in 1.1.8 back in 2007, renamed to 'names.h' and the array named fl_eventnames[]. So you can access it with:
#include <FL/names.h>
fprintf(stderr, "EVENT: %s(%d)\n", fl_eventnames[e], e);For versions of FLTK older than 1.1.8 that don't have FL/names.h, you can grab my original eventnames.h file and use #include "eventnames.h" to load it, and fl_eventnames[e] (where 'e' is the event number) to get the event names.
Printing FLTK Event Names #include <FL/names.h> // FLTK 1.1.8 and up : class YourClass : public Fl_Window { int handle(int e) { : fprintf(stderr, "EVENT: %s(%d)\n", fl_eventnames[e], e); : } };
| Using popen() and Fl::add_fd() |
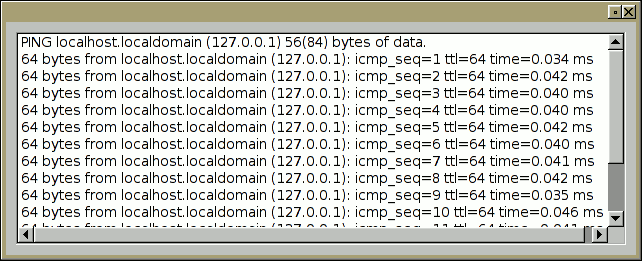
The following code shows how to use popen() with Fl::add_fd().
You can highlight text and scroll while output is coming in, showing that the FLTK interface is 'alive' while the command is running.
The add_fd() technique works well under unix, but does not work under Windows.
Example: Using popen() and Fl::add_fd() // demo use of popen() and Fl::add_fd() - erco 10/04/04 #include <FL/Fl.H> #include <FL/Fl_Window.H> #include <FL/Fl_Multi_Browser.H> #include <stdio.h> #include <unistd.h> #define PING_CMD "ping -i 3 localhost" // 'slow command' under unix FILE *G_fp = NULL; void HandleFD(int fd, void *data) { Fl_Multi_Browser *brow = (Fl_Multi_Browser*)data; char s[1024]; if ( fgets(s, 1023, G_fp) == NULL ) { Fl::remove_fd(fileno(G_fp)); pclose(G_fp); return; } brow->add(s); } int main() { Fl_Window win(600,600); Fl_Multi_Browser brow(10,10,580,580); if ( ( G_fp = popen(PING_CMD, "r") ) == NULL ) { perror("popen failed"); return(1); } Fl::add_fd(fileno(G_fp), HandleFD, (void*)&brow); win.resizable(brow); win.show(); return(Fl::run()); }Here's a similar example, showing how a button can be used to invoke the command, and the button grays out and cursor changes to a timer while the command runs, and when the command finishes, the interface is restored to normal.
| Fltk + Fifos |
The following shows how to use fifos to control a console oriented menu program from fltk, showing its output in Fl_Browser. Unix only.This demo uses a bourne shell script [menu.sh] to be the 'menu program' to be controlled by the fltk program [demo-fifo.cxx].
Example: Using FLTK with named pipes and popen()
#!/bin/bash while [ 1 ]; do echo "" echo "Menu Options" echo " a) Do an ls -la" echo " b) netstat" echo " c) date/uptime/w" echo " q) quit" echo "" echo "Your choice?" read choice if [ ! $? ]; then echo 'Parent closed'; exit 1; fi case $choice in a) ls -la ;; b) netstat ;; c) date; uptime; w ;; q) exit 0 ;; esac done [demo-fifo.cxx]
#include <stdio.h> #include <stdlib.h> #include <string.h> #include <unistd.h> #include <sys/types.h> // mkfifo #include <sys/stat.h> // mkfifo #include <fcntl.h> // open #include <signal.h> // killpg #include <FL/Fl.H> #include <FL/Fl_Window.H> #include <FL/Fl_Multi_Browser.H> #include <FL/Fl_Button.H> // // Demonstrate how to use fltk with named pipes // erco 1.00 09/21/2005 // // Globals FILE *G_in = NULL; // how we read the child int G_out = 0; // how we write to the child // Close all descriptors, remove fifo void CleanExit_CB(Fl_Widget*, void *data) { unlink("tomenu.fifo"); killpg(getpid(), SIGKILL); _exit(0); } // Read output from child, append to browser void HandleInput_CB(int, void *data) { Fl_Multi_Browser *brow = (Fl_Multi_Browser*)data; static int x = 0; static char s[1024]; char c = fgetc(G_in); // read one char at a time if ( c == '\n' || x == (sizeof(s)-1) ) { s[x] = 0; brow->add(s); x = 0; } else { s[x++] = c; } } // Handle sending commands to child when button pressed void HandleButton_CB(Fl_Widget*, void *data) { write(G_out, data, strlen((char*)data)); // 'data' is a string, eg. "a\n" } int main() { // Process group leader (for killpg()) setsid(); // Make fifo unlink("tomenu.fifo"); if ( mkfifo("tomenu.fifo", 0666) < 0 ) { perror("mkfifo(tomenu.fifo)"); exit(1); } // Popen child for reading, set child to read fifo if ( ( G_in = popen("./menu.sh < tomenu.fifo", "r") ) == NULL ) { perror("popen failed"); exit(1); } setbuf(G_in, NULL); // disable buffering // Now open fifo if ( ( G_out = open("tomenu.fifo", O_WRONLY) ) < 0 ) { perror("open(tomenu.fifo) for write failed"); unlink("tomenu.fifo"); exit(1); } // Fltk stuff Fl_Window win(600,600); win.callback(CleanExit_CB); Fl_Button a(10, 10, 20, 20, "A"); a.callback(HandleButton_CB, (void*)"a\n"); Fl_Button b(30, 10, 20, 20, "B"); b.callback(HandleButton_CB, (void*)"b\n"); Fl_Button c(50, 10, 20, 20, "C"); c.callback(HandleButton_CB, (void*)"c\n"); Fl_Button q(70, 10, 20, 20, "q"); q.callback(CleanExit_CB, (void*)"q\n"); Fl_Multi_Browser brow(10,30,580,560); brow.textfont(FL_COURIER); Fl::add_fd(fileno(G_in), HandleInput_CB, (void*)&brow); win.resizable(brow); win.show(); return(Fl::run()); }
| Tying an Fl_Slider and Fl_Int_Input Together |
The following code shows how to tie Fl_Int_Input and Fl_Slider widgets together, making a new 'composite' widget called 'SliderInput'. The widget is derived from an Fl_Group, so that the two widgets can exist together.Dragging the slider changes the input widget, and changing the input widget repositions the slider. eg:
SliderInput - Tie Fl_Slider and Fl_Int_Input together #include <FL/Fl.H> #include <FL/Fl_Window.H> #include <FL/Fl_Int_Input.H> #include <FL/Fl_Slider.H> #include <stdio.h> // sliderinput -- simple example of tying an fltk slider and input widget together // 1.00 erco 10/17/04 class SliderInput : public Fl_Group { Fl_Int_Input *input; Fl_Slider *slider; // CALLBACK HANDLERS // These 'attach' the input and slider's values together. // void Slider_CB2() { static int recurse = 0; if ( recurse ) { return; } else { recurse = 1; char s[80]; sprintf(s, "%d", (int)(slider->value() + .5)); // fprintf(stderr, "SPRINTF(%d) -> '%s'\n", (int)(slider->value()+.5), s); input->value(s); // pass slider's value to input recurse = 0; } } static void Slider_CB(Fl_Widget *w, void *data) { ((SliderInput*)data)->Slider_CB2(); } void Input_CB2() { static int recurse = 0; if ( recurse ) { return; } else { recurse = 1; int val = 0; if ( sscanf(input->value(), "%d", &val) != 1 ) { val = 0; } // fprintf(stderr, "SCANF('%s') -> %d\n", input->value(), val); slider->value(val); // pass input's value to slider recurse = 0; } } static void Input_CB(Fl_Widget *w, void *data) { ((SliderInput*)data)->Input_CB2(); } public: // CTOR SliderInput(int x, int y, int w, int h, const char *l=0) : Fl_Group(x,y,w,h,l) { int in_w = 40; input = new Fl_Int_Input(x, y, in_w, h); input->callback(Input_CB, (void*)this); input->when(FL_WHEN_ENTER_KEY|FL_WHEN_NOT_CHANGED); slider = new Fl_Slider(x+in_w, y, w-in_w, h); slider->type(1); slider->callback(Slider_CB, (void*)this); bounds(1, 10); // some usable default value(5); // some usable default end(); // close the group } // MINIMAL ACCESSORS -- Add your own as needed int value() const { return((int)(slider->value() + 0.5)); } void value(int val) { slider->value(val); Slider_CB2(); } void minumum(int val) { slider->minimum(val); } int minumum() const { return((int)slider->minimum()); } void maximum(int val) { slider->maximum(val); } int maximum() const { return((int)slider->maximum()); } void bounds(int low, int high) { slider->bounds(low, high); } }; int main() { Fl_Window win(240,90); SliderInput *si = new SliderInput(20,20,200,50,"Slider Input"); si->bounds(1,100); // set min/max for slider si->value(50); // set initial value win.show(); return(Fl::run()); }
| Fl_Slider with a floating tooltip to show current value |
The following code shows how to get a floating tooltip to show the current value of the slider while it's being moved. Not well tested. 'It works under linux'. Example:
Fl_Slider with a floating tooltip to show current value // Demonstrate a slider with tooltip that tracks the mouse - erco 11/18/04 #include <stdio.h> #include <stdlib.h> #include <string.h> #include <FL/fl_draw.H> #include <FL/Fl.H> #include <FL/Fl_Double_Window.H> #include <FL/Fl_Group.H> #include <FL/Fl_Slider.H> #include <FL/Fl_Menu_Window.H> #include <FL/Fl_Tooltip.H> // FLOATING TIP WINDOW class TipWin : public Fl_Menu_Window { char tip[40]; public: TipWin():Fl_Menu_Window(1,1) { // will autosize strcpy(tip, "X.XX"); set_override(); end(); } void draw() { draw_box(FL_BORDER_BOX, 0, 0, w(), h(), Fl_Color(175)); fl_color(FL_BLACK); fl_font(labelfont(), labelsize()); fl_draw(tip, 3, 3, w()-6, h()-6, Fl_Align(FL_ALIGN_LEFT|FL_ALIGN_WRAP)); } void value(float f) { sprintf(tip, "%.2f", f); // Recalc size of window fl_font(labelfont(), labelsize()); int W = w(), H = h(); fl_measure(tip, W, H, 0); W += 8; size(W, H); redraw(); } }; // VALUE SLIDER WITH FLOATING TIP WINDOW class MyValueSlider : public Fl_Slider { TipWin *tipwin; void value_cb2() { tipwin->value(value()); tipwin->position(Fl::event_x_root(), Fl::event_y_root()+20); } static void value_cb(Fl_Widget*, void*data) { MyValueSlider *val = (MyValueSlider*)data; val->value_cb2(); } public: MyValueSlider(int x,int y,int w,int h,const char*l=0):Fl_Slider(x,y,w,h,l) { type(FL_HOR_SLIDER); callback(value_cb, (void*)this); Fl_Group *save = Fl_Group::current(); // save current widget.. tipwin = new TipWin(); // ..because this trashes it tipwin->hide(); Fl_Group::current(save); // ..then back to previous. } int handle(int e) { switch(e) { case FL_PUSH: // XXX: if offscreen, move tip ABOVE mouse instead tipwin->position(Fl::event_x_root(), Fl::event_y_root()+20); tipwin->value(value()); tipwin->show(); break; case FL_HIDE: // valuator goes away case FL_RELEASE: // release mouse case FL_LEAVE: // leave focus // Make sure tipwin closes when app closes tipwin->hide(); break; } return(Fl_Slider::handle(e)); } }; int main() { Fl_Double_Window *win = new Fl_Double_Window(640, 100); MyValueSlider *val1 = new MyValueSlider(20,20,200,30); MyValueSlider *val2 = new MyValueSlider(20,50,200,30); win->show(); return(Fl::run()); }
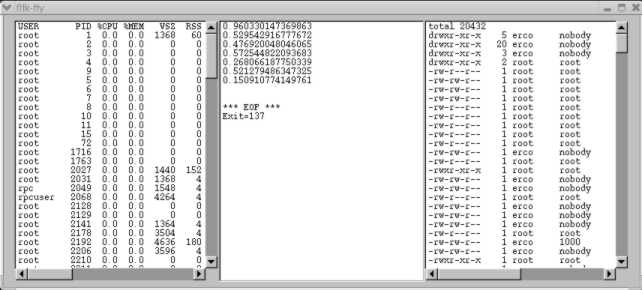
| Show Real-Time Output of Child Processes in Fl_Text_Display |
The following is a unix example that starts three child processes, showing their real-time output in separate FLTK Fl_Text_Display widgets. Also demonstrates how to use Fl::add_fd(), Fl::remove_fd(), and the unix calls waitpid(), fork(), execlp() and pipe() all together in one example. When the window is closed, any child processes that were running are killed first.
The design is this:
- Open three Fl_Text_Display widgets [see main()]
- Start three external processes that generate text on stdout [see start_child()], and configure FLTK to invoke a callback [data_ready()] whenever output from these processes is generated, so the data is appended to the appropriate Fl_Text_Display widget in real-time
- Set up FLTK to invoke a callback [close_cb()] if the app is closed, so child processes are first killed, before the app exits (preventing orphaned processes).
As the processes run, FLTK's event loop invokes callbacks whenever data is generated by the child processes, thanks to FLTK's add_fd() mechanism. The FLTK event loop also handles all FLTK events, such as when the user moves the scrollbars, highlights text, etc.
This is unix specific code. (Won't work on Windows)
Fltk-Tty example #include <sys/types.h> #include <sys/wait.h> #include <errno.h> #include <string.h> #include <unistd.h> #include <stdlib.h> #include <stdio.h> #include <FL/Fl.H> #include <FL/Fl_Double_Window.H> #include <FL/Fl_Text_Display.H> // // fltk-ttys - Open several processes, display their output in fltk widgets // Greg Ercolano 02/21/2005 1.00 // // Globals Fl_Text_Display *G_disp[3]; // one display per child Fl_Text_Buffer *G_buff[3]; // one buffer per child int G_outfd[3]; // read pipe for child's stderr, one per child pid_t G_pids[3]; // pid for each child // Start child process, makes a read pipe to its stderr void start_child(int t) { int out[2]; pipe(out); switch ( ( G_pids[t] = fork() ) ) { case -1: // Error close(out[0]); close(out[1]); perror("fork()"); exit(1); case 0: // Child close(out[0]); dup2(out[1], 2); close(out[1]); switch (t) { case 0: execlp("/bin/sh", "sh", "-c", "ps auxww 1>&2",0); perror("execlp(ps)"); exit(1); case 1: execlp("/bin/sh", "sh", "-c", "perl -e 'for($t=0; sleep(1); $t++)" "{print STDERR rand().\"\\n\"; if ($t>5) {kill(9,$$);}}' 1>&2", 0); perror("execlp(perl)"); exit(1); case 2: execlp("/bin/sh", "sh", "-c", "(ls -la; ping -c 8 localhost) 1>&2", 0); perror("execlp(ls/ping)"); exit(1); default: exit(1); } default: // Parent G_outfd[t] = out[0]; close(out[1]); return; } } // Data ready interrupt void data_ready(int fd, void *data) { int t = (int)data; char s[4096]; int bytes = read(fd, s, 4096-1); // fprintf(stderr, "Data ready for %d) pid=%ld fd=%d bytes=%d\n", t, (long)G_pids[t], fd, bytes); if ( bytes == -1 ) { // ERROR perror("read()"); } else if ( bytes == 0 ) { // EOF G_buff[t]->append("\n\n*** EOF ***\n"); int status; if ( waitpid(G_pids[t], &status, WNOHANG) < 0 ) { sprintf(s, "waitpid(): %s\n", strerror(errno)); } else { if ( WIFEXITED(status) ) { sprintf(s, "Exit=%d\n", WEXITSTATUS(status)); close(fd); Fl::remove_fd(fd); G_pids[t] = -1; } else if ( WIFSIGNALED(status) ) { sprintf(s, "Killed with %d\n", WTERMSIG(status)); close(fd); Fl::remove_fd(fd); G_pids[t] = -1; } else if ( WIFSTOPPED(status) ) { sprintf(s, "Stopped with %d\n", WSTOPSIG(status)); } } G_buff[t]->append(s); } else { // DATA s[bytes] = 0; G_buff[t]->append(s); } } // Clean up if someone closes the window void close_cb(Fl_Widget*, void*) { printf("Killing child processes..\n"); for ( int t=0; t<3; t++ ) { if ( G_pids[t] == -1 ) continue; kill(G_pids[t], 9); } printf("Done.\n"); exit(0); } int main() { Fl_Double_Window win(620,520,"fltk-tty"); win.callback(close_cb); // kill children if window closed // Start children, one tty for each for ( int t=0; t<3; t++ ) { start_child(t); G_buff[t] = new Fl_Text_Buffer(); G_disp[t] = new Fl_Text_Display(10+t*200, 10, 200, 500); G_disp[t]->buffer(G_buff[t]); G_disp[t]->textfont(FL_COURIER); G_disp[t]->textsize(12); Fl::add_fd(G_outfd[t], data_ready, (void*)t); } win.resizable(win); win.show(); return(Fl::run()); }
| Show how to draw a simple 'X' in FLTK |
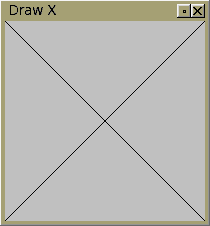
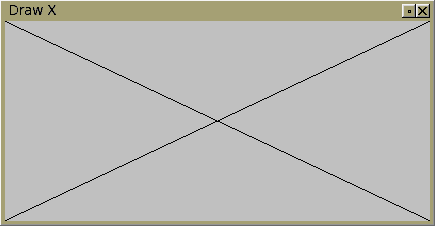
Here's how to make your own FLTK widget that just draws a simple 'X' to all four corners. You can resize the window, and the X changes with it. This is a good starting point for anyone wanting to make a custom widget that does its own drawing, such as a graph.
This example uses fltk's own built in drawing routines, which uses the window manager's simple native drawing functions, not OpenGL. So it should work on even the simplest graphics heads. (For an OpenGL example, click here)
Example: Draw 'X' // DEMONSTRATE HOW TO DRAW AN 'X' IN FLTK #include <FL/Fl.H> #include <FL/fl_draw.H> #include <FL/Fl_Double_Window.H> // SIMPLE WIDGET THAT DRAWS AN 'X' class DrawX : public Fl_Widget { public: DrawX(int X, int Y, int W, int H, const char*L=0) : Fl_Widget(X,Y,W,H,L) { } void draw() { // DRAW BLACK 'X' fl_color(FL_BLACK); int x1 = x(), y1 = y(); int x2 = x()+w()-1, y2 = y()+h()-1; fl_line(x1, y1, x2, y2); fl_line(x1, y2, x2, y1); } }; int main() { Fl_Double_Window win(200,200,"Draw X"); DrawX draw_x(0, 0, win.w(), win.h()); win.resizable(draw_x); win.show(); return(Fl::run()); }
| How to make a Scrollable 'Canvas' |
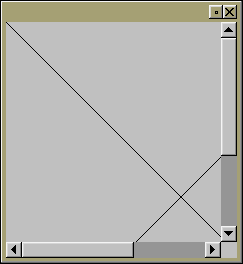
A scrollable version of the simple FLTK widget that just draws an 'X'. Scrollers let you pan around to look at the "canvas" drawing of the 'X'.
Example: A Scrollable Custom Widget "Canvas" // DEMONSTRATE HOW TO MAKE A SCROLLABLE "CANVAS" DRAWING OF AN 'X' #include <FL/Fl.H> #include <FL/Fl_Double_Window.H> #include <FL/Fl_Scroll.H> #include <FL/fl_draw.H> // SCROLLABLE CANVAS EXAMPLE -- JUST DRAWS AN 'X' class MyCanvas : public Fl_Widget { public: MyCanvas(int X,int Y,int W,int H,const char*L=0) : Fl_Widget(X,Y,W,H,L) { } void draw() { // DRAW BG fl_color(color()); fl_rectf(x(),y(),w(),h()); // DRAW 'X' OVER BG // Do your graphics here.. // int x1=x(), y1=y(); // Fl_Scroll works by changing our widget's x() and y(), int x2=x()+w()-1, y2=y()+h()-1; // so take these into account for our drawing coordinates fl_color(FL_BLACK); fl_line(x1,y1,x2,y2); fl_line(x1,y2,x2,y1); } }; int main() { Fl_Double_Window win(200,200); Fl_Scroll scroll(0,0,200,200); MyCanvas canvas(0,0,350,350); // purposely make drawing area larger than scroll scroll.end(); win.end(); win.resizable(canvas); win.show(); return(Fl::run()); }
| Show how to draw a custom bar graph |
The following is an example I posted to the newsgroup, in response to a request for a very specific 'trigger shaped' bar graph (to appear in the left corner of an eliptical LCD screen).
Example: Custom 'Trigger Shaped' Bar Graph // DEMONSTRATE HOW TO DRAW A TRIGGER SHAPED BAR GRAPH #include <stdlib.h> #include <math.h> #include <FL/Fl.H> #include <FL/fl_draw.H> #include <FL/Fl_Double_Window.H> #include <FL/Fl_Group.H> // // TRIGGER SHAPED BAR GRAPH CLASS // Modified 07/25/16 to include some colors // class MyBarGraph : public Fl_Group { int _value; // 0 - 100 public: MyBarGraph(int X, int Y, int W, int H, const char*L=0) : Fl_Group(X,Y,W,H,L) { _value = 0; } void value(int val) { _value = val; redraw(); } void draw() { Fl_Group::draw(); // TRIGGER GRAPHIC DRAWING CODE fl_color(42); int w = 1; for ( int t=0; t<_value; t+=2) { // Color the graph if ( t > 50 ) fl_color(FL_GREEN); if ( t > 80 ) fl_color(FL_YELLOW); if ( t > 85 ) fl_color(FL_RED); float f2 = ( abs(t-50) / 100.0 ); // f = .5 ~ 0 ~ .5 int xoff = (int)( f2 * f2 * 100 + .5); w += 1; int x1 = x() + 10 + xoff; int x2 = x() + 10 + w + xoff; int y1 = y() + h() - 10 - t; fl_line(x1, y1, x2, y1); } } }; // // TEST THE ABOVE CLASS // Send a 0 .. 100 sine wave to the class using a timer. // MyBarGraph *disp = 0; void Timer_CB(void *) { static float f = 6.28/4; f += .1; float v = ( sin(f) + 1.0 ) * .5; // sine wave: 0 ~ 1 v = v * 100; // sine wave: 0 ~ 100 disp->value((int)(v + .5)); Fl::repeat_timeout(0.03, Timer_CB); } int main() { Fl_Double_Window win(240,240); disp = new MyBarGraph(20,20,240-40,240-40); disp->box(FL_BORDER_BOX); disp->value(100); Fl::add_timeout(1.0, Timer_CB); win.show(); return(Fl::run()); }

| Cell Table |
A table of Fl_Box, Fl_Input and Fl_Float_Input widgets.
You can change both the size of the window, and interactively
resize the individual cell rows and columns.An example showing how one can create a table of cells using simple FLTK widgets, without using Fl_Table.
Example: Table of Cells #include <FL/Fl.H> #include <FL/Fl_Double_Window.H> #include <FL/Fl_Scroll.H> #include <FL/Fl_Tile.H> #include <FL/Fl_Box.H> #include <FL/Fl_Input.H> #include <FL/Fl_Float_Input.H> // // Demonstrate creating a table of widgets without Fl_Table // --erco Mar 8 2005 #define COLS 9 #define ROWS 20 class RateTable : public Fl_Scroll { void *w[ROWS][COLS]; // widget pointers public: RateTable(int X, int Y, int W, int H, const char*L=0) : Fl_Scroll(X,Y,W,H,L) { static const char *header[COLS] = { "Time", "In Rate", "Out Rate", "Coeff A", "Coeff B", "Coeff C", "Std Dev", "Pkg In", "Pkg Out" }; int cellw = 80; int cellh = 25; int xx = X, yy = Y; Fl_Tile *tile = new Fl_Tile(X,Y,cellw*COLS,cellh*ROWS); // Create widgets for ( int r=0; r<ROWS; r++ ) { for ( int c=0; c<COLS; c++ ) { if ( r==0 ) { Fl_Box *box = new Fl_Box(xx,yy,cellw,cellh,header[c]); box->box(FL_BORDER_BOX); w[r][c] = (void*)box; } else if ( c==0 ) { Fl_Input *in = new Fl_Input(xx,yy,cellw,cellh); in->box(FL_BORDER_BOX); in->value(""); w[r][c] = (void*)in; } else { Fl_Float_Input *in = new Fl_Float_Input(xx,yy,cellw,cellh); in->box(FL_BORDER_BOX); in->value("0.00"); w[r][c] = (void*)in; } xx += cellw; } xx = X; yy += cellh; } tile->end(); end(); } }; int main() { Fl_Double_Window win(720,486); RateTable rate(10,10,720-20,486-20); win.resizable(win); win.show(); return(Fl::run()); }
| Draggable Boxes on Scrollable Desk |
A scrollable 'desk' containing boxes the user can click to drag around.Demonstrates how to make boxes (containing images) that the user can click to drag around on a scrollable desktop.
Just click and drag the cat boxes around.. note that when you drag a box off the edge of the 'desktop', scrollbars appear, so you can scroll around the desktop to view all the boxes.
All of the work is done by FLTK.. only a few lines of custom code (shown in red) are needed to make the boxes 'draggable'.
Example: Draggable Boxes on a Scrollable Desk #include <FL/Fl.H> #include <FL/Fl_Double_Window.H> #include <FL/Fl_Scroll.H> #include <FL/Fl_Box.H> #include <FL/Fl_Pixmap.H> #include <stdio.h> // // Demonstrate user-movable boxes in a scroll region // erco@netcom.com 08/06/02 // erco@3dsite.com 01/06/05 -- added call to Fl_Box::handle() // static char *cat_xpm[] = { // XPM "50 34 4 1", " c black", "o c #ff9900", "@ c #ffffff", "# c None", "##################################################", "### ############################## ####", "### ooooo ########################### ooooo ####", "### oo oo ######################### oo oo ####", "### oo oo ####################### oo oo ####", "### oo oo ##################### oo oo ####", "### oo oo ################### oo oo ####", "### oo oo oo oo ####", "### oo oo ooooooooooooooo oo oo ####", "### oo ooooooooooooooooooooo oo ####", "### oo ooooooooooooooooooooooooooo ooo ####", "#### oo ooooooo ooooooooooooo ooooooo oo #####", "#### oo oooooooo ooooooooooooo oooooooo oo #####", "##### oo oooooooo ooooooooooooo oooooooo oo ######", "##### o ooooooooooooooooooooooooooooooo o ######", "###### ooooooooooooooooooooooooooooooooooo #######", "##### ooooooooo ooooooooo ooooooooo ######", "##### oooooooo @@@ ooooooo @@@ oooooooo ######", "##### oooooooo @@@@@ ooooooo @@@@@ oooooooo ######", "##### oooooooo @@@@@ ooooooo @@@@@ oooooooo ######", "##### oooooooo @@@ ooooooo @@@ oooooooo ######", "##### ooooooooo ooooooooo ooooooooo ######", "###### oooooooooooooo oooooooooooooo #######", "###### oooooooo@@@@@@@ @@@@@@@oooooooo #######", "###### ooooooo@@@@@@@@@ @@@@@@@@@ooooooo #######", "####### ooooo@@@@@@@@@@@ @@@@@@@@@@@ooooo ########", "######### oo@@@@@@@@@@@@ @@@@@@@@@@@@oo ##########", "########## o@@@@@@ @@@@@ @@@@@ @@@@@@o ###########", "########### @@@@@@@ @ @@@@@@@ ############", "############ @@@@@@@@@@@@@@@@@@@@@ #############", "############## @@@@@@@@@@@@@@@@@ ###############", "################ @@@@@@@@@ #################", "#################### #####################", "##################################################", }; Fl_Double_Window *G_win = NULL; Fl_Scroll *G_scroll = NULL; static Fl_Pixmap G_cat(cat_xpm); #define BOXWIDTH 80 #define BOXHEIGHT 50 // A 'MOVABLE' BOX class Box : public Fl_Box { protected: int handle(int e) { static int offset[2] = { 0, 0 }; int ret = Fl_Box::handle(e); switch ( e ) { case FL_PUSH: offset[0] = x() - Fl::event_x(); // save where user clicked for dragging offset[1] = y() - Fl::event_y(); return(1); case FL_RELEASE: return(1); case FL_DRAG: position(offset[0]+Fl::event_x(), offset[1]+Fl::event_y()); // handle dragging G_win->redraw(); return(1); } return(ret); } public: Box(int X, int Y, int W, int H, const char *L=0) : Fl_Box(X,Y,W,H,L) { image(G_cat); box(FL_UP_BOX); color(FL_GRAY); } Box(int X, int Y) : Fl_Box(X,Y,BOXWIDTH,BOXHEIGHT,0) { image(G_cat); box(FL_UP_BOX); color(FL_GRAY); } }; /// MAIN int main() { G_win = new Fl_Double_Window(420,300); G_scroll = new Fl_Scroll(10,10,420-20,300-20); G_scroll->box(FL_FLAT_BOX); G_scroll->color(Fl_Color(46)); G_scroll->begin(); { // CREATE NEW BOXES ON THE SCROLLABLE 'DESK' for ( int x=20; x<=G_scroll->w()-BOXWIDTH; x+= BOXWIDTH+20) for ( int y=20; y<=G_scroll->h()-BOXHEIGHT; y+= BOXHEIGHT+20) new Box(x,y); } G_scroll->end(); G_win->resizable(G_win); G_win->show(); return(Fl::run()); }
| Popup Menu Example |
Demonstrates how to make a popup menu appear, so the user can choose an item, and cause a callback and return the menuitem.
Two examples below showing doing a popup menu with, and without callbacks. Sometimes popup menus are simple enough that all the functions can be done within a single procedure, avoiding the need for separate callbacks.
There's several other ways to do context or 'popup' menus (this for example). The technique shown below gives you specific event control, and lets you open context menus procedurally on the fly.
Example: Popup Menu (with callbacks) // Popup menu using callbacks -erco #include <FL/Fl.H> #include <FL/fl_ask.H> #include <FL/Fl_Window.H> #include <FL/Fl_Button.H> #include <FL/Fl_Menu.H> #include <stdio.h> // Callback invoked when menu item selected void handle_menu(Fl_Widget *w, void *v) { if(!w || !v) return; switch((int)v) { case 1: fl_choice("Thing 1 happened", "OK", NULL, NULL); break; case 2: fl_choice("Thing 2 happened", "OK", NULL, NULL); break; case 3: fl_choice("Thing 3 happened", "OK", NULL, NULL); break; } } // Callback invoked when button pushed void push_cb(Fl_Widget *w, void*) { Fl_Menu_Item rclick_menu[] = { { "Do Thing 1", 0, handle_menu, (void*)1 }, { "Do Thing 2", 0, handle_menu, (void*)2 }, { "Do Thing 3", 0, handle_menu, (void*)3 }, { 0 } }; const Fl_Menu_Item *m = rclick_menu->popup(Fl::event_x(), Fl::event_y(), 0, 0, 0); if ( m ) m->do_callback(w, m->user_data()); return; } int main() { Fl_Window win(140,45,"Simple Popup Menu (using callbacks)"); Fl_Button butt(10,10,120,25,"Push For Menu"); butt.callback(push_cb); win.show(); return(Fl::run()); }
Example: Popup Menu (WITHOUT callbacks) // Popup menu WITHOUT callbacks -erco 09/07/09 #include <FL/Fl.H> #include <FL/fl_ask.H> #include <FL/Fl_Window.H> #include <FL/Fl_Button.H> #include <FL/Fl_Menu.H> #include <stdio.h> // Callback invoked when button pushed void push_cb(Fl_Widget *w, void*) { Fl_Menu_Item rclick_menu[] = { { "Do Thing 1" }, { "Do Thing 2" }, { "Do Thing 3" }, { 0 } }; const Fl_Menu_Item *m = rclick_menu->popup(Fl::event_x(), Fl::event_y(), 0, 0, 0); if ( !m ) { return; } else if ( strcmp(m->label(), "Do Thing 1") == 0 ) { fl_choice("Thing 1 happened", "OK", NULL, NULL); } else if ( strcmp(m->label(), "Do Thing 2") == 0 ) { fl_choice("Thing 2 happened", "OK", NULL, NULL); } else if ( strcmp(m->label(), "Do Thing 3") == 0 ) { fl_choice("Thing 3 happened", "OK", NULL, NULL); } return; } int main() { Fl_Window win(140,45,"Simple Popup Menu (No callbacks)"); Fl_Button butt(10,10,120,25,"Push For Menu"); butt.callback(push_cb); win.show(); return(Fl::run()); }
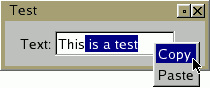
| Right-Click Popup Copy/Paste Menu for Fl_Input |
Demonstrates how to make a popup copy/paste menu appear over an Fl_Input widget.
There's probably a lot of ways to do this; this is probably the most explicit.
Example: Right-Click Popup Copy/Paste Menu for Fl_Input #include <FL/Fl.H> #include <FL/Fl_Window.H> #include <FL/Fl_Input.H> #include <FL/Fl_Menu.H> #include <stdio.h> // printf // // How to implement a copy/paste menu for Fl_Input -- erco 02/04/09 // class MyInput : public Fl_Input { static void Copy_CB(Fl_Widget*, void *userdata) { printf("*** COPY ***\n"); MyInput *in = (MyInput*)userdata; in->copy(0); // text selection clipboard in->copy(1); // copy/paste clipboard } static void Paste_CB(Fl_Widget*, void *userdata) { printf("*** PASTE ***\n"); MyInput *in = (MyInput*)userdata; Fl::paste(*in, 1); // 09/03/2013 fix: added ",1" to help paste from e.g. notepad } public: int handle(int e) { switch (e) { case FL_PUSH: // RIGHT MOUSE PUSHED? Popup menu on right click if ( Fl::event_button() == FL_RIGHT_MOUSE ) { Fl_Menu_Item rclick_menu[] = { { "Copy", 0, Copy_CB, (void*)this }, { "Paste", 0, Paste_CB, (void*)this }, { 0 } }; const Fl_Menu_Item *m = rclick_menu->popup(Fl::event_x(), Fl::event_y(), 0, 0, 0); if ( m ) m->do_callback(0, m->user_data()); return(1); // (tells caller we handled this event) } break; case FL_RELEASE: // RIGHT MOUSE RELEASED? Mask it from Fl_Input if ( Fl::event_button() == FL_RIGHT_MOUSE ) { return(1); // (tells caller we handled this event) } break; } return(Fl_Input::handle(e)); // let Fl_Input handle all other events } MyInput(int X,int Y,int W,int H,const char*L=0):Fl_Input(X,Y,W,H,L) { } }; int main() { Fl_Window win(200,45,"Test"); MyInput input(50,10,120,25,"Text:"); win.show(); return(Fl::run()); }
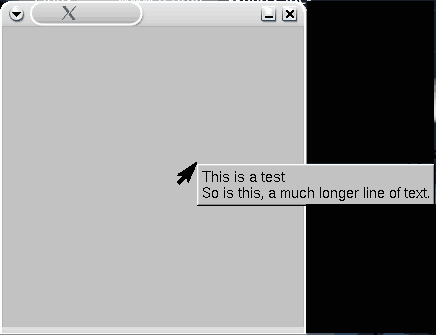
| Popup Text Window |
Demonstrates how to popup a borderless text message window when user clicks anywhere in the window.
Example: Popup Text Window #include <FL/Fl.H> #include <FL/Fl_Window.H> #include <FL/Fl_Box.H> #include <FL/Fl_Menu_Window.H> #include <FL/fl_draw.H> #include <stdio.h> // // Demonstrate how to popup a simple window of information // erco 1.1 01/04/06 // class PopupWindow : public Fl_Menu_Window { Fl_Box *output; // Size window to just fit output's label text void SizeToText() { int W=0, H=0; fl_font(output->labelfont(), output->labelsize()); fl_measure(output->label(), W, H, 0); resize(x(), y(), W+10, H+10); // +10: leaves +5 margin on all sides output->resize(0, 0, W+10, H+10); } public: PopupWindow() : Fl_Menu_Window(10,10) { output = new Fl_Box(0, 0, w(), h()); // box will have the text of user's msg output->box(FL_UP_BOX); // popup window will have an 'Up Box' border end(); hide(); border(0); // popup will be borderless output->align(FL_ALIGN_LEFT|FL_ALIGN_INSIDE); // text should be left aligned output->label("No text defined"); // (default msg if none defined) SizeToText(); } // Change text in box void text(const char*s) { output->label(s); // set message text SizeToText(); // resize window to size of text } // Pop up window at current mouse position void popup() { position(Fl::event_x_root(), Fl::event_y_root()); // position window at cursor show(); } }; // A window where mouse events pops open text messages class MyWindow : public Fl_Window { PopupWindow *popup; int handle(int e) { int ret = Fl_Window::handle(e); switch (e) { case FL_PUSH: popup->popup(); return(1); case FL_RELEASE: popup->hide(); return(1); } return(ret); } public: MyWindow(int w,int h) : Fl_Window(w,h) { popup = new PopupWindow(); popup->text("This is a test\nSo is this, a much longer line of text."); end(); } }; int main(int argc, char** argv) { MyWindow win(300,300); win.show(); return(Fl::run()); }
| Draw Mouse Coordinates Example |
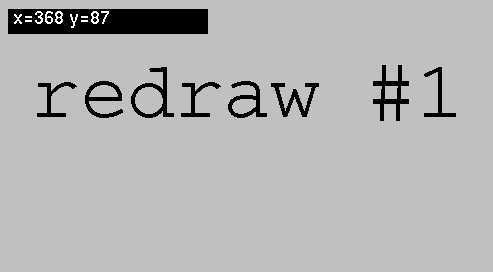
|
| Screen shows x/y coords of mouse in upper left, while large font shows the full screen's redraw count to show that the entire screen is not being redrawn as the mouse is moved. |
Demonstrates how to draw the coordinates of a mouse into a window without causing the entire screen to redraw, without using overlay planes, separate widgets or windows for the coordinates.
I liked Hartmut's idea of only drawing the coords over the graphic, avoiding overlays and complete redraws, while still updating the coords IN the screen area, and doing it fast.
Here's a cute technique abusing damage(FL_DAMAGE_USER1), to avoid the whole problem of keeping a separate 'flag'. This works in the knowledge that setting the damage flag also causes a redraw, and the flag gets ORed with other bits if other kinds of damage occur.
Note that the main screen graphic counts the redraws, so you can see whenever the entire screen is redrawn. While moving around the mouse, /only/ the coords will change, showing entire redraws are being avoided.
To get the screen to fully redraw, you can resize the screen, or on some window managers, overlaying then revealing again will count it up.
Example: Drawing Mouse Coordinates Without Redrawing Entire Screen #include <FL/Fl.H> #include <FL/Fl_Window.H> #include <FL/Fl_Group.H> #include <FL/fl_draw.H> #include <stdio.h> // Demonstrate drawing mouse coords: // o w/out redrawing entire screen // o w/out using overlay planes or windows // o w/out using XOR mode class MyDesk : public Fl_Group { protected: int handle(int e) { int ret = Fl_Group::handle(e); switch ( e ) { case FL_ENTER: ret = 1; // FL_ENTER: must return(1) to receive FL_MOVE break; case FL_MOVE: // FL_MOVE: mouse movement causes 'user damage' and redraw.. damage(FL_DAMAGE_USER1); ret = 1; break; } return(ret); } // Draw mouse coords in small black rectangle void draw_coords() { // Coordinates as a string char s[80]; sprintf(s, "x=%d y=%d", (int)Fl::event_x(), (int)Fl::event_y()); // Black rect fl_color(FL_BLACK); fl_rectf(10,10,200,25); // White text fl_color(FL_WHITE); fl_font(FL_HELVETICA, 18); fl_draw(s, 15, 25); } void draw() { // User damage ONLY? just draw coords and done if ( damage() == FL_DAMAGE_USER1 ) { draw_coords(); return; } // Let group draw itself Fl_Group::draw(); { // Show redraw count, so we can tell when full redraws occur. static int redraws = 0; char s[80]; sprintf(s, "redraw #%d", ++redraws); fl_color(FL_BLACK); fl_font(FL_COURIER, 80); fl_draw(s, 50, h()/2); } // Draw coords last draw_coords(); } public: MyDesk(int X, int Y, int W, int H, const char *L=0) : Fl_Group(X,Y,W,H,L) { color(48); } }; /// MAIN int main() { Fl_Window win(720,486); MyDesk desk(10,10,700,466); win.resizable(win); win.show(); return(Fl::run()); }
| Progress Bar Example |
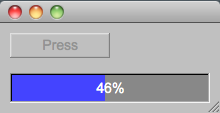
Progress bar
Demonstrates how to update a progress bar within a cpu intensive operation.
Example: Progress Bar Demonstration #include <stdio.h> #include <FL/Fl.H> #include <FL/Fl_Window.H> #include <FL/Fl_Button.H> #include <FL/Fl_Progress.H> // Demonstrate progress bar in app window (windows|linux) // erco 05/02/05 #ifdef _WIN32 // WINDOWS #include <windows.h> #define usleep(v) Sleep(v/1000) #else // UNIX #include <unistd.h> // usleep #endif // Button callback void butt_cb(Fl_Widget *butt, void *data) { // Deactivate the button butt->deactivate(); // prevent button from being pressed again Fl::check(); // give fltk some cpu to gray out button // Make the progress bar Fl_Window *w = (Fl_Window*)data; // access parent window w->begin(); // add progress bar to it.. Fl_Progress *progress = new Fl_Progress(10,50,200,30); progress->minimum(0); // set progress range to be 0.0 ~ 1.0 progress->maximum(1); progress->color(0x88888800); // background color progress->selection_color(0x4444ff00); // progress bar color progress->labelcolor(FL_WHITE); // percent text color w->end(); // end adding to window // Computation loop.. for ( int t=1; t<=500; t++ ) { progress->value(t/500.0); // update progress bar with 0.0 ~ 1.0 value char percent[10]; sprintf(percent, "%d%%", int((t/500.0)*100.0)); progress->label(percent); // update progress bar's label Fl::check(); // give fltk some cpu to update the screen usleep(1000); // 'your stuff' that's compute intensive } // Cleanup w->remove(progress); // remove progress bar from window delete(progress); // deallocate it butt->activate(); // reactivate button w->redraw(); // tell window to redraw now that progress removed } // Main int main() { Fl_Window win(220,90); Fl_Button butt(10,10,100,25,"Press"); butt.callback(butt_cb, &win); win.resizable(win); win.show(); return(Fl::run()); }
| Scrollable Image Viewer |
Demonstrates how to display an image in a scrollable window.
Example: Scrollable Image Viewer #include <stdio.h> #include <stdlib.h> #include <FL/Fl.H> #include <FL/Fl_Shared_Image.H> #include <FL/Fl_Double_Window.H> #include <FL/Fl_Scroll.H> #include <FL/Fl_JPEG_Image.H> #include <FL/Fl_Box.H> #define JPGFILE "/var/tmp/foo.jpg" // Show a jpg image in a scrolled window - erco 05/07/2005 int main() { fl_register_images(); Fl_Double_Window win(720,486); Fl_Scroll scr(0,0,720,486); Fl_JPEG_Image jpg(JPGFILE); if ( jpg.h() == 0 ) { perror(JPGFILE); exit(1); } // error check Fl_Box box(0,0,jpg.w(),jpg.h()); box.image(jpg); win.resizable(win); win.show(); return(Fl::run()); }
| Scrollable Resizable Widget Browser |
Demonstrates how to make a scrollable browser of widgets where children of the scroll follow a change in size of the scroller.
Good for long vertical lists of short horizontal data, where vertical browsing is desired, and horizontal resizing is desired.
Contents that extends sideways is assumed to be able to fit on screen at all times using stretch-to-fit, and contents that extends vertically causes a vertical scrollbar to appear, so the user can scroll down to see it.
Example: Scrollable widget 'browser' #include <FL/Fl.H> #include <FL/Fl_Double_Window.H> #include <FL/Fl_Group.H> #include <FL/Fl_Scroll.H> #include <FL/Fl_Button.H> #include <FL/Fl_Box.H> // demonstrate a scrollable browser of widgets where children follow size // erco 05/20/05 // // dialog // ------------------------------------------- // | scroll | // | ------------------------------------- | // | | fixed | stretch | ^| | // | |_________|________________________|--| | // | | fixed | stretch | | | // | |_________|________________________| | | // | | fixed | stretch | | | // | |_________|________________________| | | // | | fixed | stretch | | | // | |_________|________________________|__| | // | |__________________________________| v| | // | -- | // | _______ | // | | ADD | | // | ------- | // |___________________________________________| // const int fixedWidth = 50; const int defaultHeight = 25; // Combo widget to appear in the scroll, two boxes: one fixed, the other stretches class ScrollItem : public Fl_Group { Fl_Box *fixedBox; Fl_Box *stretchBox; public: ScrollItem(int X, int Y, int W, int H, const char* L=0) : Fl_Group(X,Y,W,H,L) { begin(); // Fixed width box fixedBox = new Fl_Box(X,Y,fixedWidth,defaultHeight,"Fixed"); fixedBox->box(FL_UP_BOX); // Stretchy box stretchBox = new Fl_Box(X+fixedWidth,Y,W-fixedWidth,defaultHeight, "Stretch"); stretchBox->box(FL_UP_BOX); resizable(stretchBox); end(); } }; // Custom scroll that tells children to follow scroll's width when resized class MyScroll : public Fl_Scroll { int nchild; public: MyScroll(int X, int Y, int W, int H, const char* L=0) : Fl_Scroll(X,Y,W,H,L) { nchild = 0; } void resize(int X, int Y, int W, int H) { // Tell children to resize to our new width for ( int t=0; t<nchild; t++ ) { Fl_Widget *w = child(t); w->resize(w->x(), w->y(), W-20, w->h()); // W-20: leave room for scrollbar } // Tell scroll children changed in size init_sizes(); Fl_Scroll::resize(X,Y,W,H); } // Append new scrollitem to bottom // Note: An Fl_Pack would be a good way to do this too // void AddItem() { int X = x() + 1, Y = y() - yposition() + (nchild*defaultHeight) + 1, W = w() - 20, // -20: compensate for vscroll bar H = defaultHeight; add(new ScrollItem(X,Y,W,H)); redraw(); nchild++; } }; // Callback to add new item to scroll void add_cb(Fl_Widget*, void *data) { MyScroll *scroll = (MyScroll*)data; scroll->AddItem(); } // Main int main() { Fl_Double_Window *win = new Fl_Double_Window(300,300); MyScroll *scroll = new MyScroll(10,10,win->w()-20,win->h()-60); scroll->box(FL_BORDER_BOX); scroll->end(); Fl_Button *add_butt = new Fl_Button(win->w()-150, win->h()-40, 100, 25, "Add"); add_butt->callback(add_cb, (void*)scroll); // Create a few widgets to start with for ( int t=0; t<4; t++ ) { scroll->AddItem(); } win->resizable(scroll); win->show(); return(Fl::run()); }
| How To Globally Disable @ Symbols |
Disable Symbols Globally
Demonstrates how to globally disable fltk's '@' symbols throughout your app. Also shows how to define your own global label drawing code.
Example: Disable Symbols // // Example showing how to disable FLTK symbols globally // erco 05/31/2005 // #include <FL/Fl.H> #include <FL/Fl_Double_Window.H> #include <FL/Fl_Choice.H> #include <FL/Fl_Button.H> #include <FL/fl_draw.H> static int G_usesymbols = 1; // Global FLTK callback for drawing all label text void MyDraw(const Fl_Label *o, int X, int Y, int W, int H, Fl_Align a) { fl_font(o->font, o->size); fl_color((Fl_Color)o->color); fl_draw(o->value, X, Y, W, H, a, o->image, G_usesymbols); } // Global FLTK callback for measuring all labels void MyMeasure(const Fl_Label *o, int &W, int &H) { fl_font(o->font, o->size); fl_measure(o->value, W, H, G_usesymbols); } // Turn symbols on or off void FltkUseSymbols(int onoff) { G_usesymbols = onoff; Fl::set_labeltype(FL_NORMAL_LABEL, MyDraw, MyMeasure); // real action here } // Button callback to toggle symbols on/off void Button_CB(Fl_Widget*,void*data) { FltkUseSymbols(G_usesymbols ? 0 : 1); Fl_Window *win = (Fl_Window*)data; win->redraw(); } int main() { Fl_Double_Window win(0,0,300,100); Fl_Choice choice(110,10,120,25,"Email@3Dsite"); choice.add("abc@->"); choice.add("ABC@<-"); choice.value(0); Fl_Button butt(100,45,130,25,"Toggle Symbols"); butt.callback(Button_CB, (void*)&win); win.resizable(win); win.show(); return(Fl::run()); }
| OpenGL Simple Example |
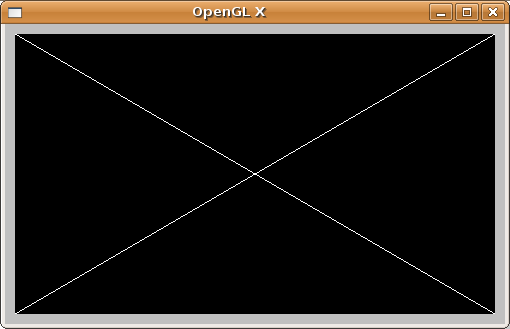
Demonstrates the simplest OpenGL example, drawing a simple 'X'.
Example: OpenGL Simple Example #include <FL/Fl.H> #include <FL/Fl_Gl_Window.H> #include <FL/gl.h> // // Simple resizable 2D GL window // erco 10/08/05 // class MyGlWindow : public Fl_Gl_Window { // DRAW METHOD // OpenGL window: (w,h) is upper right, (-w,-h) is lower left, (0,0) is center // void draw() { // Viewport not valid? Init viewport, ortho, etc. if (!valid()) { glLoadIdentity(); glViewport(0,0,w(),h()); glOrtho(-w(),w(),-h(),h(),-1,1); } // Clear screen glClear(GL_COLOR_BUFFER_BIT); // Draw white 'X' glColor3f(1.0, 1.0, 1.0); glBegin(GL_LINE_STRIP); glVertex2f(w(), h()); glVertex2f(-w(),-h()); glEnd(); glBegin(GL_LINE_STRIP); glVertex2f(w(),-h()); glVertex2f(-w(), h()); glEnd(); } public: // CONSTRUCTOR MyGlWindow(int X,int Y,int W,int H,const char*L=0) : Fl_Gl_Window(X,Y,W,H,L) { } }; // MAIN int main() { Fl_Window win(500, 300, "OpenGL X"); MyGlWindow mygl(10, 10, win.w()-20, win.h()-20); win.end(); win.resizable(mygl); win.show(); return(Fl::run()); }
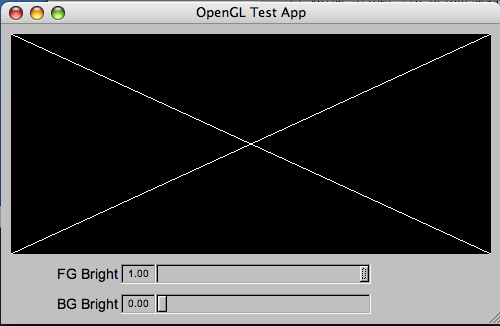
| OpenGL Example with Widgets |
Demonstrates a simple OpenGL application that includes FLTK widgets to control the brightness of the OpenGL's contents (an 'X').
Example: OpenGL Application With Widgets #include <FL/Fl.H> #include <FL/Fl_Window.H> #include <FL/Fl_Value_Slider.H> #include <FL/Fl_Gl_Window.H> #include <FL/gl.h> // // OpenGL App With FLTK Widgets // erco 11/08/06 // // OPENGL WINDOW CLASS class MyGlWindow : public Fl_Gl_Window { double fg; // foreground brightness double bg; // background brightness // FIX OPENGL VIEWPORT // Do this on init or when window's size is changed void FixViewport(int W,int H) { glLoadIdentity(); glViewport(0,0,W,H); glOrtho(-W,W,-H,H,-1,1); } // DRAW METHOD void draw() { if (!valid()) { valid(1); FixViewport(w(), h()); } // first time? init // Clear screen to bg color glClearColor(bg, bg, bg, 0.0); glClear(GL_COLOR_BUFFER_BIT); // Draw 'X' in fg color glColor3f(fg, fg, fg); glBegin(GL_LINE_STRIP); glVertex2f(w(), h()); glVertex2f(-w(),-h()); glEnd(); glBegin(GL_LINE_STRIP); glVertex2f(w(),-h()); glVertex2f(-w(), h()); glEnd(); } // HANDLE WINDOW RESIZING void resize(int X,int Y,int W,int H) { Fl_Gl_Window::resize(X,Y,W,H); FixViewport(W,H); redraw(); } public: // OPENGL WINDOW CONSTRUCTOR MyGlWindow(int X,int Y,int W,int H,const char*L=0) : Fl_Gl_Window(X,Y,W,H,L) { fg = 1.0; bg = 0.0; end(); } void SetBrightness(double new_fg, double new_bg) { fg = new_fg; bg = new_bg; redraw(); } }; // APP WINDOW CLASS class MyAppWindow : public Fl_Window { MyGlWindow *mygl; // opengl window Fl_Value_Slider *fg_bright; // fg brightness slider Fl_Value_Slider *bg_bright; // bg brightness slider private: // Someone changed one of the sliders void ValueChanged_CB2() { mygl->SetBrightness(fg_bright->value(), bg_bright->value()); } static void ValueChanged_CB(Fl_Widget*, void*userdata) { MyAppWindow *appwin = (MyAppWindow*)userdata; appwin->ValueChanged_CB2(); } public: // APP WINDOW CONSTRUCTOR MyAppWindow(int W,int H,const char*L=0) : Fl_Window(W,H,L) { // OpenGL window mygl = new MyGlWindow(10, 10, w()-20, h()-80); // Foreground slider fg_bright = new Fl_Value_Slider(120, h()-60, w()/2, 20, "FG Bright"); fg_bright->align(FL_ALIGN_LEFT); fg_bright->type(FL_HOR_SLIDER); fg_bright->bounds(0.0, 1.0); fg_bright->value(1.0); fg_bright->callback(ValueChanged_CB, (void*)this); // Background slider bg_bright = new Fl_Value_Slider(120, h()-30, w()/2, 20, "BG Bright"); bg_bright->align(FL_ALIGN_LEFT); bg_bright->type(FL_HOR_SLIDER); bg_bright->bounds(0.0, 1.0); bg_bright->value(0.0); bg_bright->callback(ValueChanged_CB, (void*)this); end(); } }; // MAIN int main() { MyAppWindow win(500, 300, "OpenGL Test App"); win.resizable(win); win.show(); return(Fl::run()); }
| OpenGL Shape Interpolation |
Demonstrates how to animate simple shape interpolation in opengl, using a 24fps timer to run the animation smoothly. (Image above shows only a few frames to give a rough idea of the demo)
Example: Simple OpenGL Shape Interpolation #include <FL/Fl.H> #include <FL/Fl_Gl_Window.H> #include <FL/gl.h> #include <math.h> // // Demonstrate interpolating shapes // erco 06/10/05 // class Playback : public Fl_Gl_Window { int frame; // Linear interpolation between two values based on 'frac' (0.0=a, 1.0=b) float Linterp(float frac, float a, float b) { return( a + ( frac * (b - a) )); } // Sinusoidal easein/easeout interpolation between two values based on 'frac' (0.0=a, 1.0=b) float SinInterp(float frac, float a, float b) { float pi = 3.14159; frac = (sin(pi/2 + frac*pi ) + 1.0 ) / 2.0; // 0 ~ 1 -> 0 ~ 1 return(Linterp(frac,a,b)); } // DRAW SIMPLE SHAPE INTERPOLATION // Interpolation is based on the current frame number // void DrawShape(int frame) { // Calculate a fraction that represents the frame# being shown float frac = ( frame % 48 ) / 48.0 * 2; if ( frac > 1.0 ) frac = 2.0-frac; // saw tooth wave: "/\/\/\" static float a_xy[9][2] = { { -.5, -1. }, { 0.0, -.5 }, { -.5, -1. }, { 0.0, -.5 }, { 0.0, 0.0 }, { 0.0, -.5 }, { +.5, -1. }, { 0.0, -.5 }, { +.5, -1. }, }; static float b_xy[9][2] = { { -.25, -1. }, { -.50, -.75 }, { -.75, -1.0 }, { -.50, -.75 }, { 0.0, 0.0 }, { +.50, -.75 }, { +.75, -1.0 }, { +.50, -.75 }, { +.25, -1.0 } }; // Linterp a and b to form new shape c float c_xy[9][2]; for ( int i=0; i<9; i++ ) for ( int xy=0; xy<2; xy++ ) c_xy[i][xy] = SinInterp(frac, a_xy[i][xy], b_xy[i][xy]); // Draw shape glColor3f(1.0, 1.0, 1.0); glBegin(GL_LINE_STRIP); for ( int i=0; i<9; i++ ) glVertex2f(c_xy[i][0], c_xy[i][1]); glEnd(); } // DRAW THE WIDGET // Each time we're called, assume // void draw() { if (!valid()) { valid(1); glLoadIdentity(); glViewport(0,0,w(),h()); } glClear(GL_COLOR_BUFFER_BIT); // Draw shape 4x, rotated at 90 degree positions glPushMatrix(); DrawShape(frame); glRotatef(90.0, 0, 0, 1); DrawShape(frame); glRotatef(90.0, 0, 0, 1); DrawShape(frame); glRotatef(90.0, 0, 0, 1); DrawShape(frame); glPopMatrix(); // Advance frame counter ++frame; } // 24 FPS TIMER CALLBACK // Called 24x per second to redraw the widget // static void Timer_CB(void *userdata) { Playback *pb = (Playback*)userdata; pb->redraw(); Fl::repeat_timeout(1.0/24.0, Timer_CB, userdata); } public: // Constructor Playback(int X,int Y,int W,int H,const char*L=0) : Fl_Gl_Window(X,Y,W,H,L) { frame = 0; Fl::add_timeout(1.0/24.0, Timer_CB, (void*)this); // 24fps timer end(); } }; int main() { Fl_Window win(500, 500); Playback playback(10, 10, win.w()-20, win.h()-20); win.resizable(&playback); win.show(); return(Fl::run()); }
| OpenGL 3D Sphere With Light |
Example of an opengl 3D solid sphere with a light and materials.
Uses glut for creating the sphere.Update 03/15/2011: This older code used an Fl_Gl_Window and worked with FLTK 1.1.x, but that no longer works correctly in 1.3.x, so the code has been updated (below) to use pure glut code to create the FLTK subwindow.
Update 04/06/2013: The above older example seems to work again in 1.3.x.. someone must have fixed something. Works with centos5.6 + fltk 1.3.x current anyway. I prefer the older example because it uses opengl/FLTK the way it's intended to be used, with little dependence on glut other than to create the sphere's geometry.
OpenGL Sphere With Light #include <FL/Fl.H> #include <FL/Fl_Window.H> #include <FL/glut.H> #include <FL/gl.h> #define WIDTH 640 #define HEIGHT 480 // // Render a simple opengl shaded sphere with a single side light -- erco 11/28/08 // // 1.1 Mods to use pure glut calls for subwindow -- erco 03/15/11 // // COMPILE: fltk-config --use-glut --compile sphere.cxx // // GLUT: RESHAPE THE VIEWPORT void Reshape(int W, int H) { // (REFERENCE: SGI light.c DEMO) GLfloat ratio = (float)W / (float)H; glViewport(0, 0, (GLsizei)W, (GLsizei)H); glMatrixMode(GL_PROJECTION); glLoadIdentity(); glOrtho(-1.5*ratio, 1.5*ratio, -1.5, 1.5, -10.0, 10.0); glMatrixMode(GL_MODELVIEW); glLoadIdentity(); } // GLUT: REDRAW THE SCENE void Redraw() { static int valid = 0; if (!valid) { valid = 1; Reshape(WIDTH, HEIGHT); // (REFERENCE: SGI 'light.c' EXAMPLE) GLfloat mat_ambient[] = { 1.0, 1.0, 1.0, 1.0 }; // RGBA GLfloat mat_diffuse[] = { 1.0, 1.0, 1.0, 1.0 }; // RGBA GLfloat mat_specular[] = { 1.0, 1.0, 1.0, 1.0 }; // RGBA GLfloat light_position[] = { 5.0, 5.0, 0.0, 0.0 }; // XYZ glClearColor(0.0, 0.0, 0.4, 0.0); // bg color glShadeModel(GL_SMOOTH); // glMaterialfv(GL_FRONT, GL_AMBIENT, mat_ambient); glMaterialfv(GL_FRONT, GL_DIFFUSE, mat_diffuse); glMaterialfv(GL_FRONT, GL_SPECULAR, mat_specular); glMaterialf(GL_FRONT, GL_SHININESS, 20.0); glLightfv(GL_LIGHT0, GL_POSITION, light_position); // glEnable(GL_LIGHTING); glEnable(GL_LIGHT0); glEnable(GL_DEPTH_TEST); } glClear(GL_COLOR_BUFFER_BIT | GL_DEPTH_BUFFER_BIT); glPushMatrix(); glColor3f(0.5, 0.5, 0.5); glutSolidSphere(0.5, 30, 30); glPopMatrix(); } int main(int argc, char *argv[]) { Fl_Window win(WIDTH, HEIGHT, "sphere"); win.resizable(win); win.show(argc, argv); // Docs say to add glut subwindow /after/ calling win.show() win.begin(); // glutInit(&argc, argv); // docs say not to call this if a subwindow glutInitWindowSize(WIDTH-20, HEIGHT-20); glutInitWindowPosition(10,10); // place inside parent window glutInitDisplayMode(GLUT_DOUBLE | GLUT_RGBA | GLUT_DEPTH | GLUT_MULTISAMPLE); glutCreateWindow("sphere"); glutReshapeFunc(Reshape); glutDisplayFunc(Redraw); win.end(); return(Fl::run()); }
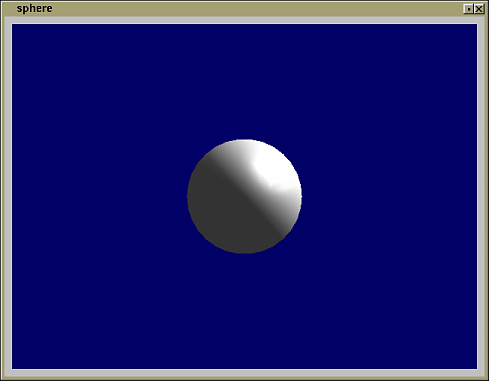
| Fl_File_Browser Example |
This demostrates the simple and sparse Fl_File_Browser class that is useful for loading an Fl_Browser widget with a directory listing.
Note Fl_File_Browser is /just/ an Fl_Browser with filenames loaded into it; it doesn't have all the usual adornments users expect when browsing files, eg. pathname bar, image previews, filter controls. For that, use Fl_File_Chooser instead!
Example #1: Fl_File_Browser: Selection demo
Show how to browse some files and select one#include <FL/Fl.H> #include <FL/Fl_Window.H> #include <FL/Fl_File_Browser.H> // // Demonstrate simple use of Fl_File_Browser with selection -- erco 6/4/11 // int main(int argc, char **argv) { Fl_Window win(300, 400, "Fl_File_Browser"); Fl_File_Browser fbrow(10,10,300-20,400-20); fbrow.load("."); // load directory listing of current directory fbrow.type(FL_HOLD_BROWSER); // use for single selection //fbrow.type(FL_MULTI_BROWSER); // use for multiple selection win.end(); win.resizable(fbrow); win.show(argc,argv); return(Fl::run()); }Example #2: Fl_File_Browser: Selection with callback
Shows use of callback to determine selected item.#include <FL/Fl.H> #include <FL/Fl_Window.H> #include <FL/Fl_File_Browser.H> #include <FL/fl_ask.H> // // Demonstrate Fl_File_Browser with callback -- erco 6/4/11 // void BrowserCallback(Fl_Widget *w, void *data) { Fl_File_Browser *fbrow = (Fl_File_Browser*)w; int index = fbrow->value(); // get index of selected item if ( index > 0 ) { // valid item? fl_alert("Selected: %d (%s)\n", index, fbrow->text(index)); // show item's text } } int main(int argc, char **argv) { Fl_Window win(300, 400, "Fl_File_Browser with Callback"); Fl_File_Browser fbrow(10,10,300-20,400-20); fbrow.load("."); // load directory listing of current directory fbrow.type(FL_HOLD_BROWSER); // use for single selection //fbrow.type(FL_MULTI_BROWSER); // use for multiple selection fbrow.callback(BrowserCallback); win.end(); win.resizable(fbrow); win.show(argc,argv); return(Fl::run()); }
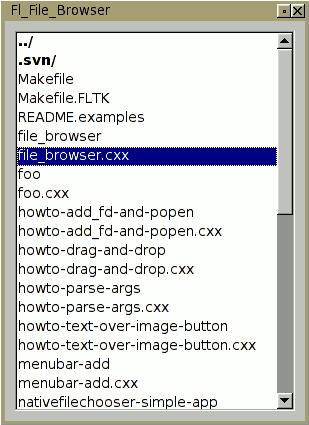
| Fl_File_Chooser Example |
What follows is a /simple/ example of how to use Fl_File_Chooser, the typical way to let the user select files and browse directories. Or, for a more thorough example, see this larger example.
Example: Fl_File_Chooser Example Usage #include <FL/Fl.H> #include <FL/Fl_Window.H> #include <FL/Fl_Menu_Bar.H> #include <FL/Fl_File_Chooser.H> // // Demonstrate how to use Fl_File_Chooser // erco 08/04/2005 // // Callback: when use picks 'File | Open' from main menu void open_cb(Fl_Widget*, void*) { // Create the file chooser, and show it Fl_File_Chooser chooser(".", // directory "*", // filter Fl_File_Chooser::MULTI, // chooser type "Title Of Chooser"); // title chooser.show(); // Block until user picks something. // (The other way to do this is to use a callback()) // while(chooser.shown()) { Fl::wait(); } // User hit cancel? if ( chooser.value() == NULL ) { fprintf(stderr, "(User hit 'Cancel')\n"); return; } // Print what the user picked fprintf(stderr, "--------------------\n"); fprintf(stderr, "DIRECTORY: '%s'\n", chooser.directory()); fprintf(stderr, " VALUE: '%s'\n", chooser.value()); fprintf(stderr, " COUNT: %d files selected\n", chooser.count()); // Multiple files? Show all of them if ( chooser.count() > 1 ) { for ( int t=1; t<=chooser.count(); t++ ) { fprintf(stderr, " VALUE[%d]: '%s'\n", t, chooser.value(t)); } } } // Callback: when user picks 'Quit' void quit_cb(Fl_Widget*, void*) { exit(0); } int main() { Fl_Window win(300, 180, "Simple Example of Fl_File_Chooser"); Fl_Menu_Bar menubar(0,0,300,25); menubar.add("File/Open", 0, open_cb); menubar.add("File/Quit", 0, quit_cb); win.show(); return(Fl::run()); }
| Get coordinates for mouse clicks on scrollable box |
This example shows how to get the coordinates for mouse click events on a scrollable box, the coordinates being relative to the corners of the box.
This can be usful, for instance, in an application that shows large images inside a scroll; allowing the user to click on the image, so as to read back and display pixel data and x/y pixel coordinates on the image, taking into account the scroll positions of the image.
Shows how to use the mouse events (which are relative to the corner of the fltk window) and the offset of the scrollbars to calculate where in the box (or image) the user clicked.
Example: Getting Mouse Clicks on a Scrollable Box #include <stdio.h> #include <FL/Fl.H> #include <FL/Fl_Double_Window.H> #include <FL/Fl_Scroll.H> #include <FL/Fl_Box.H> // // Demonstrate getting mouse click coords on a scrollable box // erco 08/14/2005 // class ScrollBox : public Fl_Box { Fl_Scroll *scroll; public: int handle(int e) { if ( e == FL_PUSH ) { fprintf(stderr, "event_x,event_y: %d,%d, Hit on box: %d,%d\n", Fl::event_x(), Fl::event_y(), Fl::event_x() - scroll->x() + scroll->hscrollbar.value(), Fl::event_y() - scroll->y() + scroll->scrollbar.value()); } return(Fl_Box::handle(e)); } void SetScroll(Fl_Scroll *val) { scroll = val; } ScrollBox(int x,int y,int w,int h,const char*l=0) : Fl_Box(x,y,w,h,l) { color(FL_BLUE); box(FL_FLAT_BOX); } }; int main() { Fl_Double_Window win(400, 400); Fl_Scroll scroll(0,0,400,400); ScrollBox box(0,0,1000,1000); // box is bigger than scroll box.SetScroll(&scroll); scroll.end(); win.resizable(win); win.show(); return(Fl::run()); }
| Using Fl_Browser with columns |
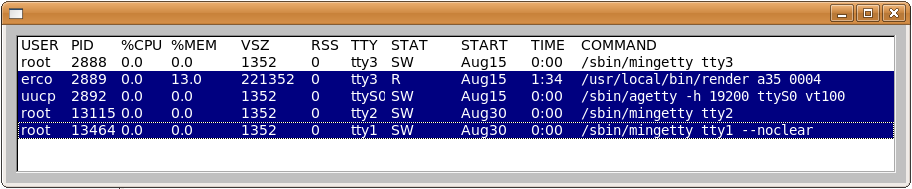
This example shows how to use the Fl_Browser column_widths() and column_char() methods for presenting data in columns (even in non-fixed-width fonts).
Example: Using Fl_Browser with columns #include <FL/Fl.H> #include <FL/Fl_Window.H> #include <FL/Fl_Browser.H> // // Demonstrate Fl_Browser with columns // erco 09/16/05 // int main() { Fl_Window *w = new Fl_Window(900,300); Fl_Browser *b = new Fl_Browser(10,10,w->w()-20,w->h()-20); int widths[] = { 50, 50, 50, 70, 70, 40, 40, 70, 70, 50, 0 }; // widths for each column b->column_widths(widths); b->column_char('\t'); // tabs as column delimiters b->type(FL_MULTI_BROWSER); b->add("USER\tPID\t%CPU\t%MEM\tVSZ\tRSS\tTTY\tSTAT\tSTART\tTIME\tCOMMAND"); // lines of tab delimited data b->add("root\t2888\t0.0\t0.0\t1352\t0\ttty3\tSW\tAug15\t0:00\t@b@f/sbin/mingetty tty3"); b->add("erco\t2889\t0.0\t13.0\t221352\t0\ttty3\tR\tAug15\t1:34\t@b@f/usr/local/bin/render a35 0004"); b->add("uucp\t2892\t0.0\t0.0\t1352\t0\tttyS0\tSW\tAug15\t0:00\t@b@f/sbin/agetty -h 19200 ttyS0 vt100"); b->add("root\t13115\t0.0\t0.0\t1352\t0\ttty2\tSW\tAug30\t0:00\t@b@f/sbin/mingetty tty2"); b->add("root\t13464\t0.0\t0.0\t1352\t0\ttty1\tSW\tAug30\t0:00\t@b@f/sbin/mingetty tty1 --noclear"); w->resizable(b); w->end(); w->show(); return(Fl::run()); }
| Fl_Browser Sorting |
This example shows how to sort the lines in an Fl_Browser.
Example: Sorting an Fl_Browser #include <string.h> #include <FL/Fl.H> #include <FL/Fl_Window.H> #include <FL/Fl_Button.H> #include <FL/Fl_Browser.H> // // Demo sorting an Fl_Browser with bubble sort // erco 09/02/2005 // void ForwardSort(Fl_Browser *b) { for ( int t=1; t<=b->size(); t++ ) { for ( int r=t+1; r<=b->size(); r++ ) { if ( strcmp(b->text(t), b->text(r)) > 0 ) { b->swap(t,r); } } } } void ReverseSort(Fl_Browser *b) { for ( int t=1; t<=b->size(); t++ ) { for ( int r=t+1; r<=b->size(); r++ ) { if ( strcmp(b->text(t), b->text(r)) < 0 ) { b->swap(t,r); } } } } void togglesort_cb(Fl_Widget *w, void*data) { Fl_Browser *b = (Fl_Browser*)data; if ( strcmp(w->label(), "Do Fwd Sort") == 0 ) { ForwardSort(b); w->label("Do Rev Sort"); // toggle } else { ReverseSort(b); w->label("Do Fwd Sort"); // toggle } } int main() { Fl_Window *win = new Fl_Window(300,500,"Sort Example"); Fl_Browser *b = new Fl_Browser(10,40,win->w()-20, win->h()-50); b->type(FL_MULTI_BROWSER); b->add("Papa"); b->add("Delta"); b->add("Hotel"); b->add("Charlie"); b->add("Echo"); b->add("Foxtrot"); b->add("Golf"); b->add("Lima"); b->add("Victor"); b->add("Alpha"); b->add("Xray"); b->add("Yankee"); b->add("Oscar"); b->add("India"); b->add("Juliet"); b->add("Kilo"); b->add("Mike"); b->add("Sierra"); b->add("November"); b->add("Tango"); b->add("Quebec"); b->add("Bravo"); b->add("Romeo"); b->add("Uniform"); b->add("Whisky"); b->add("Zulu"); Fl_Button *butt = new Fl_Button(10,10,100,28,"Do Fwd Sort"); butt->callback(togglesort_cb, (void*)b); win->show(); return(Fl::run()); }
| Strike Through Text |
Demonstrates how to draw 'strikethrough' text.
A slider is included to show how font size changes look with the strikethrough line.You can uncomment the 'DRAW UNDERLINE' code to do underlining as well.
Example: Drawing Strikethrough Text #include <FL/Fl.H> #include <FL/Fl_Window.H> #include <FL/Fl_Box.H> #include <FL/Fl_Value_Slider.H> #include <FL/fl_draw.H> // // Demonstrate strikethrough text // erco 10/09/05 // class MyBox : public Fl_Box { void draw() { if ( label() ) { Fl_Box::draw_box(); // DRAW LABEL IN CENTER OF WIDGET int label_x, label_y, label_w, label_h; fl_font(labelfont(), labelsize()); fl_measure(label(), label_w, label_h, 1); fl_color(labelcolor()); label_x = x() + (w() / 2) - label_w / 2; // always center text label_y = y() + (h() / 2) - label_h / 2; fl_draw(label(), label_x, label_y+labelsize()); // DRAW STRIKETHROUGH fl_line_style(FL_SOLID); fl_line(label_x, label_y+(labelsize()/3*2), label_x+label_w, label_y+(labelsize()/3*2)); //// // DRAW UNDERLINE //// fl_line_style(FL_SOLID); //// fl_line(label_x, label_y+labelsize(), label_x+label_w, label_y+labelsize()+1); } } public: // CONSTRUCTOR MyBox(int X,int Y,int W,int H,const char*L=0) : Fl_Box(X,Y,W,H,L) { } }; // HANDLE SLIDER CHANGING FONT SIZE void ChangeFontsize_CB(Fl_Widget *w,void *data) { Fl_Value_Slider *slider = (Fl_Value_Slider*)w; Fl_Box *box = (Fl_Box*)data; int newsize = (int)slider->value(); box->labelsize(newsize); box->redraw(); } int main() { Fl_Window win(200, 100); MyBox box(10, 40, win.w()-20, win.h()-50, "Testing"); box.labelsize(24); box.box(FL_FLAT_BOX); box.color(50); Fl_Value_Slider fontsize(10,10,200-20,20); fontsize.callback(ChangeFontsize_CB, (void*)&box); fontsize.type(FL_HOR_SLIDER); fontsize.range(8,40); fontsize.value(box.labelsize()); win.show(); return(Fl::run()); }
| Changing the mouse cursor for an Fl_GL_Window |
Demonstrates how to change the cursor for an Fl_Gl_Window.
Fl_Gl_Window is a special case on Win32 with Fltk versions 1.1.6 and older, because there was a bug where just setting the cursor wasn't enough, you had to set the cursor for the parent Fl_Window.
The following code should work for all platforms and all versions of 1.1.x.
Changing the mouse cursor for an Fl_GL_Window #include <FL/Fl.H> #include <FL/Fl_Window.H> #include <FL/Fl_Gl_Window.H> #include <FL/gl.h> // // Test 'cross' cursor when mouse in GL window // erco 11/03/05 // class MyGlWindow : public Fl_Gl_Window { int handle(int e) { int ret = Fl_Gl_Window::handle(e); switch ( e ) { case FL_ENTER: window()->cursor(FL_CURSOR_CROSS); // 'window()->cursor()' needed on WIN32 for 1.1.6 and older. ret = 1; // 1.1.7 and up can probably just use fl_cursor(..) break; case FL_LEAVE: window()->cursor(FL_CURSOR_DEFAULT); ret = 1; break; } return(ret); } void draw() { if (!valid()) { valid(1); glViewport(0,0,w(),h()); } glClear(GL_COLOR_BUFFER_BIT); } public: MyGlWindow(int x,int y,int w,int h,const char*l=0) : Fl_Gl_Window(x,y,w,h,l) { } }; int main() { Fl_Window win(500, 500); MyGlWindow glwin(10,10,500-20,500-20); win.show(); return(Fl::run()); }
| Extend Fl_Browser to have interactively resizable columns |
An interactively resizable Fl_BrowserDemonstrates how to extend the functionality of the standard Fl_Browser to support interactively resizable columns.
The following code tested on Fltk 1.1.6
An Interactively Resizable Fl_Browser #include <FL/Fl.H> #include <FL/Fl_Double_Window.H> #include <FL/Fl_Browser.H> #include <FL/fl_draw.H> // // Demonstrate how to derive a class extending Fl_Browser with interactively resizable columns // erco 1.10 12/09/2005 // erco 1.20 07/17/2016 -- fix scrollbar recalc, code simplifications // class ColResizeBrowser : public Fl_Browser { Fl_Color _colsepcolor; // color of column separator lines int _showcolsep; // flag to enable drawing column separators Fl_Cursor _last_cursor; // saved cursor state info int _drag_col; // col# user is dragging (-1 = not dragging) int *_widths; // pointer to user's width[] array int _nowidths[1]; // default width array (non-const) // CHANGE CURSOR // Does nothing if cursor already set to value specified. // void change_cursor(Fl_Cursor newcursor) { if ( newcursor == _last_cursor ) return; window()->cursor(newcursor); _last_cursor = newcursor; } // RETURN THE COLUMN MOUSE IS 'NEAR' // Returns -1 if none. // int which_col_near_mouse() { int X,Y,W,H; Fl_Browser::bbox(X,Y,W,H); // area inside browser's box() // EVENT NOT INSIDE BROWSER AREA? (eg. on a scrollbar) if ( ! Fl::event_inside(X,Y,W,H) ) { return(-1); } int mousex = Fl::event_x() + hposition(); int colx = this->x(); for ( int t=0; _widths[t]; t++ ) { colx += _widths[t]; int diff = mousex - colx; // MOUSE 'NEAR' A COLUMN? // Return column # // if ( diff >= -4 && diff <= 4 ) { return(t); } } return(-1); } // FORCE SCROLLBAR RECALC // Prevents scrollbar from getting out of sync during column drags void recalc_hscroll() { int size = textsize(); textsize(size+1); // XXX: changing textsize() briefly triggers textsize(size); // XXX: recalc Fl_Browser's scrollbars redraw(); } protected: // MANAGE EVENTS TO HANDLE COLUMN RESIZING int handle(int e) { // Not showing column separators? Use default Fl_Browser::handle() logic if ( !showcolsep() ) return(Fl_Browser::handle(e)); // Handle column resizing int ret = 0; switch ( e ) { case FL_ENTER: { ret = 1; break; } case FL_MOVE: { change_cursor( (which_col_near_mouse() >= 0) ? FL_CURSOR_WE : FL_CURSOR_DEFAULT); ret = 1; break; } case FL_PUSH: { int whichcol = which_col_near_mouse(); if ( whichcol >= 0 ) { // CLICKED ON RESIZER? START DRAGGING _drag_col = whichcol; change_cursor(FL_CURSOR_DEFAULT); return 1; // eclipse event from Fl_Browser's handle() } // (prevents FL_PUSH from selecting item) break; } case FL_DRAG: { if ( _drag_col != -1 ) { // Sum up column widths to determine position int mousex = Fl::event_x() + hposition(); int newwidth = mousex - x(); for ( int t=0; _widths[t] && t<_drag_col; t++ ) { newwidth -= _widths[t]; } if ( newwidth > 0 ) { // Apply new width, redraw interface _widths[_drag_col] = newwidth; if ( _widths[_drag_col] < 2 ) { _widths[_drag_col] = 2; } recalc_hscroll(); redraw(); } return 1; // eclipse event from Fl_Browser's handle() } break; } case FL_LEAVE: case FL_RELEASE: { _drag_col = -1; // disable drag mode change_cursor(FL_CURSOR_DEFAULT); // ensure normal cursor if ( e == FL_RELEASE ) return 1; // eclipse event ret = 1; break; } } return(Fl_Browser::handle(e) ? 1 : ret); } void draw() { // DRAW BROWSER Fl_Browser::draw(); if ( _showcolsep ) { // DRAW COLUMN SEPARATORS int colx = this->x() - hposition(); int X,Y,W,H; Fl_Browser::bbox(X,Y,W,H); fl_color(_colsepcolor); for ( int t=0; _widths[t]; t++ ) { colx += _widths[t]; if ( colx > X && colx < (X+W) ) { fl_line(colx, Y, colx, Y+H-1); } } } } public: // CTOR ColResizeBrowser(int X,int Y,int W,int H,const char*L=0) : Fl_Browser(X,Y,W,H,L) { _colsepcolor = Fl_Color(FL_GRAY); _last_cursor = FL_CURSOR_DEFAULT; _showcolsep = 0; _drag_col = -1; _nowidths[0] = 0; _widths = _nowidths; } // GET/SET COLUMN SEPARATOR LINE COLOR Fl_Color colsepcolor() const { return(_colsepcolor); } void colsepcolor(Fl_Color val) { _colsepcolor = val; } // GET/SET DISPLAY OF COLUMN SEPARATOR LINES // 1: show lines, 0: don't show lines // int showcolsep() const { return(_showcolsep); } void showcolsep(int val) { _showcolsep = val; } // GET/SET COLUMN WIDTHS ARRAY // Just like fltk method, but array is non-const. // int *column_widths() const { return(_widths); } void column_widths(int *val) { _widths = val; Fl_Browser::column_widths(val); } }; int main() { Fl_Double_Window *w = new Fl_Double_Window(900,300); int widths[] = { 50, 50, 50, 70, 70, 40, 40, 70, 70, 50, 0 }; // widths for each column ColResizeBrowser *b = new ColResizeBrowser(10,10,w->w()-20,w->h()-20); b->column_widths(widths); b->showcolsep(1); //b->colsepcolor(FL_RED); b->column_char('\t'); // tabs as column delimiters b->type(FL_MULTI_BROWSER); //// SIMPLE UN-COLORED HEADING //// b->add("USER\tPID\t%CPU\t%MEM\tVSZ\tRSS\tTTY\tSTAT\tSTART\tTIME\tCOMMAND"); // NICER COLORED HEADING b->add("@B12@C7@b@.USER\t@B12@C7@b@.PID\t@B12@C7@b@.%CPU\t" // tab delimited columns with colors "@B12@C7@b@.%MEM\t@B12@C7@b@.VSZ\t@B12@C7@b@.RSS\t" "@B12@C7@b@.TTY\t@B12@C7@b@.STAT\t@B12@C7@b@.START\t" "@B12@C7@b@.TIME\t@B12@C7@b@.COMMAND"); // COLUMNS OF DATA b->add("root\t2888\t0.0\t0.0\t1352\t0\ttty3\tSW\tAug15\t0:00\t@b@f/sbin/mingetty tty3"); b->add("erco\t2889\t0.0\t13.0\t221352\t0\ttty3\tR\tAug15\t1:34\t@b@f/usr/local/bin/render a35 0004"); b->add("uucp\t2892\t0.0\t0.0\t1352\t0\tttyS0\tSW\tAug15\t0:00\t@b@f/sbin/agetty -h 19200 ttyS0 vt100"); b->add("root\t13115\t0.0\t0.0\t1352\t0\ttty2\tSW\tAug30\t0:00\t@b@f/sbin/mingetty tty2"); b->add("root\t13464\t0.0\t0.0\t1352\t0\ttty1\tSW\tAug30\t0:00\t@b@f/sbin/mingetty tty1 --noclear"); w->resizable(b); w->end(); w->show(); return(Fl::run()); }

| How to make a 4 port proportionally resizable OpenGL window using Fl_Tile |
An interactively resizable 4 Port OpenGL windowDemonstrates how to create 4 separate OpenGL windows in one, all proportionally resizable using Fl_Tile, and interactively resizable.
The following code tested on Fltk 1.1.6
Fl_Tile 4 port OpenGL Window #include <FL/Fl.H> #include <FL/Fl_Double_Window.H> #include <FL/Fl_Tile.H> #include <FL/Fl_Group.H> #include <FL/Fl_Gl_Window.H> #include <FL/gl.h> // // Example of how to make a 4 port tiled GL window // ting/erco 1.0 // class Viewport : public Fl_Gl_Window { void RectLine(int x1, int y1, int x2, int y2) { glBegin(GL_LINE_LOOP); glVertex2s(x1, y1); glVertex2s(x2, y1); glVertex2s(x2, y2); glVertex2s(x1, y2); glEnd(); } protected: void draw() { if ( !valid() ) { // First time? init viewport, etc. valid(1); glLoadIdentity(); glViewport(0, 0, w(), h()); glOrtho(-w(), w(), -h(), h(), -1, 1); } // Clear screen glClear(GL_COLOR_BUFFER_BIT); // Draw white 'X' glColor3f(1.0, 1.0, 1.0); glBegin(GL_LINE_STRIP); glVertex2f(w(), h()); glVertex2f(-w(), -h()); glEnd(); glBegin(GL_LINE_STRIP); glVertex2f(w(), -h()); glVertex2f(-w(), h()); glEnd(); // Draw yellow border last, around the outer edge glColor3f(1.0, 1.0, 0.0); RectLine(-w()+1, -h()+1, w()-1, h()-1); } public: Viewport(int x, int y, int w, int h, char* l=0) : Fl_Gl_Window(x, y, w, h, l) { end(); } }; class Layout:public Fl_Tile { private: Viewport *toplft, *toprig, *botlft, *botrig; protected: // Custom resize behavior : keep viewports proportional during resize void resize(int X, int Y, int W, int H) { // Get old proportions so we can preserve through resize float dw = (float)toplft->w() / w(); float dh = (float)toplft->h() / h(); // Carefully construct new edges of ports, keeping proportions int xlef = 0, xmid = (int)(W * dw + 0.5), xrig = W; int ytop = 0, ymid = (int)(H * dh + 0.5), ybot = H; int wlef = xmid - xlef, wrig = xrig - xmid; int htop = ymid - ytop, hbot = ybot - ymid; // Resize our widget via Fl_Widget (to prevent children resizing) Fl_Widget::resize(X, Y, W, H); // Resize children with custom computations toplft->resize(xlef, ytop, wlef, htop); toprig->resize(xmid, ytop, wrig, htop); botlft->resize(xlef, ymid, wlef, hbot); botrig->resize(xmid, ymid, wrig, hbot); } public: Layout(int x, int y, int w, int h) : Fl_Tile(x, y, w, h) { box(FL_BORDER_BOX); color(FL_RED); // (shouldn't be seen) // Carefully construct edges of ports int xlef = 0, xmid = w/2, xrig = w; int ytop = 0, ymid = h/2, ybot = h; int wlef = xmid - xlef, wrig = xrig - xmid; int htop = ymid - ytop, hbot = ybot - ymid; // Create the 4 ports toplft = new Viewport(xlef, ytop, wlef, htop); toprig = new Viewport(xmid, ytop, wrig, htop); botlft = new Viewport(xlef, ymid, wlef, hbot); botrig = new Viewport(xmid, ymid, wrig, hbot); end(); } }; int main() { Fl_Double_Window *win = new Fl_Double_Window(800, 500); Layout *layout = new Layout(0, 0, win->w(), win->h()); win->resizable(layout); win->end(); win->show(); return(Fl::run()); }
| An OpenGL Window with a Dynamic Popup Menu |
Demonstrates how to create a dynamic popup menu over an OpenGL window. (Probably works for regular windows too)The following code tested with Fltk 1.1.6 on OSX/Linux/Windows.
OpenGL + Dynamic Popup Menu #include <stdio.h> #include <time.h> #include <FL/Fl.H> #include <FL/Fl_Gl_Window.H> #include <FL/Fl_Menu_Button.H> #include <FL/gl.h> // // Simple GL window with dynamic popup menu // erco 01/25/06 // class MyGlWindow : public Fl_Gl_Window { void draw() { if (!valid()) { glLoadIdentity(); glViewport(0,0,w(),h()); glOrtho(-w(),w(),-h(),h(),-1,1); } glClear(GL_COLOR_BUFFER_BIT); } static void Menu_CB(Fl_Widget*, void *data) { char name[80]; ((Fl_Menu_Button*)data)->item_pathname(name, sizeof(name)-1); fprintf(stderr, "Menu Callback: %s\n", name); } int handle(int e) { int ret = Fl_Gl_Window::handle(e); switch ( e ) { case FL_PUSH: if ( Fl::event_button() == 3 ) { char tmp[80]; time_t t = time(NULL); sprintf(tmp, "Time is %s", ctime(&t)); // Dynamically create menu, pop it up Fl_Menu_Button menu(Fl::event_x_root(), Fl::event_y_root(), 80, 1); menu.add(tmp); // dynamic -- changes each time popup opens.. menu.add("Edit/Copy", 0, Menu_CB, (void*)&menu); menu.add("Edit/Paste", 0, Menu_CB, (void*)&menu); menu.add("Quit", 0, Menu_CB, (void*)&menu); menu.popup(); } } return(ret); } public: // CONSTRUCTOR MyGlWindow(int X,int Y,int W,int H,const char*L=0) : Fl_Gl_Window(X,Y,W,H,L) { } }; // MAIN int main() { Fl_Window win(500, 300); MyGlWindow mygl(10, 10, win.w()-20, win.h()-20); win.show(); return(Fl::run()); }
| Drop Shadow Effect Example |
A clock with the drop shadow effect.Demonstrates how to make a drop shadow effect with text. Creates a 'DropShadowBox' widget, and demonstrates its use with a simple clock application.
Tested with Fltk 1.1.6 on Linux, probably works on all platforms + all revs of 1.1.x.
Update 04/06/2013: Works with fltk 1.3.x on linux as well.
Drop Shadow Effect #include <FL/Fl.H> #include <FL/Fl_Double_Window.H> #include <FL/Fl_Box.H> #include <FL/fl_draw.H> #include <stdio.h> #include <time.h> // // Drop shadow example widget // 1.0 erco 02/11/06 // class DropShadowBox : public Fl_Box { int _levels; void draw() { Fl_Box::draw_box(); if ( label() ) { // Draw label w/dropshadow effect fl_font(labelfont(), labelsize()); int X = x() + Fl::box_dx(box()); int Y = y() + Fl::box_dy(box()); for ( int i=_levels; i>0; i-- ) { // loop through shades of color fl_color(fl_color_average(color(), // bg color (widget's bg) labelcolor(), // fg color (label) (i / (float)_levels))); // weight between bg and fg color fl_draw(label(), X+i, Y+i, w(), h(), align()); } } } public: DropShadowBox(int X,int Y,int W,int H,const char*L=0) : Fl_Box(X,Y,W,H,L) { _levels = 5; } void levels(int val) { _levels = val; } int levels() { return(_levels); } }; // Timer callback to update label void Update_CB(void* userdata) { DropShadowBox *box = (DropShadowBox*)userdata; time_t lt = time(NULL); box->label(ctime(<)); Fl::repeat_timeout(1.0, Update_CB, (void*)box); } int main() { Fl_Double_Window *win = new Fl_Double_Window(400, 100, "Drop Shadow Clock"); DropShadowBox *box = new DropShadowBox(10, 10, win->w()-20, win->h()-20); box->labelsize(28); box->levels(8); Fl::add_timeout(1.0, Update_CB, (void*)box); win->show(); Update_CB((void*)box); // force update immediately return(Fl::run()); }
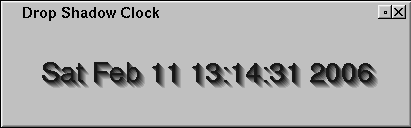
| OpenGL 2D Text on a 3D Object |
Text on a spinning 3D OpenGL objectDemonstrates how to show text on a 3D object.
Tested with Fltk 1.1.6 on Linux, probably works on all platforms + all revs of 1.1.x.
Update 04/06/2013: Works with fltk 1.3.x on linux as well.
OpenGL 2D Text on 3D Object // // OpenGL example showing text on a rotating 3D object. // erco 03/03/06 // #include <FL/Fl.H> #include <FL/Fl_Gl_Window.H> #include <FL/gl.h> #include <GL/glu.h> #include <string.h> #include <stdio.h> // Tetrahedron points #define TOP 0, 1, 0 #define RIGHT 1, -1, 1 #define LEFT -1, -1, 1 #define BACK 0, -1, -1 class MyGlWindow : public Fl_Gl_Window { float rotangle; void draw() { // First time? init viewport, etc. if (!valid()) { valid(1); // Initialize GL glClearColor(0.0, 0.0, 0.0, 0.0); glClearDepth(1.0); glDepthFunc(GL_LESS); glEnable(GL_DEPTH_TEST); glShadeModel(GL_FLAT); } glClear(GL_COLOR_BUFFER_BIT|GL_DEPTH_BUFFER_BIT); // Position camera/viewport init glMatrixMode(GL_PROJECTION); glLoadIdentity(); glViewport(0,0,w(),h()); gluPerspective(45.0, (float)w()/(float)h(), 1.0, 10.0); glTranslatef(0.0, 0.0, -5.0); // Position object glMatrixMode(GL_MODELVIEW); glLoadIdentity(); glRotatef(rotangle, 1, 0, 1); glRotatef(rotangle, 0, 1, 0); glRotatef(rotangle, 1, 1, 1); // Draw tetrahedron glColor3f(1.0, 0.0, 0.0); glBegin(GL_POLYGON); glVertex3f(TOP); glVertex3f(RIGHT); glVertex3f(LEFT); glEnd(); glColor3f(0.0, 1.0, 0.0); glBegin(GL_POLYGON); glVertex3f(TOP); glVertex3f(BACK); glVertex3f(RIGHT); glEnd(); glColor3f(0.0, 0.0, 1.0); glBegin(GL_POLYGON); glVertex3f(TOP); glVertex3f(LEFT); glVertex3f(BACK); glEnd(); glColor3f(0.5, 0.5, 0.5); glBegin(GL_POLYGON); glVertex3f(RIGHT); glVertex3f(BACK); glVertex3f(LEFT); glEnd(); // Print tetrahedron's points on object // Disable depth buffer while drawing text, // so text draws /over/ object. // glDisable(GL_DEPTH_TEST); { const char *p; gl_font(1, 12); glColor3f(1.0, 1.0, 1.0); glRasterPos3f(TOP); p = "+ top"; gl_draw(p, strlen(p)); glRasterPos3f(LEFT); p = "+ left"; gl_draw(p, strlen(p)); glRasterPos3f(RIGHT); p = "+ right"; gl_draw(p, strlen(p)); glRasterPos3f(BACK); p = "+ back"; gl_draw(p, strlen(p)); } glEnable(GL_DEPTH_TEST); // Print rotangle value at fixed position at lower left char s[40]; sprintf(s, "ROT=%.2f", rotangle); glLoadIdentity(); glRasterPos2f(-3,-2); gl_draw(s, strlen(s)); } static void Timer_CB(void *userdata) { MyGlWindow *o = (MyGlWindow*)userdata; o->rotangle += 1.0; o->redraw(); Fl::repeat_timeout(1.0/24.0, Timer_CB, userdata); // 24fps } public: // CONSTRUCTOR MyGlWindow(int X,int Y,int W,int H,const char*L=0) : Fl_Gl_Window(X,Y,W,H,L) { rotangle = 0; Fl::add_timeout(3.0, Timer_CB, (void*)this); // wait 3 secs before animation begins } }; // MAIN int main() { Fl_Window win(500, 300); MyGlWindow mygl(10, 10, win.w()-20, win.h()-20); win.show(); return(Fl::run()); }
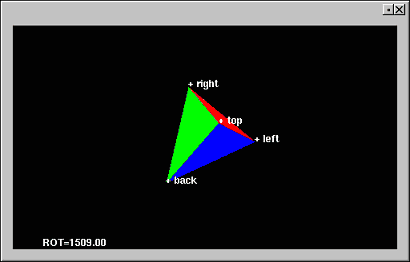
| Simple Tabs Example |
Tabs ExampleDemonstrates how to use the Fl_Tabs widget.
Fl_Tabs Example #include <FL/Fl.H> #include <FL/Fl_Window.H> #include <FL/Fl_Tabs.H> #include <FL/Fl_Group.H> #include <FL/Fl_Button.H> // // Simple tabs example // _____ _____ // __/ Aaa \/ Bbb \______________________ // | _______ | // | |_______| | // | _______ | // | |_______| | // | _______ | // | |_______| | // |______________________________________| // int main(int argc, char *argv[]) { Fl_Window *win = new Fl_Window(500,200,"Tabs Example"); { Fl_Tabs *tabs = new Fl_Tabs(10,10,500-20,200-20); { // Aaa tab Fl_Group *aaa = new Fl_Group(10,35,500-20,200-45,"Aaa"); { Fl_Button *b1 = new Fl_Button(50, 60,90,25,"Button A1"); b1->color(88+1); Fl_Button *b2 = new Fl_Button(50, 90,90,25,"Button A2"); b2->color(88+2); Fl_Button *b3 = new Fl_Button(50,120,90,25,"Button A3"); b3->color(88+3); } aaa->end(); // Bbb tab Fl_Group *bbb = new Fl_Group(10,35,500-10,200-35,"Bbb"); { Fl_Button *b1 = new Fl_Button( 50,60,90,25,"Button B1"); b1->color(88+1); Fl_Button *b2 = new Fl_Button(150,60,90,25,"Button B2"); b2->color(88+3); Fl_Button *b3 = new Fl_Button(250,60,90,25,"Button B3"); b3->color(88+5); Fl_Button *b4 = new Fl_Button( 50,90,90,25,"Button B4"); b4->color(88+2); Fl_Button *b5 = new Fl_Button(150,90,90,25,"Button B5"); b5->color(88+4); Fl_Button *b6 = new Fl_Button(250,90,90,25,"Button B6"); b6->color(88+6); } bbb->end(); } tabs->end(); } win->end(); win->show(); return(Fl::run()); }
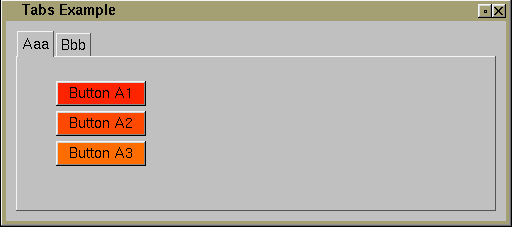
| How to turn a Mac FLTK application into an ".app bundle" |
NOTE: This can now all be done automagically with just fltk-config -post foo
which if invoked on a Mac creates the foo.app directory, and creates a proper wrapper script..On OSX, GUI applications must have a few 'resources' in order to make the application run correctly. In the pre-OSX days, this was done by adding a magical 'resource fork' and 'data forks' to the executable.
These days Apple is (rightfully) trying to get away from this 'magic data' approach, since Apple has now adopted Unix as its base operating system, which likes to think of all files as a stream of bytes, and no 'magic data'.
To do this, Apple decided to separate the file and the magic data into separate files, and put them all into a directory hierarchy known as a 'bundle'. From a unix point of view, a 'bundle' is simply a directory of files, so when one wants to run the application from the Finder or with the open(1) command, one refers to the subdirectory, not the files within it.
For instance, if you have an application called 'foo', then the 'bundle' (or directory hierarchy) might look like this:
% find foo.app -print
foo.app/                                 <-- the top level directory (bundle)
foo.app/Contents/Info.plist
foo.app/Contents/MacOS
foo.app/Contents/MacOS/foo               <-- the executable
foo.app/Contents/PkgInfo
foo.app/Contents/Resources
foo.app/Contents/Resources/icon.icns     <-- the icon for this program
So if you have just a 'foo' executable lying around, you can create a bundle for it via these unix commands:
mkdir foo.app
mkdir foo.app/Contents
mkdir foo.app/Contents/Resources
mkdir foo.app/Contents/MacOS
echo APPLnone > foo.app/Contents/PkgInfo
cp /some/where/yourapp/foo foo.app/Contents/MacOS
chmod 755 foo.app/Contents/MacOS/foo
cat << EOF > foo.app/Contents/info.plist
<?xml version="1.0" encoding="UTF-8"?>
<!DOCTYPE plist SYSTEM "file://localhost/System/Library/DTDs/PropertyList.dtd">
<plist version="0.9">
<dict>
        <key>CFBundleName</key>
        <string>foo</string>
        <key>CFBundlePackageType</key>
        <string>APPL</string>
        <key>CFBundleVersion</key>
        <string>59</string>
        <key>CFBundleShortVersionString</key>
        <string>1.1</string>
        <key>CFBundleSignature</key>
        <string>none</string>
</dict>
</plist>
EOF
That's about as simple as it can get; no icons or other frills. (To set up icons, see the next section)
For a different executable name, just change all the instances of 'foo' in the above to the name of your actual application.
You don't have to worry about the above 'cp' command stripping off your executable's resource fork, as OSX will look at the other files to determine the resource information, assuming you invoke the application by either:
open /path/to/foo.app
..or by browsing the Finder to the directory in which the foo.app subdirectory lives. The Finder will show the "foo.app" directory as an application, not a directory. When you double-click on it, the Finder will open your app. There will be no indication it's a directory. Only the Unix command line tools (like cd, ls, etc) will show foo.app as a directory. The Finder treates the ".app" extension as a special entity, and looks into the directory to see if the Contents and Contents/MacOS subdirs exist to determine what kind of 'bundle' this is.. in this case, an 'executable bundle'.
To get your application to run from the unix command line, you can put a shell script in your bin directory that runs the app using the 'open' command (above).
For actual OSX examples of bundles, look in your machine's /Applications directory; if you sniff around with 'ls -la', you'll see most OSX applications are implemented as 'bundles' (eg. "Terminal.app", "Mail.app", etc)
| How to make icons for your FLTK bundle |
Under OSX, GUI applications should be 'released' as bundles, so you can easily assign resources to it, such as icons.
Once you have your Mac Bundle working, you can associate an icon with it, using these steps.
1) Create a nice 128x128 square icon image.
Make sure it is optimized for viewing at 128x128 pixels, and is consistent with Apple's artistic recommendations.
Use an 8 bit alpha channel in your image, so that parts of your icon can be 'see through'. I've found GIMP works perfectly well for generating Mac icons with alpha channels.
When finished, save your icon as a PNG file with the alpha channel intact.
If need be, make separate 32x32 and 16x16 versions of the icon if it doesn't otherwise scale well. In most cases this isn't needed, as most icons drawn at 128x128 will be automatically scaled by Apple's IconComposer (in the following steps) and look fine. But if your image /doesn't/ scale well, making separate 32x32 and 16x16 images manually optimized will help OSX better show your icon when it needs to animate the icons size for the Dock, or when the user sets a small icon viewing size in the Finder.
2) Run "IconComposer" to import the application's icon:
       OSX 10.3.x: open '/Developer/Applications/IconComposer.app'
       OSX 10.4.x: open '/Developer/Applications/Utilities/Icon Composer.app/'
3) In IconComposer, use File -> Import to load your PNG icon(s).
Or, I believe you can simply 'drag and drop' your image into one of the appropriate boxes in the IconComposer interface.
The program lets you load multiple icons, and in the Import file browser, lets you choose what the destination resolution will be for each file you import.
If the file isn't already the correct size, IconComposer will rescale it for you (after first posting a warning dialog).
4) Import your 128x128 png image.
At /minimum/ give it a 128x128 icon, so the dock can scale it down.
However, I recommend using a 16x16, 32x32 and 128x128 icon, as that is what Mac OSX's own Terminal program uses.
DIGRESSION: You can prove this to yourself by browsing the Terminal application's icons file using the "icns Browser" [sic] utility:
           OSX 10.3.x: open '/Developer/Applications/icns Browser.app/'
           OSX 10.4.x: open '/Developer/Applications/Utilities/icns Browser.app/'
Use File -> Open to open the Terminal's icon file:
/Applications/Utilities/Terminal.app/Contents/Resources/icon.icns5) File -> Save the result as foo.app/Contents/Resources/icons.icns
6) Add a "CFBundleIconFile" tag to your foo.app/Contents/info.plist file.
<?xml version="1.0" encoding="UTF-8"?>
<!DOCTYPE plist SYSTEM "file://localhost/System/Library/DTDs/PropertyList.dtd">
<plist version="0.9">
<dict>
        <key>CFBundleName</key>
        <string>foo</string>
        <key>CFBundlePackageType</key>
        <string>APPL</string>
        <key>CFBundleVersion</key>
        <string>59</string>
        <key>CFBundleShortVersionString</key>
        <string>1.1</string>
        <key>CFBundleIconFile</key>
        <string>icons.icns</string>
        <key>CFBundleSignature</key>
        <string>none</string>
</dict>
</plist>
For more info on the Info.plist file, if you're really curious, see Apple Tech Note 2013, and Apple's release notes on Info.Plist file. (Sorry if either of those two links go stale.. blame Apple, who is constantly moving things around.)
7) That's it.
When you're done, you should end up with something like:
    -rw-r--r--   1 root  wheel      575 Jun  5  2008 foo.app/Contents/Info.plist           <-- should have this contents
    -rw-r--r--   1 root  wheel        9 Jun  5  2008 foo.app/Contents/PkgInfo              <-- should contain 'APPLnone'
    -rwxr-xr-x   1 root  wheel  1637196 Jun  5  2008 foo.app/Contents/MacOS/foo            <-- your executable
    -rw-r--r--   1 root  wheel    26978 Jun  5  2008 foo.app/Contents/Resources/icon.icns  <-- the icons file saved from IconComposer
The 'foo.app' directory should show up in the finder as 'foo', with your icon on it, and you should be able to:
- Double click on 'foo' to run your app.
- Drag 'foo' onto the desktop.
- Drag 'foo' onto the Dock, and watch it animate the size..!
If the Finder /doesn't/ show your foo.app directory as 'foo' with your icon, then you might need to 'wake up' the finder by restarting it. I found that just 'kill'ing the Finder process works fine:
1) Find the pid of the Finder:
           [root@yourhost] # ps axww | grep Finder
           8125  ??  S  0:03.72 /System/Library/[..]acOS/Finder -psn_0_4325377
           8141 std  UV+    0:00.84 grep Finder
2) Kill it:
           [root@yourhost] # kill 8125
           (Finder goes away, then comes back)
..this will cause the finder to definitely reload your icon.
If the Finder shows your app as a folder, then you did something wrong when you created the directory tree, or the files in it. Check filename case, permissions, and contents for errors.
CAVEATS
Of interest; you can make the GUIs accessable from the terminal command line by making a small wrapper script that invokes your app with open(1):
           #!/usr/bin/perl
           exec("open /some/path/foo.app");
If you make that an executable script and put it in the user's PATH, users can invoke the program from a shell prompt just like any other unix program, ie. without needing to type 'open' and an absolute path.
NOTE: I don't think there's currently any way to pass command line arguments through 'open', when used as above. This will (hopefully) change in future releases of OSX. Beware too: OSX may pass a weird "-psn" command line argument to your app when invoked via 'open', eg. 'foo -psn_0_12345', so make sure that if your app parses the command line for arguments, that it ignore this -psnXXXX stuff.
| How to make a pop-up numeric keypad for touch screens |
Demonstrates how to create an input widget for touch screen applications, so that you can touch on an input widget, and enter data using the touch screen. This example shows entering of numeric data only, but a more elaborate example can be derived to emulate a full keyboard as well.
Simple Numeric Keypad for Touch Screen Applications // Demonstrate how to use Fl_Input in a touchscreen application -erco 08/25/06 #include <FL/Fl.H> #include <FL/Fl_Window.H> #include <FL/Fl_Input.H> #include <FL/Fl_Button.H> class MyNumPad : public Fl_Window { Fl_Input *in; // input preview Fl_Callback *enter_cb; // callback when user hits 'enter' void *enter_data; // Handle numeric keypad buttons pressed void Button_CB2(Fl_Widget *w) { Fl_Button *b = (Fl_Button*)w; if ( strcmp(b->label(),"Del") == 0 ) { // handle Delete // Delete if (in->mark() != in->position()) in->cut(); else in->cut(-1); } else if ( strcmp(b->label(), "Ent") == 0 ) { // handle enter key // Do 'Enter' callback if ( enter_cb ) (*enter_cb)(in, enter_data); } else { // handle all other keys // Appends label of button in->replace(in->position(), in->mark(), b->label(), 1); } } static void Button_CB(Fl_Widget *w, void *data) { MyNumPad *numpad = (MyNumPad*)data; numpad->Button_CB2(w); } public: MyNumPad(int X,int Y,int W=100,int H=140,const char *L=0):Fl_Window(X,Y,W,H,L) { const int bsize = 20; // Preview input in = new Fl_Input(X+10,Y+10,W-20,20); // Numeric keypad Fl_Button *b; int colstart = 10, col = colstart, row = in->y()+in->h()+10; b = new Fl_Button(col,row,bsize,bsize, "7"); b->callback(Button_CB, (void*)this); col+=b->w(); b = new Fl_Button(col,row,bsize,bsize, "8"); b->callback(Button_CB, (void*)this); col+=b->w(); b = new Fl_Button(col,row,bsize,bsize, "9"); b->callback(Button_CB, (void*)this); col+=b->w(); b = new Fl_Button(col,row,bsize,bsize, "Del"); b->callback(Button_CB, (void*)this); b->labelsize(10); col=colstart; row+=b->h(); b = new Fl_Button(col,row,bsize,bsize, "4"); b->callback(Button_CB, (void*)this); col+=b->w(); b = new Fl_Button(col,row,bsize,bsize, "5"); b->callback(Button_CB, (void*)this); col+=b->w(); b = new Fl_Button(col,row,bsize,bsize, "6"); b->callback(Button_CB, (void*)this); col+=b->w(); b = new Fl_Button(col,row,bsize,bsize, "-"); b->callback(Button_CB, (void*)this); col=colstart; row+=b->h(); b = new Fl_Button(col,row,bsize,bsize, "1"); b->callback(Button_CB, (void*)this); col+=b->w(); b = new Fl_Button(col,row,bsize,bsize, "2"); b->callback(Button_CB, (void*)this); col+=b->w(); b = new Fl_Button(col,row,bsize,bsize, "3"); b->callback(Button_CB, (void*)this); col+=b->w(); b = new Fl_Button(col,row,bsize,bsize, "+"); b->callback(Button_CB, (void*)this); col=colstart; row+=b->h(); b = new Fl_Button(col,row,bsize,bsize, "."); b->callback(Button_CB, (void*)this); col+=b->w(); b = new Fl_Button(col,row,bsize,bsize, "0"); b->callback(Button_CB, (void*)this); col+=b->w(); b = new Fl_Button(col,row,bsize*2,bsize,"Ent"); b->callback(Button_CB, (void*)this); col+=b->w(); b->color(10); end(); enter_cb = 0; enter_data = 0; } // Return current value const char *value() { return(in->value()); } // Clear current value void clear() { in->value(""); } // Set callback for when Enter is pressed void SetEnterCallback(Fl_Callback *cb, void *data) { enter_cb = cb; enter_data = data; } }; class MyInput : public Fl_Input { MyNumPad *numpad; // local instance of numeric keypad widget // Called when user finishes entering data with numeric keypad void SetNumPadValue_CB2() { value(numpad->value()); // pass value from numpad to our input numpad->hide(); // hide numpad } static void SetNumPadValue_CB(Fl_Widget*,void *data) { MyInput *in = (MyInput*)data; in->SetNumPadValue_CB2(); } // Handle when user right clicks on our input widget int handle(int e) { int ret = 0; switch(e) { // Mouse click on input field? Open numpad dialog.. case FL_PUSH: if ( Fl::event_button() == FL_LEFT_MOUSE ) { ret = 1; } break; case FL_RELEASE: if ( Fl::event_button() == FL_LEFT_MOUSE ) { ret = 1; if ( ! numpad ) numpad = new MyNumPad(0,0); numpad->SetEnterCallback(SetNumPadValue_CB, (void*)this); numpad->position(parent()->x(),parent()->y()); numpad->clear(); numpad->show(); } break; } return(Fl_Input::handle(e)?1:ret); } public: MyInput(int X,int Y,int W,int H,const char *L=0):Fl_Input(X,Y,W,H,L) { numpad = 0; } }; int main(int argc, char **argv) { Fl_Window win(400,50); MyInput in(150,10,200,30,"Value:"); in.value("-click here-"); win.end(); win.resizable(win); win.show(); return(Fl::run()); }
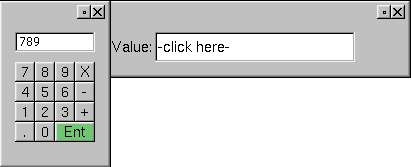
| Drawing into overlay planes |
If you're just drawing rectangles into the overlay plane, you can just use fl_overlay_rect(x,y,w,h).
But for more complex graphics, or graphics where the child widgets want to define the overlay drawing behavior, here's an example that shows how to register an array of callbacks to the parent Fl_Overlay_Window so that it can call the children when drawing needs to be done.
In the following example, resize the window to cause the overlays to redraw. You would use your own mechanism (Timer, events) to change the overlays. The example draws a random colored X over each of the four instances of the custom Fl_Group's. (The use of random colors makes it clear when the overlay is redrawn.)
How Child Widgets Can Draw Into Overlay Planes // Demonstrate using callbacks to draw into overlays -erco 8/23/06 #include <stdlib.h> #include <vector> using namespace std; #include <FL/Fl.H> #include <FL/Fl_Overlay_Window.H> #include <FL/Fl_Group.H> #include <FL/fl_draw.H> typedef void (OverlayCallback)(void*); class MyOverlayWindow : public Fl_Overlay_Window { vector<OverlayCallback*> oly_callbacks; // array of child callbacks to draw overlays vector<void*> oly_data; // array of child userdata public: MyOverlayWindow(int W,int H,const char*L=0):Fl_Overlay_Window(W,H,L) { } // SETUP AN OVERLAY DRAWING CALLBACK // Called by child widgets to arrange callback to draw into overlay plane. // void AddOverlayCallback(OverlayCallback *cb, void *data) { oly_callbacks.push_back(cb); // add callback to array oly_data.push_back(data); // add userdata to array } // INVOKE CHILDREN'S CALLBACKS TO DRAW OVERLAYS void draw_overlay() { // Invoke all the children's overlay callbacks for ( unsigned int t=0; t<oly_callbacks.size(); t++ ) { (*oly_callbacks[t])(oly_data[t]); } } }; class MyGroup : public Fl_Group { MyOverlayWindow *oly; // DRAW THE OVERLAY GRAPHIC FOR THIS INSTANCE OF CHILD static void OverlayCallback(void *data) { MyGroup *o = (MyGroup*)data; // Draw a random colored 'x' fl_color(rand() % 8); fl_line(o->x(), o->y(), o->x()+o->w(), o->y()+o->h()); fl_line(o->x(), o->y()+o->h(), o->x()+o->w(), o->y()); } public: MyGroup(MyOverlayWindow *win,int X,int Y,int W,int H,const char*L=0):Fl_Group(X,Y,W,H,L) { oly = win; win->AddOverlayCallback(OverlayCallback, (void*)this); end(); } void draw() { Fl_Group::draw(); oly->redraw_overlay(); // tell parent to redraw child overlays } }; int main(int argc, char **argv) { // Create overlay window MyOverlayWindow win(400,400); // Create four child groups, each with its own overlay graphic MyGroup g1(&win, 0, 0, 200,200); MyGroup g2(&win, 200,0, 200,200); MyGroup g3(&win, 0, 200,200,200); MyGroup g4(&win, 200,200,200,200); win.end(); win.resizable(win); win.show(); return(Fl::run()); }
| Thumbnail Scroller With Labels |
Someone asked about the issue of how to draw thumbnail images inside a scroller with labels, because when the labels were drawn outside the thumbnail widget, the top row of labels would truncate off, due to how the scroller clips.
Here's one way to do it by deriving a class from Fl_Box, and drawing the image and label in a custom draw routine. The result of the above code example creates a window that looks like this:
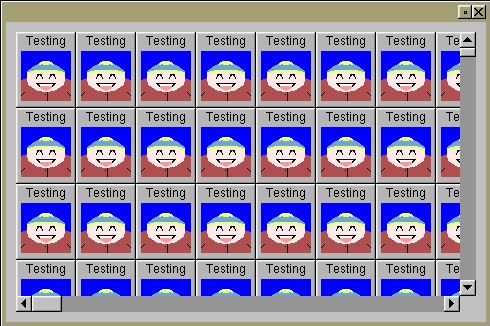
| Demo of Drag + Drop (DND) with FLTK |
Here's a simple demo of drag+drop with FLTK.
When you run the program, just drag the red square over to the green square to show a 'drag and drop' sequence.
Credit: Thanks to Michael Sephton's original example posted to fltk.general; some code cleanup and event handle()er modifications were added.
Drag And Drop #include <stdio.h> #include <FL/Fl.H> #include <FL/Fl_Window.H> #include <FL/Fl_Box.H> // // Demo of Drag+Drop (DND) from red sender to green receiver // // SENDER CLASS class Sender : public Fl_Box { public: // Sender Ctor Sender(int x,int y,int w,int h) : Fl_Box(x,y,w,h) { box(FL_FLAT_BOX); color(9); label("Drag from here"); } // Sender event handler int handle(int event) { int ret = Fl_Box::handle(event); switch ( event ) { case FL_PUSH: // do 'copy/dnd' when someone clicks on box Fl::copy("message",7,0); Fl::dnd(); ret = 1; break; } return(ret); } }; // RECEIVER CLASS class Receiver : public Fl_Box { public: // Receiver Ctor Receiver(int x,int y,int w,int h) : Fl_Box(x,y,w,h) { box(FL_FLAT_BOX); color(10); label("to here"); } // Receiver event handler int handle(int event) { int ret = Fl_Box::handle(event); switch ( event ) { case FL_DND_ENTER: // return(1) for these events to 'accept' dnd case FL_DND_DRAG: case FL_DND_RELEASE: ret = 1; break; case FL_PASTE: // handle actual drop (paste) operation label(Fl::event_text()); fprintf(stderr, "PASTE: %s\n", Fl::event_text()); ret = 1; break; } return(ret); } }; int main(int argc, char **argv) { // Create sender window and widget Fl_Window win_a(0,0,200,100,"Sender"); Sender a(0,0,100,100); win_a.end(); win_a.show(); // Create receiver window and widget Fl_Window win_b(400,0,200,100,"Receiver"); Receiver b(100,0,100,100); win_b.end(); win_b.show(); return(Fl::run()); }
| How to use fl_draw_image() to display a pixel buffer |
Freeze-frame from animating demo that draws into an image buffer, and displays the resulting image 20x per second.This is a simple animated demo of how to draw pixels into a pixel buffer, and then display that buffer in FLTK using the fl_draw_image() function.
Display Pixel Buffer in FLTK #include <FL/Fl.H> #include <FL/Fl_Double_Window.H> #include <FL/fl_draw.H> #include <stdio.h> #include <time.h> #define XSIZE 500 #define YSIZE 500 #define UPDATE_RATE 0.05 // update rate in seconds // Demonstrate how to display a pixel buffer in FLTK // WINDOW CLASS TO HANDLE DRAWING IMAGE class MyWindow : public Fl_Double_Window { unsigned char pixbuf[YSIZE][XSIZE][3]; // image buffer // FLTK DRAW METHOD void draw() { fl_draw_image((const uchar*)&pixbuf, 0, 0, XSIZE, YSIZE, 3, XSIZE*3); } // TIMER CALLBACK: CALLED TO UPDATE THE DRAWING static void RenderImage_CB(void *userdata) { MyWindow *win = (MyWindow*)userdata; win->RenderImage(); Fl::repeat_timeout(UPDATE_RATE, RenderImage_CB, userdata); } public: // CTOR MyWindow(int w, int h, const char *name=0) : Fl_Double_Window(w,h,name) { end(); RenderImage(); // show first drawing // Start timer updating Fl::add_timeout(UPDATE_RATE, RenderImage_CB, (void*)this); } // PLOT A PIXEL AS AN RGB COLOR INTO THE PIXEL BUFFER void PlotPixel(int x, int y, unsigned char r, unsigned char g, unsigned char b) { pixbuf[y][x][0] = r; pixbuf[y][x][1] = g; pixbuf[y][x][2] = b; } // MAKE A NEW PICTURE IN THE PIXEL BUFFER, SCHEDULE FLTK TO DRAW IT void RenderImage() { static unsigned char drawcount = 0; for ( int x=0; x<XSIZE; x++ ) for ( int y=0; y<YSIZE; y++ ) PlotPixel(x, y, x+drawcount, y+drawcount, x+y+drawcount); ++drawcount; redraw(); } }; int main(int argc, char**argv) { Fl::visual(FL_RGB); // prevents dithering on some systems MyWindow *win = new MyWindow(XSIZE, YSIZE); win->show(); return(Fl::run()); }
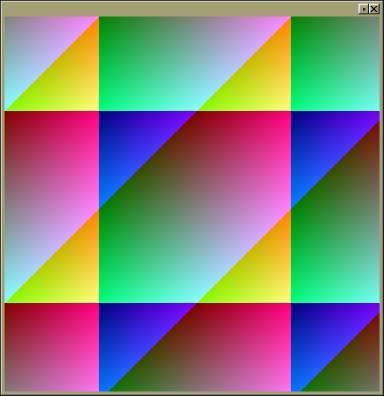
| Opening WIN32 File Chooser from FLTK |
Simple demonstration of opening a WIN32 file chooser from within FLTK. All the various WIN32 file choosers (Open, Save, Directory, Mutli-select, etc) can be accessed from FLTK using similar WIN32-specific techniques.
(Or, just use the Fl_Native_File_Chooser widget, to avoid WIN32-specific code in your app.)
FLTK + WIN32 File Chooser #include <windows.h> #include <commdlg.h> // OPENFILENAME, GetOpenFileName() #include <stdio.h> #include <string.h> #include <FL/Fl.H> #include <FL/Fl_Window.H> #include <FL/Fl_Button.H> // HOW TO MIX THE WINDOWS FILE BROWSER WITH FLTK OPENFILENAME ofn; // global void Browse_CB(Fl_Widget*, void*) { // OPEN WINDOWS FILE BROWSER // The following is WIN32-specific code, and therefore not pretty and 'non-fltk-ish' ;) // if ( ofn.lpstrFile ) { delete [] ofn.lpstrFile; } if ( ofn.lpstrInitialDir ) { delete [] ofn.lpstrInitialDir; } memset((void*)&ofn, 0, sizeof(ofn)); ofn.lStructSize = sizeof(OPENFILENAME); ofn.Flags |= OFN_NOVALIDATE; // prevent disabling of front slashes ofn.Flags |= OFN_HIDEREADONLY; // hide readonly flag ofn.Flags |= OFN_EXPLORER; // use 'newer' explorer windows ofn.Flags |= OFN_ENABLESIZING; // allow window to be resized ofn.Flags |= OFN_NOCHANGEDIR; // prevent dialog for messing up the cwd ofn.nMaxFile = 4096-1; ofn.lpstrFile = new char[4096]; ofn.lpstrFile[0] = 0; ofn.hwndOwner = GetForegroundWindow(); ofn.lpstrTitle = "Open some file"; int err = GetOpenFileName(&ofn); if ( err == 0 ) { err = CommDlgExtendedError(); // extended error check if ( err == 0 ) return; // user hit 'cancel' fprintf(stderr, "CommDlgExtendedError() code=%d", err); return; } printf("User picked '%s'\n", ofn.lpstrFile); } int main() { Fl_Window win(200,200); Fl_Button but(10,10,100,25,"Browse"); but.callback(Browse_CB); win.end(); win.show(); memset((void*)&ofn, 0, sizeof(OPENFILENAME)); return(Fl::run()); }
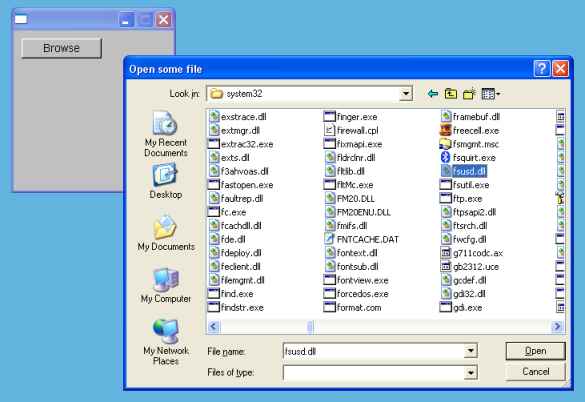
| Fl_Group clips children of events, but not graphics |
Demonstration of a common problem where children of an Fl_Group won't receive mouse events on areas of the widgets that lay outside the parent group's xywh area, even though the children will still draw correctly (ie. events will be clipped, but not the drawing of children's graphic elements)
By default, Fl_Group does not clip drawing of children. This is mainly for speed efficiency, to keep the clipping stack size small in deep group hierarchies.
But due to how events are delivered, children that lay outside the parent group's bounding area will not receive mouse events. For children that are partially outside the parent's xywh area, only the parts of the child inside the parent's perimeter will be sensitive to mouse events.
Fl_Group Event vs. Visual Clipping #include <FL/Fl.H> #include <FL/Fl_Window.H> #include <FL/Fl_Button.H> // // Demonstrate clipping problem with widgets outside their parent's xywh extents // erco 04/20/08 // Fl_Window *win = 0; Fl_Group *grp = 0; void Why_CB(Fl_Widget*, void*) { grp->box(FL_FLAT_BOX); grp->color(FL_RED); win->redraw(); } int main() { win = new Fl_Window(500,500); grp = new Fl_Group(5,5,100,155); new Fl_Button(10,10 ,40,40,"7"); new Fl_Button(60,10 ,40,40,"8"); new Fl_Button(110,10 ,40,40,"9"); new Fl_Button(10,60 ,40,40,"4"); new Fl_Button(60,60 ,40,40,"5"); new Fl_Button(110,60 ,40,40,"6"); new Fl_Button(10,110,40,40,"1"); new Fl_Button(60,110,40,40,"2"); new Fl_Button(110,110,40,40,"3"); grp->end(); Fl_Button *but = new Fl_Button(100, 400, 300, 25, "Why doesn't 9,6,3 work?"); but->callback(Why_CB); win->end(); win->show(); return(Fl::run());
| Using Fl_Browser to make a 'vertical tabbed' dialog |
Demonstration of how to use an Fl_Browser to implement a 'vertical tab' style dialog.
This is a good alternative to using 'tabs', since tabs have limits on the amount of text and the number of items. Fl_Browser offers scrollbars if lists are large.
Vertical Tab Demo #include <FL/Fl.H> #include <FL/Fl_Window.H> #include <FL/Fl_Hold_Browser.H> #include <FL/Fl_Group.H> #include <FL/Fl_Input.H> // Demonstrate a "vertical tabbed" window dialog // erco 05/09/08 Fl_Window *win = 0; Fl_Hold_Browser *bro = 0; Fl_Group *grp[3] = { 0,0,0 }; // CALLBACK FOR SOMEONE CLICKING ON A BROWSER TAB void SelectGroup_CB(Fl_Widget*, void*) { // Show the 'selected' group for ( int t=0; t<3; t++ ) { if ( t == (bro->value()-1) ) { grp[t]->show(); } else { grp[t]->hide(); } } } int main() { win = new Fl_Window(600,400); // Browser to act as "tab selector" bro = new Fl_Hold_Browser(10,10,150,400-20); bro->add("Tab One"); bro->add("Tab Two"); bro->add("Tab Three"); // Make three groups with different contents grp[0] = new Fl_Group(170,10,450-30,400-20,"Employee Name"); grp[0]->box(FL_ENGRAVED_BOX); grp[0]->align(FL_ALIGN_INSIDE|FL_ALIGN_TOP); grp[0]->labelsize(24); new Fl_Input(170+140,160+00,200,20,"First:"); new Fl_Input(170+140,160+30,200,20,"Last:"); new Fl_Input(170+140,160+60,200,20,"Title:"); grp[0]->end(); grp[1] = new Fl_Group(170,10,450-30,400-20,"Employee Home"); grp[1]->box(FL_ENGRAVED_BOX); grp[1]->align(FL_ALIGN_INSIDE|FL_ALIGN_TOP); grp[1]->labelsize(24); new Fl_Input(170+140,160+00,200,20,"Street:"); new Fl_Input(170+140,160+30,200,20,"City:"); new Fl_Input(170+140,160+60,200,20,"State:"); new Fl_Input(170+140,160+90,200,20,"ZIP:"); grp[1]->end(); grp[2] = new Fl_Group(170,10,450-30,400-20,"Employee Contact"); grp[2]->box(FL_ENGRAVED_BOX); grp[2]->align(FL_ALIGN_INSIDE|FL_ALIGN_TOP); grp[2]->labelsize(24); new Fl_Input(170+140,160+00,200,20,"Email:"); new Fl_Input(170+140,160+30,200,20,"Extension:"); new Fl_Input(170+140,160+60,200,20,"Parking Space:"); new Fl_Input(170+140,160+90,200,20,"Cell/Pager:"); grp[2]->end(); // Set a callback for the browser, initialize first selection bro->callback(SelectGroup_CB); bro->select(2); SelectGroup_CB(0,0); // (updates visible group based on our select()tion) win->show(); return(Fl::run()); }

| How to use Fl_Chart |
Demonstration of how to use Fl_Chart.
Fl_Chart Demo #include <FL/Fl.H> #include <FL/Fl_Window.H> #include <FL/Fl_Chart.H> #include <math.h> // Demonstration of how to use Fl_Chart -- erco 11/20/08 int main() { Fl_Window *win = new Fl_Window(1000, 480); Fl_Chart *chart = new Fl_Chart(20, 20, win->w()-40, win->h()-40, "Chart"); chart->bounds(-125.0, 125.0); for ( double t=0; t<15; t+=0.5 ) { double val = sin(t) * 125.0; static char val_str[20]; sprintf(val_str, "%.0lf", val); chart->add(val, val_str, (val<0)?FL_RED:FL_GREEN); } win->resizable(win); win->show(); return(Fl::run()); }
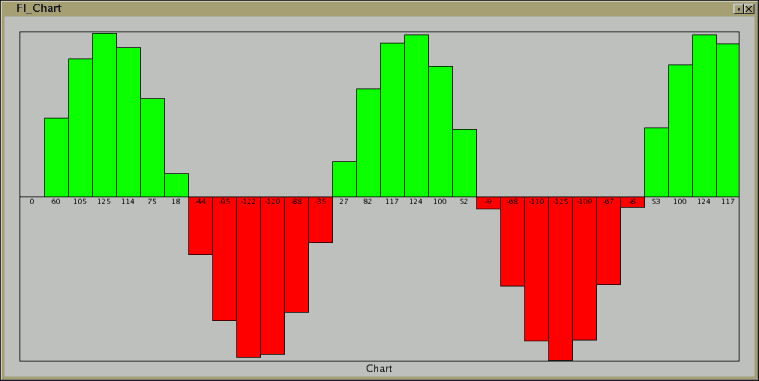
| How to use Fl_Scrollbar |
Demonstration of how to use Fl_Scrollbar.
Fl_Scrollbar Demo #include <stdio.h> #include <string.h> #include <FL/Fl.H> #include <FL/Fl_Double_Window.H> #include <FL/Fl_Scrollbar.H> #include <FL/Fl_Output.H> // // Demonstrate Fl_Scrollbar -- erco 02/18/09 // Fl_Double_Window *win = 0; Fl_Output *out = 0; Fl_Scrollbar *scrollbar = 0; // Scrollbar changed: show scrollbar's value when changed void Scrollbar_CB(Fl_Widget*, void *) { char s[20]; sprintf(s, "%d", scrollbar->value()); out->value(s); } int main(int argc, char **argv) { win = new Fl_Double_Window(500,300,"Fl_Scrollbar Demo"); { // Create scrollbar scrollbar = new Fl_Scrollbar(0,50,500,25,"Scrollbar"); scrollbar->type(FL_HORIZONTAL); scrollbar->slider_size(.5); // the fractional size of the scrollbar's tab, 1/2 scollbar's size scrollbar->bounds(100,200); // min/max value of the slider's positions ((Fl_Valuator*)scrollbar)->value(150.0); // the initial value (in fltk1.3+ you can use scrollbar->value(150); scrollbar->step(10); // force step rate to 10 (slider move changes value: 100, 110, 120..) scrollbar->callback(Scrollbar_CB, (void*)&out); // Create output to show scrollbar's value out = new Fl_Output(200,150,100,40,"Scrollbar Value:"); out->textsize(24); } win->end(); win->show(); Scrollbar_CB(0,0); // show scrollbar's initial position return(Fl::run()); }
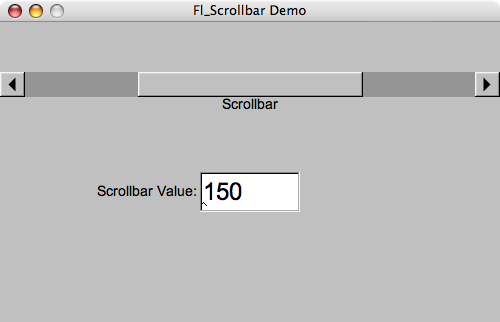
| How to draw text over an image |
Demonstration of deriving a class that draws text over an image.
New in FLTK 1.3.x: There's a new align() option called FL_ALIGN_IMAGE_BACKDROP that apparently will let you assign an image to e.g. a button, and the text will draw over it. The first example below shows how to do this; it's certainly much easier than the other two examples that are needed for the older 1.1.x releases.
First example shows the simplest example of how to draw text over an image using the FL_ALIGN_IMAGE_BACKDROP align() flag (new in FLTK 1.3.0) to allow an image to be assigned to a widget, in this case a button, such that the image appears underneath the text. The example image is an XPM grayscale gradient compiled into the binary, but could also be an image from disk loaded at runtime too, if the code is modified.
Second example uses the older technique that works with all versions of FLTK that involves deriving a new widget that from Fl_Button that defines a custom draw() method to make text draw over the xpm image of a grayscale gradient (loaded at compile time, and built into the binary).
Third example shows how to derive from Fl_Widget to make text draw over a jpeg image of colorbars loaded at runtime; displays the jpeg image with no text until the button is pushed. This technique will also work on both old 1.1.x and new 1.3.x versions of FLTK.
These examples show several things: how to load and display an image, how a button callback can change a widget's label(), and how a custom widget can display an image with its label text over the image.
Note all examples can be changed to either use XPM images (compiled into the code), or load from external images (from disk at runtime). The examples separately show JPG vs. XPM just to show the different techniques.
Text over image demo #1
Using FL_ALIGN_IMAGE_BACKDROP
This only works in FLTK 1.3.x and up
Text over image demo #2
Deriving from Fl_Button
Functionally similar to example #1, but compatible with FLTK 1.1.x and 1.3.x. Derives a custom widget.
If you're using 1.3.x, you can use the simpler FL_ALIGN_IMAGE_BACKDROP technique.
Text over image demo #3
Deriving from Fl_Widget
Compatible with FLTK 1.1.x and 1.3.x. Derives a custom widget.
If you're using 1.3.x, you can use the simpler FL_ALIGN_IMAGE_BACKDROP technique
using an Fl_Box instead of Fl_Widget.
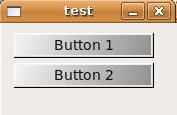
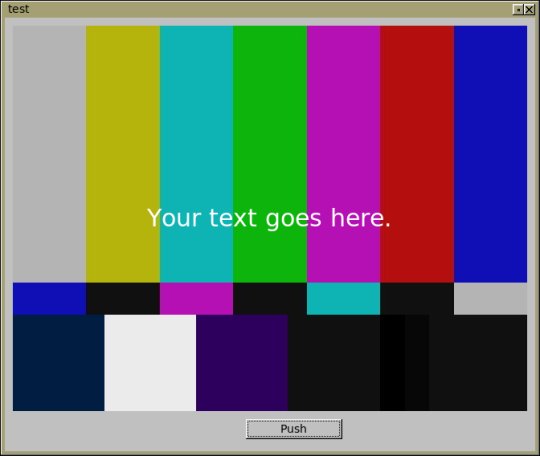
| OpenGL Texturemapped Cube |
GL_MODULATE GL_DECAL Demonstration of checkerboard texture mapped rotating cube with lights and perspective frustum. Uses FLTK timer to handle rotation, and procedural generation of texture mapped 'checkerboard' image.
Cube rotates showing all sides. Texture map is a white checkerboard that by default inherits colors from the cube's polygons, due to opengl's default for glTexEnv() defaulting to GL_MODULATE. To have the texture shown in its own color (pure white), add a call to glTexEnv() setting the GL_DECAL parameter.
Cube rotates showing all sides.
Thanks to Loic for commented cube object posted on fltk.opengl (03/17/09).
Texture Mapped Cube #include <stdio.h> #include <math.h> #include <FL/Fl.H> #include <FL/Fl_Window.H> #include <FL/Fl_Gl_Window.H> #include <FL/gl.h> // // OpenGL spinning cube with checker texturemap -- erco/loic 03/17/09 // #define WIN_W 400 // window width #define WIN_H 400 // window height #define TEX_W 64 // texturemap width #define TEX_H 64 // texturemap height #define FPS (1.0/24.0) // frames per second playback // // OpenGL class to show texturemapped cube // class MyGlWindow : public Fl_Gl_Window { double spin; GLuint TexID; // TIMER CALLBACK // Handles rotation the object // static void Timer_CB(void *userdata) { MyGlWindow *mygl = (MyGlWindow*)userdata; mygl->spin += 2.0; // spin mygl->redraw(); Fl::repeat_timeout(FPS, Timer_CB, userdata); } public: // CTOR MyGlWindow(int x,int y,int w,int h,const char *l=0) : Fl_Gl_Window(x,y,w,h,l) { spin = 0.0; Fl::add_timeout(FPS, Timer_CB, (void*)this); // 24fps timer } // PERSPECTIVE VIEW // Same as gluPerspective().. // void Perspective(GLdouble fovy, GLdouble aspect, GLdouble zNear, GLdouble zFar) { GLdouble xmin, xmax, ymin, ymax; ymax = zNear * tan(fovy * M_PI / 360.0); ymin = -ymax; xmin = ymin * aspect; xmax = ymax * aspect; glFrustum(xmin, xmax, ymin, ymax, zNear, zFar); } // RESHAPED VIEWPORT // OpenGL stuff to do whenever window changes size // void ReshapeViewport() { // Viewport glViewport(0, 0, w(), h()); // Projection glMatrixMode(GL_PROJECTION); glLoadIdentity(); GLfloat ratio = w() / h(); Perspective(30.0, 1.0*ratio, 1.0, 30.0); glTranslatef(0.0, 0.0, -8.0); // Model view glMatrixMode(GL_MODELVIEW); glLoadIdentity(); } // OPENGL INITIALIZATION // OpenGL stuff to do *only once* on startup. // void GlInit() { // Make sure we only do this once static int first_time = 1; if ( first_time ) { first_time = 0; // Texture Map Init GLubyte img[TEX_W][TEX_H][3]; // after glTexImage2D(), array is no longer needed glGenTextures(1, &TexID); glBindTexture(GL_TEXTURE_2D, TexID); /*** Texture Mapping Mode *** Uncomment one of the following lines: GL_DECAL or GL_MODULATE ***/ //glTexEnvf(GL_TEXTURE_ENV, GL_TEXTURE_ENV_MODE, GL_DECAL); // use actual texture colors glTexEnvf(GL_TEXTURE_ENV, GL_TEXTURE_ENV_MODE, GL_MODULATE); // texture colors affected by poly's color for (int x=0; x<TEX_W; x++) { for (int y=0; y<TEX_H; y++) { /*** Texture Pattern *** Uncomment one of the following lines: checkboard or basketweave ***/ //GLubyte c = ((x&16)^(y&16)) ? ((x%16)<<4) : (((x%16)^15)<<4); // basket weave GLubyte c = ((x&16)^(y&16)) ? 255 : 0; // checkerboard img[x][y][0] = c; img[x][y][1] = c; img[x][y][2] = c; } } glPixelStorei(GL_UNPACK_ALIGNMENT, 1); glTexImage2D(GL_TEXTURE_2D, 0, GL_RGB, TEX_W, TEX_H, 0, GL_RGB, GL_UNSIGNED_BYTE, &img[0][0][0]); glTexParameterf(GL_TEXTURE_2D, GL_TEXTURE_MIN_FILTER, GL_LINEAR); glTexParameterf(GL_TEXTURE_2D, GL_TEXTURE_MAG_FILTER, GL_LINEAR); glEnable(GL_TEXTURE_2D); // Misc OpenGL settings glShadeModel(GL_FLAT); glEnable(GL_DEPTH_TEST); glDepthFunc(GL_LEQUAL); } } // FLTK DRAW // Called by FLTK to draw the scene. // void draw() { // Initialize/handle reshaped viewport if ( !valid() ) { valid(1); GlInit(); ReshapeViewport(); } // Clear glClearColor(.5,.5,.5, 0.0); glClear(GL_COLOR_BUFFER_BIT | GL_DEPTH_BUFFER_BIT); // Setup model matrix glLoadIdentity(); glRotatef(spin, 0.5, 1.0, 0.0); // show all sides of cube // Draw cube with texture assigned to each face glBegin(GL_QUADS); // Front Face glColor3f(1.0, 0.0, 0.0); // red glTexCoord2f(0.0, 1.0); glVertex3f(-1.0, 1.0, 1.0); // Top Left Of The Texture and Quad glTexCoord2f(1.0, 1.0); glVertex3f( 1.0, 1.0, 1.0); // Top Right Of The Texture and Quad glTexCoord2f(1.0, 0.0); glVertex3f( 1.0, -1.0, 1.0); // Bottom Right Of The Texture and Quad glTexCoord2f(0.0, 0.0); glVertex3f(-1.0, -1.0, 1.0); // Bottom Left Of The Texture and Quad // Back Face glColor3f(0.0, 1.0, 1.0); // cyn glTexCoord2f(0.0, 1.0); glVertex3f( 1.0, 1.0, -1.0); // Top Left Of The Texture and Quad glTexCoord2f(1.0, 1.0); glVertex3f(-1.0, 1.0, -1.0); // Top Right Of The Texture and Quad glTexCoord2f(1.0, 0.0); glVertex3f(-1.0, -1.0, -1.0); // Bottom Right Of The Texture and Quad glTexCoord2f(0.0, 0.0); glVertex3f( 1.0, -1.0, -1.0); // Bottom Left Of The Texture and Quad // Top Face glColor3f(0.0, 1.0, 0.0); // grn glTexCoord2f(0.0, 1.0); glVertex3f(-1.0, 1.0, -1.0); // Top Left Of The Texture and Quad glTexCoord2f(1.0, 1.0); glVertex3f( 1.0, 1.0, -1.0); // Top Right Of The Texture and Quad glTexCoord2f(1.0, 0.0); glVertex3f( 1.0, 1.0, 1.0); // Bottom Right Of The Texture and Quad glTexCoord2f(0.0, 0.0); glVertex3f(-1.0, 1.0, 1.0); // Bottom Left Of The Texture and Quad // Bottom Face glColor3f(1.0, 0.0, 1.0); // mag glTexCoord2f(0.0, 1.0); glVertex3f( 1.0, -1.0, -1.0); // Top Left Of The Texture and Quad glTexCoord2f(1.0, 1.0); glVertex3f(-1.0, -1.0, -1.0); // Top Right Of The Texture and Quad glTexCoord2f(1.0, 0.0); glVertex3f(-1.0, -1.0, 1.0); // Bottom Right Of The Texture and Quad glTexCoord2f(0.0, 0.0); glVertex3f( 1.0, -1.0, 1.0); // Bottom Left Of The Texture and Quad // Right face glColor3f(0.0, 0.0, 1.0); // blu glTexCoord2f(0.0, 1.0); glVertex3f( 1.0, 1.0, 1.0); // Top Left Of The Texture and Quad glTexCoord2f(1.0, 1.0); glVertex3f( 1.0, 1.0, -1.0); // Top Right Of The Texture and Quad glTexCoord2f(1.0, 0.0); glVertex3f( 1.0, -1.0, -1.0); // Bottom Right Of The Texture and Quad glTexCoord2f(0.0, 0.0); glVertex3f( 1.0, -1.0, 1.0); // Bottom Left Of The Texture and Quad // Left Face glColor3f(1.0, 1.0, 0.0); // yel glTexCoord2f(0.0, 1.0); glVertex3f(-1.0, 1.0, -1.0); // Top Left Of The Texture and Quad glTexCoord2f(1.0, 1.0); glVertex3f(-1.0, 1.0, 1.0); // Top Right Of The Texture and Quad glTexCoord2f(1.0, 0.0); glVertex3f(-1.0, -1.0, 1.0); // Bottom Right Of The Texture and Quad glTexCoord2f(0.0, 0.0); glVertex3f(-1.0, -1.0, -1.0); // Bottom Left Of The Texture and Quad glEnd(); // DEBUG: CHECK FOR ERRORS GLenum err = glGetError(); if ( err != GL_NO_ERROR ) { fprintf(stderr, "GLGETERROR=%d\n", (int)err); } } }; int main(int argc, char *argv[]) { MyGlWindow* mygl = new MyGlWindow(10, 10, WIN_W-20, WIN_H-20, "Texture Test"); mygl->end(); mygl->resizable(mygl); mygl->show(); return(Fl::run()); }
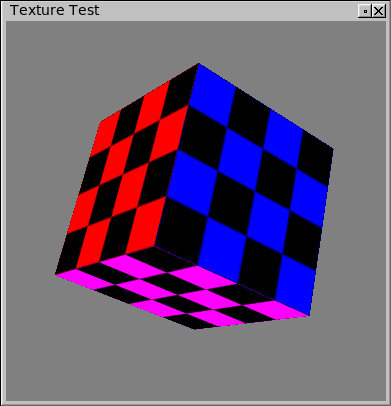
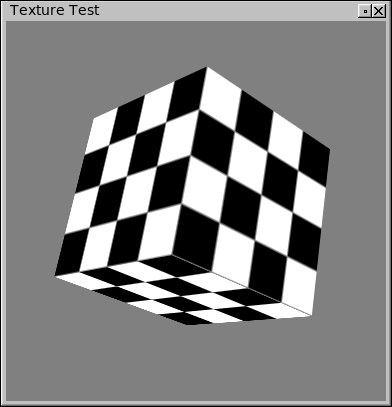
| OpenGL Texture Mapped Image With Lighting |
Spinning cube demonstration with a PNG image texture-mapped onto the cube, with a simple lighting model and materials applied.
Shows how FLTK's Fl_Shared_Image class can be used to load any of the image types that FLTK supports, and assign the image as a texture map.
The texture map image I used for this demo is this 128x128 png file, but you can use any image of similar resolution.
Thanks to Ian MacArthur for a pointer to the Fl_Shared_Image class (which I'd never used before -- I was going going to post an example with Fl_PNG_Image instead, but Fl_Shared_Image is more flexible).
Cube object and normals nabbed from an SGI OpenGL example called scubes.c by Mark J. Kilgard.
Screenshot of this image-texturemapped-cube.cxx demo program.I added a lighting model and materials so that the texture reacts to lighting.
Fortunately, Fl_Shared_Image's internal image format for 3 channel depth images is fully compatible with opengl's glTexImage2D() call, so no 'conversion' step is necessary; the image can be applied with almost two lines of code:
---- snip
        Fl_Shared_Image *img = Fl_Shared_Image::get(filename);
        /* ..error checking snipped.. */
        glTexImage2D(GL_TEXTURE_2D, 0, GL_RGB, img->w(), img->h(), 0, GL_RGB, GL_UNSIGNED_BYTE, img->data()[0]);
---- snip
..which loads the image and assigns the texture. To get the lighting model to work, I used a cube object and normals from one of SGI's example programs that included pre-computed normals. (Without the correct normals on the cube, it looked like the light was moving around even though it was stationary..!)
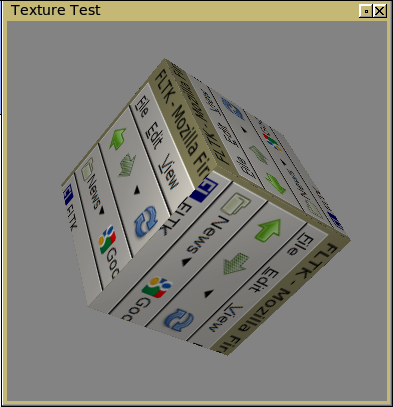
| UTF8 Japanese Test |
Demonstration of Japanese UTF8 text display.
This is a screenshot under Ubuntu of this utf8-japanese-songs.cxx demo program.Under Ubuntu, I had to make sure Japanese fonts were installed, eg:
apt-get install xfonts-intl-japanese
..and in my case, I needed to make sure the following line was uncommented:Fl::set_font(FL_HELVETICA, "Kochi Gothic"); // uncomment for linux
..for the text to display using Kochi Gothic. You may need to comment out this line or change it for your specific OS.
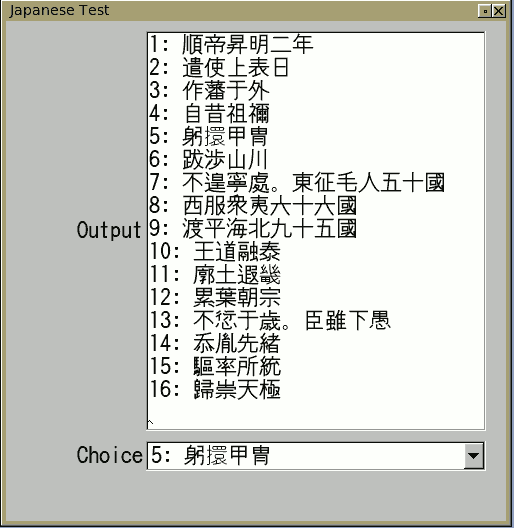
| Alpha Blending with PNG files |
Demonstration of alpha blending these two PNG files over a widget:
left-alpha.png
right-alpha.png
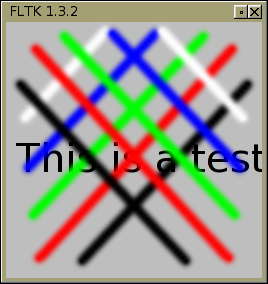
What follows is the code that combines the two above images (which you can download by right clicking to save on your machine), and displays them over the top of the window with a text string underneath.
This is one way to do it.. in this case showing two images over one another. I could have also just assigned an image() to the widget using this technique, but in this case I wanted full control over the order in which the text and images are drawn.
Alpha Blending PNG images #include <stdio.h> #include <string.h> #include <FL/Fl.H> #include <FL/Fl_Window.H> #include <FL/Fl_Shared_Image.H> #include <FL/Fl_PNG_Image.H> #include <FL/fl_draw.H> // // Demonstrate overlapping alpha blended images -- erco 06/09/09 // class MyWindow : public Fl_Window { Fl_PNG_Image *left; Fl_PNG_Image *right; void GetFLTKVersion(char *s) { // get fltk version info for demo -- optional sprintf(s, "FLTK %d.%d.%d", FL_MAJOR_VERSION, FL_MINOR_VERSION, FL_PATCH_VERSION); } public: void draw() { Fl_Window::draw(); // Draw window widget first fl_font(FL_HELVETICA, 40); // set font fl_color(FL_BLACK); // set color fl_draw("This is a test", 10, 150); // draw a text string left->draw(0,0); // draw left alpha image over the above right->draw(0,0); // draw right alpha image over the above } MyWindow(int W, int H) : Fl_Window(W,H) { char s[80]; GetFLTKVersion(s); copy_label(s); // (show fltk version -- optional) left = new Fl_PNG_Image("./left-alpha.png"); // assumes images in cwd right = new Fl_PNG_Image("./right-alpha.png"); // assumes images in cwd show(); } }; int main() { fl_register_images(); MyWindow win(256,256); win.show(); return(Fl::run()); }


| Dumb Terminal Emulator |
Linux Example
Windows ExampleDemonstrates how to make a simple terminal that lets the user type commands and see the output in a scrolling FLTK text editor widget. In this example the user can type commands that are run in the shell [via popen()], but you can change this to run your own commands.
Update: here's a link to a unix only version that lets you interact with a unix shell. It handles asynchronous I/O. This example is a bit more complicated than the below, because it using threads to achieve async I/O, and uses bi-directional pipes to handle both stdin and stdout/err.
Dumb Terminal Emulator #include <string.h> #include <stdio.h> #include <FL/Fl.H> #include <FL/Fl_Double_Window.H> #include <FL/Fl_Text_Editor.H> #ifdef _WIN32 #define popen _popen #define pclose _pclose #endif // // Simple terminal simulator (PROOF OF CONCEPT) // 1.00 erco 07/30/2009 -- initial implementation // 1.10 erco 09/06/2009 -- use Fl::event_text() to handle non-ascii codes // class MyTerminal : public Fl_Text_Editor { Fl_Text_Buffer *buff; char cmd[1024]; public: MyTerminal(int X,int Y,int W,int H,const char* L=0) : Fl_Text_Editor(X,Y,W,H,L) { buff = new Fl_Text_Buffer(); buffer(buff); textfont(FL_COURIER); textsize(12); cmd[0] = 0; } // Append to buffer, keep cursor at end void append(const char*s) { buff->append(s); // Go to end of line insert_position(buffer()->length()); scroll(count_lines(0, buffer()->length(), 1), 0); } // Run the specified command in the shell, append output to terminal void RunCommand(const char *command) { append("\n"); fprintf(stderr, "EXECUTING: '%s'\n", command); FILE *fp = popen(command, "r"); if ( fp == 0 ) { append("Failed to execute: '"); append(command); append("'\n"); } else { char s[1024]; while ( fgets(s, sizeof(s)-1, fp) ) { append(s); } pclose(fp); } } // Handle events in the Fl_Text_Editor int handle(int e) { switch (e) { case FL_KEYUP: { int key = Fl::event_key(); if ( key == FL_Enter ) return(1); // hide Enter from editor if ( key == FL_BackSpace && cmd[0] == 0 ) return(0); break; } case FL_KEYDOWN: { int key = Fl::event_key(); // Enter key? Execute the command, clear command buffer if ( key == FL_Enter ) { // Execute your commands here strcat(cmd, " 2>&1"); // stderr + stdout RunCommand(cmd); cmd[0] = 0; append("\nEnter a shell command: "); return(1); // hide 'Enter' from text widget } if ( key == FL_BackSpace ) { // Remove a character from end of command buffer if ( cmd[0] ) { cmd[strlen(cmd)-1] = 0; break; } else { return(0); } } else { // Append text to our 'command' buffer strncat(cmd, Fl::event_text(), sizeof(cmd)-1); cmd[sizeof(cmd)-1] = 0; } break; } } return(Fl_Text_Editor::handle(e)); } }; int main() { Fl_Double_Window win(620,520,"Terminal Test"); MyTerminal edit(10,10,win.w()-20,win.h()-20); edit.append("Line one\nLine Two\nEnter a shell command: "); win.resizable(win); win.show(); return(Fl::run()); }
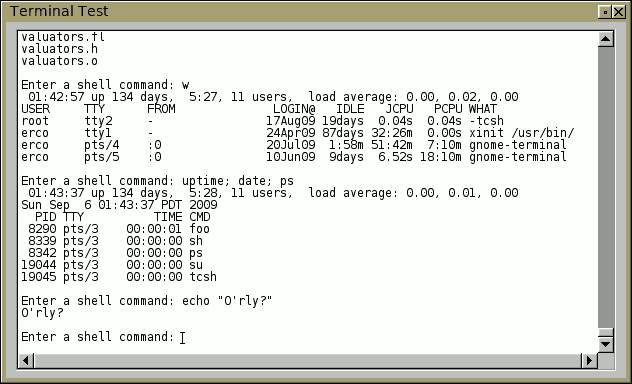
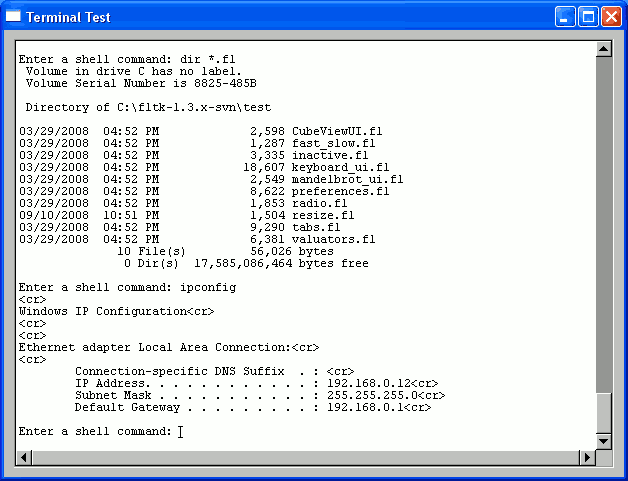
| Toolbar Widget with Fl_Pack |
Demonstrates how to make a simple toolbar out of an Fl_Pack and Fl_Button. You can expand the MyToolbar class to add more functionality, such as allowing the user to graphically move or remove icons..
The icons used here are for example purposes only. These icons were screen-grabbed from the toolbar of Linux "OpenOffice" using Gimp, then saved as an xpm. Then the xpm contents was pasted directly into the code below. For your own application, to avoid copyright infringement, make your own icons, or use icons that are released under open source or creative commons.
Toolbar Widget #include <FL/Fl.H> #include <FL/Fl_Window.H> #include <FL/Fl_Pack.H> #include <FL/Fl_Button.H> #include <FL/Fl_Pixmap.H> // // Example of how to make a toolbar widget with icons // erco 1.0 05/24/10 // static const char *open_xpm[] = { // XPM "25 25 16 1", " c #766E67", ". c #817C78", "+ c #B18563", "@ c #E97E25", "# c #D28445", "$ c #9D9791", "% c #F4882A", "a c #F1963B", "* c #AFAAA3", "= c #F4AB6E", "- c #C8C5C1", "; c #F2C092", "x c #F7CCA4", ", c #DEDDDA", "' c #F3DECD", ") c None", ")))))))))))))))))))))))))", // open icon (nabbed from linux staroffice -- use your own!) ")))))))-..........)))))))", "))))))).)))))))),,*))))))", "))))))).)))))))),,)*)))))", "))))))).)))))))),-))*))))", "))))))).)),-,))),*--,*)))", "),$$$$$ ))))))))-* $$*))", ")*))))).)),,,,,,--$$*-.))", ")*)x===+)),,,,,,,--*-,.))", ")*))))).),,,-,,,,,--,,.))", ")*))))).),,,,-*$$$$$** -)", ")*)),.. $$$$$*x'''''''=*)", ")*),+''''''''';;;;====#-)", ")$)-====xxxxxxx;;;;;;;+,)", ")$)*====;;;;;;;;;;;;;=+))", ")$)+====;=======aaaaaa.))", ")$,#===#=aaaaaaaaaaaa#.))", ")$-#a%%@aaaaaaaaaaaaa+.))", ")$+@%@%@aaaaaaaaaaaaa*.))", ")$#%%%%%%%%%%%%%%%%%a.*))", ").#@@@@@@aaaaaaaaaaa#-)))", ")-. $-,))", ")),,,,,,,,,,,,,,,,,,,,)))", ")))))))))))))))))))))))))", ")))))))))))))))))))))))))" }; static const char *save_xpm[] = { // XPM "25 25 16 1", " c #684467", ". c #7A5279", "+ c #626461", "@ c #757172", "# c #9D6D9C", "$ c #888382", "% c #969499", "a c #ACA7AC", "* c #BABAC4", "= c #CACBD4", "- c #D2D3DD", "; c #E5E3E8", "x c #E9E9F3", ", c None", "' c #F7F6FA", ") c #FEFFFC", ",,,,,,,,,,,,,,,,,,,,,,,,,", ",,,,,,,,,,,,,,,,,,,,,,,,,", // save icon (nabbed from linux staroffice -- use your own!) ",a$$$$$$$@$$$$$$$$@$$$=,,", ",$';xxxxx%))))))))%--;$,,", ",$x=-****%xxxx%%%'%**x$,,", ",$x=-****%xxxx%*%'a**x$,,", ",$x=-****%xxxx%*%'a**x$,,", ",$x=-****%xxxx%*%;%**x$,,", ",$x=-****%xx;;%%%;%**x$,,", ",$x--****%x;;;)));%==x$,,", ",$x--****%%%%%%%%%%==x$,,", ",$x----------------==x$,,", ",$x--**************==x$,,", ",$x--''''''''''''''==x$,,", ",$x--''''''''''''''==x$,,", ",$x--';;;;;;;;;;;;'==x$,,", ",$x--''''''''''''''==x$,,", ",$x--';;;;;;;;;;;;'==x$,,", ",$x==''''''''''''''==x$,,", ",$x==';;;;;;;;;;;;'==x$,,", ",$x==''''''''''''''==x$,,", ",$aaa###########...**x$,,", ",$xxx......... xxx$,,", ",a@++++++++++++++++++@a,,", ",,,,,,,,,,,,,,,,,,,,,,,,," }; class MyToolbar : public Fl_Pack { public: // CTOR MyToolbar(int X,int Y,int W,int H):Fl_Pack(X,Y,W,H) { type(Fl_Pack::HORIZONTAL); // horizontal packing of buttons box(FL_UP_FRAME); spacing(4); // spacing between buttons end(); } // ADD A TOOLBAR BUTTON TO THE PACK void AddButton(const char *name, Fl_Pixmap *img=0, Fl_Callback *cb=0, void *data=0) { begin(); Fl_Button *b = new Fl_Button(0,0,30,30); b->box(FL_FLAT_BOX); // buttons won't have 'edges' b->clear_visible_focus(); if ( name ) b->tooltip(name); if ( img ) b->image(img); if ( cb ) b->callback(cb,data); end(); } }; void Open_CB(Fl_Widget*,void*) { printf("Open..\n"); } void Save_CB(Fl_Widget*,void*) { printf("Save..\n"); } int main() { // CREATE MAIN WINDOW Fl_Window win(720,486,"toolbar demo"); win.begin(); // CREATE TOOLBAR Fl_Pixmap *open_pixmap = new Fl_Pixmap(open_xpm); Fl_Pixmap *save_pixmap = new Fl_Pixmap(save_xpm); MyToolbar toolbar(0,0,win.w(),30); toolbar.AddButton(0, open_pixmap, Open_CB); toolbar.AddButton(0, save_pixmap, Save_CB); toolbar.AddButton(0, open_pixmap, Open_CB); // (repeated to simulate several icons) toolbar.AddButton(0, save_pixmap, Save_CB); toolbar.AddButton(0, open_pixmap, Open_CB); toolbar.AddButton(0, save_pixmap, Save_CB); win.end(); win.show(); return(Fl::run()); }

| Demonstrate keyboard press/release |
Demonstrates how to visualize keyboard up/down states.
When you run the app, typing the q/w/e keys on the keyboard should make the appropriate q/w/e buttons go up and down, should shift focus to the correct button that changed state, and the callback should print the button pressed and its up/down state.
The tricky part here is getting buttons to show the up/down state when keyboard keys are pressed/released. Using shortcuts doesn't get what you want, because shortcuts only invoke the callback once, you don't get separate callbacks for up/down events, and the button doesn't reflect the key's up/down state.
The technique used here is to derive a custom group to parent the buttons, and have the group's handle() method take over keyup/down events, controlling the appropriate button value() based on the key pushed/released. It also manages invoking the button's callback, and forcing the correct button to take focus.
Key Press/Release Demo #include <stdio.h> #include <FL/Fl.H> #include <FL/Fl_Window.H> #include <FL/Fl_Button.H> // A group of buttons, 'q', 'w', 'e'.. class MyButtonGroup : public Fl_Group { Fl_Button *butts[3]; // for sake of example, 3 buttons static void Button_CB(Fl_Widget *w, void* data) { Fl_Button *b = (Fl_Button*)w; fprintf(stderr, "Button '%s' was %s\n", b->label(), b->value() ? "Pushed" : "Released"); } public: MyButtonGroup(int X,int Y,int W,int H,const char *L=0) : Fl_Group(X,Y,W,H,L) { // Create the three 'q','w','e' buttons // The button's label() determines which will keyboard key invokes its callback // box(FL_BORDER_BOX); color(46); // dark bg color for group Fl_Button *b; int i = 0; b = new Fl_Button(x()+10+0, y()+10, 25, 25, "q"); b->callback(Button_CB); butts[i++] = b; b = new Fl_Button(x()+10+50, y()+10, 25, 25, "w"); b->callback(Button_CB); butts[i++] = b; b = new Fl_Button(x()+10+100, y()+10, 25, 25, "e"); b->callback(Button_CB); butts[i++] = b; end(); } int handle(int e) { int ret = Fl_Group::handle(e); // assume the buttons won't handle the keyboard events switch(e) { case FL_FOCUS: case FL_UNFOCUS: ret = 1; // enables receiving keyboard events break; case FL_SHORTCUT: // incase widget that isn't ours has focus case FL_KEYDOWN: // keyboard key pushed case FL_KEYUP: // keyboard key released { // Walk button array, trying to match button's label with the keyboard event. // If found, set that button's value() based on up/down event, // and invoke that button's callback() // for (int t=0; t<3; t++ ) { Fl_Button *b = butts[t]; if ( Fl::event_key() == b->label()[0] ) { // event matches button's label? b->take_focus(); // move focus to this button b->value((e == FL_KEYDOWN || e == FL_SHORTCUT) ? 1 : 0); // change the button's state b->do_callback(); // invoke the button's callback ret = 1; // indicate we handled it } } break; } } return(ret); } }; int main(int argc, char *argv[]) { Fl_Window *win = new Fl_Window(200,200,"Example"); new MyButtonGroup(10,50,200-20,200-60); win->begin(); (new Fl_Button(10,10,25,25,"X"))->tooltip("This is an extra button outside group " "to test focus taken from other buttons"); win->end(); win->show(); return(Fl::run()); }
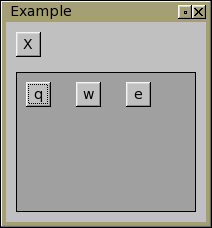
| Demonstrate multiple selection in Fl_Table |
Demonstrates how to implement secondary selection in an Fl_Table.
When you run the app, you can drag out a green 'primary row selection', then click the "Secondary Selection" check button in the lower-left corner to toggle a blue 'secondary row/column selection' that can overlap the primary.
Multiple selections in Fl_Table #include <FL/Fl.H> #include <FL/Fl_Double_Window.H> #include <FL/Fl_Table_Row.H> #include <FL/Fl_Check_Button.H> #include <FL/fl_draw.H> // // Demonstrate Fl_Table_Row with multiple selections -- erco 04/14/11 // (Started with examples/table_simple.cxx) // #define MAX_ROWS 100 #define MAX_COLS 100 // Derive a class from Fl_Table_Row class MyTable : public Fl_Table_Row { int secondary_selection[4]; // secondary selection left/right/top/bottom values // (left/right are column #'s, top/bot are row #'s) // Draw the row/col headings // Make this a dark thin upbox with the text inside. // void DrawHeader(const char *s, int X, int Y, int W, int H) { fl_push_clip(X,Y,W,H); fl_draw_box(FL_THIN_UP_BOX, X,Y,W,H, row_header_color()); fl_color(FL_BLACK); fl_draw(s, X,Y,W,H, FL_ALIGN_CENTER); fl_pop_clip(); } // Handle drawing table's cells // Fl_Table calls this function to draw each visible cell in the table. // It's up to us to use FLTK's drawing functions to draw the cells the way we want. // void draw_cell(TableContext context, int ROW=0, int COL=0, int X=0, int Y=0, int W=0, int H=0) { static char s[40]; switch ( context ) { case CONTEXT_STARTPAGE: // before page is drawn.. fl_font(FL_HELVETICA, 16); // set the font for our drawing operations return; case CONTEXT_COL_HEADER: // Draw column headers sprintf(s,"%c",'A'+COL); // "A", "B", "C", etc. DrawHeader(s,X,Y,W,H); return; case CONTEXT_ROW_HEADER: // Draw row headers sprintf(s,"%03d:",ROW); // "001:", "002:", etc DrawHeader(s,X,Y,W,H); return; case CONTEXT_CELL: { // Draw data in cells sprintf(s,"%d",ROW*MAX_COLS+COL); // whatever.. // Handle coloring of cells int fgcol = FL_BLACK; int bgcol = FL_WHITE; if ( row_selected(ROW) ) { fgcol = FL_WHITE; bgcol = 0xaa4444; // lt blue } //// Handle secondary selection if ( COL >= secondary_selection[0] && COL <=; secondary_selection[1] && ROW >= secondary_selection[2] && ROW <=; secondary_selection[3] ) { fgcol = FL_WHITE; bgcol = 0x44aa44; // lt green } fl_draw_box(FL_THIN_UP_BOX, X,Y,W,H, bgcol); fl_color(fgcol); fl_draw(s, X,Y,W,H, FL_ALIGN_CENTER); return; } default: return; } } public: // Constructor // Make our data array, and initialize the table options. // MyTable(int X, int Y, int W, int H, const char *L=0) : Fl_Table_Row(X,Y,W,H,L) { // Init secondary selection off SetSecondarySelection(-1,-1,-1,-1); // disable secondary selection // Rows rows(MAX_ROWS); // how many rows row_header(1); // enable row headers (along left) row_height_all(20); // default height of rows row_resize(0); // disable row resizing // Cols cols(MAX_COLS); // how many columns col_header(1); // enable column headers (along top) col_width_all(80); // default width of columns col_resize(1); // enable column resizing end(); // end the Fl_Table group } ~MyTable() { } // Let caller define a secondary selection rectangle void SetSecondarySelection(int col_left, int col_right, int row_top, int row_bot) { secondary_selection[0] = col_left; secondary_selection[1] = col_right; secondary_selection[2] = row_top; secondary_selection[3] = row_bot; redraw(); } }; void Button_CB(Fl_Widget *w,void *data) { Fl_Check_Button *but = (Fl_Check_Button*)w; MyTable *table = (MyTable*)data; if ( but->value() ) { table->SetSecondarySelection(4,8,4,8); // on } else { table->SetSecondarySelection(-1,-1,-1,-1); // off } } int main(int argc, char **argv) { Fl_Double_Window win(900, 400, "Multiselect Table"); // Table MyTable table(10,10,win.w()-20,win.h()-50); // Toggle button for 'fixed' secondary selection Fl_Check_Button but(10,win.h()-35,220,25,"Secondary Selection"); but.callback(Button_CB, (void*)&table); win.end(); win.resizable(table); win.show(argc,argv); return(Fl::run()); }
| Demonstrate a simple Multilanguage App |
Demonstrates one way to manange a multi-lingual FLTK application whose menubar's language can be changed interactively. Demonstrates how to arrange each menu item so that it can have multilanguage labels displayed while still being able to internally operate on a fixed language.
The goal of this example is not to depend on external libraries (like gettext(3)), and to only show the widget mechanics, not how to create 'language files'.
The "secret" here is to make a small class ("ItemData", shown in green) that is used for the userdata() of each menu item. This class keeps track of both the 'this' pointer the callbacks need, and an 'internal menuname' for each item. This internal menuname never changes, regardless of what language is selected, so it can be used internally by the app to e.g. check which menu item was selected, or to do searches on. (Ordinarily one might use the menu item's label()s for this, but in a multilingual app, the labels() can have different values, making them useless for such use)
Go into the 'Language" menu, and click on either "English" or "French" to see the application displayed in that language.
For simplicity, this example assume only English + French. An actual app would surely want to use external text files (or 'language files') to define the different menu names, which should be a relatively easy exercise to the reader to add that to the techniques shown here. Perhaps in a follow up example, I'll show an example of how to handle that.
Multilanguage Application -- changable dynamically #include <FL/Fl.H> #include <FL/Fl_Window.H> #include <FL/Fl_Menu_Bar.H> #include <iostream> #include <string> // // Demonstrate multilanguage application menu // A simple app example demonstrating a multilingual menubar; // e.g. click Language > French to see the menubar's language change. -erco 11/27/2011 // typedef struct { const char *langname, *menuname, *equiv; } Translate; Translate xlat[] = { // French.. { "French", "File", "Fichier" }, { "French", "File/New", "Nouveau" }, { "French", "File/Open", "Ouvrir" }, { "French", "File/Quit", "Quitter" }, { "French", "Language", "Langue" }, { "French", "Language/English", "Anglaise" }, { "French", "Language/French", "Francaise" }, // English.. { "English", "File", "File" }, { "English", "File/New", "New" }, { "English", "File/Open", "Open" }, { "English", "File/Quit", "Quit" }, { "English", "Language", "Language" }, { "English", "Language/English", "English" }, { "English", "Language/French", "French" }, // ..add other languages here.. { 0,0,0 } }; // A class we point the user_data of each item to which keeps track of 'this' // and 'internal menu item names' (which are unique internal names for each item // that foreign language labels can be mapped to). Other app data can be added to the class as needed. // class ItemData { std::string menuname; // use for keeping track of the 'internal menu name' void *data; // use for keeping track of 'this' public: ItemData(const char *menuname, void *data) { this->menuname = menuname; this->data = data; } void* GetData() const { return(data); } const char* GetMenuName() const { return(menuname.c_str()); } }; // The 'application class' which keeps track of all the widgets and menus. // The SetLanguage() method handles changing the language of all widgets. // class App { Fl_Window *win; Fl_Menu_Bar *menubar; // Change the language -- in our case, just the menubar // Changes the displayed label()s, but leaves the internal menunames unchanged // so that the language can be switched back and forth. // void SetLanguage(const char *lang) { // Translate all items in the menubar for ( int t=0; t<menubar->size(); t++ ) { Fl_Menu_Item *item = (Fl_Menu_Item*)&(menubar->menu()[t]); if ( item && item->label() && item->user_data() ) { ItemData *id = (ItemData*)item->user_data(); const char *menuname = id->GetMenuName(); // Run through translation table to see if there's a language equivalent for this menu for ( int r=0; xlat[r].langname; r++ ) { if ( strcmp(lang, xlat[r].langname) == 0 && // language match? strcmp(menuname, xlat[r].menuname)==0) { // menu name match? item->label(xlat[r].equiv); break; } } } } // Adjust window titlebar separately if ( strcmp(lang, "English")==0 ) win->label("Multilanguage Test Application"); else win->label("Application de Test Multilangue"); win->redraw(); } // Handle a picked menu item // Uses internal names (in english) to keep track of which item was picked. // void Menu_CB2(ItemData *id) { const char *picked = id->GetMenuName(); // get the 'fixed menu name' for this item std::cout << picked << " picked" << std::endl; if ( strcmp(picked, "File/New" ) == 0 ) { } // How to handle 'New'.. else if ( strcmp(picked, "File/Open" ) == 0 ) { } // How to handle 'Open'.. else if ( strcmp(picked, "File/Quit" ) == 0 ) { exit(0); } // How to handle 'Quit'.. else if ( strcmp(picked, "Language/English") == 0 ) { SetLanguage("English"); } else if ( strcmp(picked, "Language/French" ) == 0 ) { SetLanguage("French"); } } static void Menu_CB(Fl_Widget*, void *userdata) { ItemData *id = (ItemData*)userdata; // resolve the ItemData() App *app = (App*)id->GetData(); // get app pointer ('this') from itemdata app->Menu_CB2(id); // invoke class instance's method } void AddItem(const char *realname, // logical name for item, eg. "File/New" const char *menuname, // menu label name, e.g. "&File/&New" const char *shortcut=0, // shortcut for this item, eg, "^N" int flags=0) { // FL_MENU_INACTIVE, 0, etc.. ItemData *id = new ItemData(realname, (void*)this); // create new ItemData instance for each menu item menubar->add(menuname, shortcut, Menu_CB, (void*)id, flags); // add the item } public: App() { win = new Fl_Window(600,200,"Multilanguage Test Application"); win->begin(); menubar = new Fl_Menu_Bar(0,0,win->w(),25); // INTERNAL MENUNAME DEFAULT LABEL SHORTCUT MENUFLAGS // ================= ===================== ======== ========== AddItem("File", "&File", 0, FL_SUBMENU); AddItem("File/New", "&File/&New", "^n"); AddItem("File/Open", "&File/&Open", "^o"); AddItem("File/Quit", "&File/&Quit", "^q"); AddItem("Language", "&Language", 0, FL_SUBMENU); AddItem("Language/English", "&Language/&English"); AddItem("Language/French", "&Language/&French"); win->end(); win->resizable(win); win->show(); } }; int main() { new App(); return(Fl::run()); }
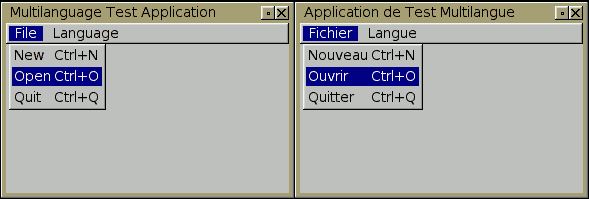
| Demonstrate a Dynamic "File/Open Recent../" Menu |
This demonstrates dynamically managing a "File -> Recent.." submenu that is common in applications that shows the files a user most recently opened or saved.
To keep the demo simple and generic, we focus only on the FLTK techniques, reloading the Recent submenu with procedurally generated numeric filenames, instead of array of actual filenames.
To manage such a menu, the easy thing is to use the find_index() method to get the "Recent" submenu's index, then clear_submenu() to clear the submenu of its previous contents, and then using add() to reload the submenu with the new contents, e.g.
    int index = menubar->find_index("File/Recent"); // find the index of the "File/Recent" submenu
    menubar->clear_submenu(index);                  // clear the contents of the "Recent" submenu
    menubar->add("File/Open Recent../file-0001.jpg");
    menubar->add("File/Open Recent../file-0002.jpg");
    ..etc..
What follows is a compileable example showing a typical File/Edit/Help menubar, the key feature being the "File -> Open Recent" submenu that gets dynamically regenerated with new content, each time the "Update.." button is pressed.
Dynamic "File -> Recent" Submenu #include <stdlib.h> // exit() #include <FL/Fl.H> #include <FL/Fl_Window.H> #include <FL/Fl_Button.H> #include <FL/Fl_Menu_Bar.H> // Rebuild the "File/Open Recent/.." menu with new content void UpdateOpenRecent(Fl_Menu_Bar *menu) { int i = menu->find_index("&File/Open Recent.."); if ( i >= 0 ) { static int counter = 1; char s[80]; menu->clear_submenu(i); // Fill "Recent" menu with newly numbered items for ( int j=0; j<8; j++ ) { sprintf(s, "&File/Open Recent../file-%04d.jpg", counter++); menu->add(s); } } } // // When File -> Quit is selected static void Quit_CB(Fl_Widget *, void *) { exit(0); } // Whenever the user hits "Update" button static void UpdateButtonCallback(Fl_Widget *w, void *data) { Fl_Menu_Bar *menu = (Fl_Menu_Bar*)data; UpdateOpenRecent(menu); } int main() { Fl_Window *win = new Fl_Window(600,400,"menubar-file-recent"); // Create window Fl_Menu_Bar *menu = new Fl_Menu_Bar(0,0,600,25); // Create menubar, items.. menu->add("&File/&Open", "^o", 0, 0, FL_MENU_INACTIVE); menu->add("&File/&Save", "^s", 0, 0, FL_MENU_INACTIVE); menu->add("&File/&Save As", "^s", 0, 0, FL_MENU_INACTIVE|FL_MENU_DIVIDER); menu->add("&File/Open Recent../", 0, 0, 0, FL_MENU_DIVIDER); menu->add("&File/&Quit", "^q", Quit_CB); menu->add("&Edit/&Copy", "^c", 0, 0, FL_MENU_INACTIVE); menu->add("&Edit/&Paste", "^v", 0, 0, FL_MENU_INACTIVE); menu->add("&Help/About", 0, 0, 0, FL_MENU_INACTIVE); // Button to update the "Open Recent.." menu Fl_Button *but = new Fl_Button(100, 150, 280, 25, "Update 'File/Open Recent/..' Menu"); but->callback(UpdateButtonCallback, menu); but->tooltip("Click this updates the contents of the\n\"File -> Open Recent..\" menu."); win->end(); win->show(); // Initialize the "Open Recent.." submenu's content UpdateOpenRecent(menu); return(Fl::run()); }
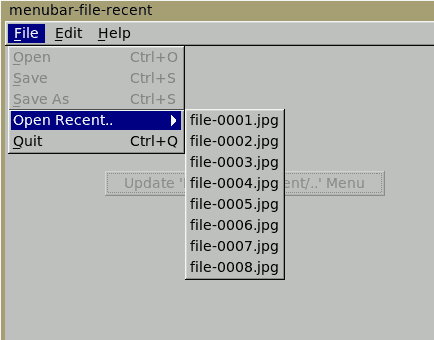
| How to make an application icon |
It is actually up to the window managers on how icons are displayed. As such, it's not really an FLTK issue, but more of a general GUI programming issue not specific to FLTK. Each platform is a bit different about how icons for apps are managed.
In Windows the icon is linked into the executable.
In OSX the icon becomes part of the .app bundle.
In Linux the icon is a separate file that is added into a directory where the window manager looks for app icons based on a match in the executable's filename.Details for each platform on how to make an icon for apps are here:
| How to detect double-clicks separately from single-clicks |
Normally it's easy to detect double-clicks; just read the value of Fl::event_clicks() when you receive FL_PUSH. During a double-click, this will return 0 for the first click, and 1 for the second. So if you get a 1, a double-click has occurred.But what if you want to detect a double-click without processing the first of the two clicks as a single-click? This is what someone wanted in a thread started on fltk.general on March 7 2012.
It's tricky to do this: Ian MacArthur added some code to my simple counting example that delays detecting single-clicking until enough time passed that for sure a double-click hasn't occurred, and this will detect a double-click without interpreting the first of the two clicks as a single.
This has the side effect of creating a 1/4 second delay in the processing of single-click button presses, but it's unavoidable given the temporal nature of double-clicking.
Ian added these caveats regarding this timer approach:
- On OSX and X11 I can (fairly reliably) get it to report up to 15 clicks, if I *really try*, but on WinXX (winXP specifically, in case it makes a difference) I can never get it to report more than 2, so I *assume* there's something specific about how WinXX counts clicks
- The code as written wouldn't be thread safe, though that should not matter since all the fltk context ought to be in the same thread anyway.
- I've hard-coded a delay time of 250ms, which seems to work OK for me, but I have no idea how "portable" that is. In particular, if the click-detection-delay being used by the host system is substantially longer than that, then this may mean that the count does not "reset" properly between bursts of clicking.
How to do mutually exclusive checks for double and single clicks // // Example: How to do mutually exclusive checks for double and single clicks 03/07/12 // 1.0 Greg Ercolano -- showed how to count clicks // 2.0 Ian MacArthur -- added timer to uniquely identify double clicks from single clicks. // #include <stdio.h> #include <stdint.h> #include <FL/Fl.H> #include <FL/Fl_Window.H> // Timer callback: determine the number of clicks static void wait_click(void *v) { intptr_t cc = (intptr_t)v; int ic = (int)(cc & 0x0F) + 1; // If it's a single click, print 1. // If it's a double click, print 2 *without* printing the first click! printf("Number of clicks: %d\n", ic); } // Set up a timer to differentiate single and double clicks static void timer_extend(int cc) { if (cc) Fl::remove_timeout(wait_click); Fl::add_timeout(0.25, wait_click, (void*)cc); } class MyWindow : public Fl_Window { public: MyWindow(int W,int H,const char *L=0) : Fl_Window(W,H,L) { } int handle(int e) { switch (e) { case FL_PUSH: // Set a timer to count clicks timer_extend(Fl::event_clicks()); break; } return(Fl_Window::handle(e)); } }; int main() { MyWindow win(300,200,"Identify single and double clicks"); win.show(); return Fl::run(); }
| Demonstrate Fl_RGB_Image showing inline data |
How to use Fl_RGB_Image to show an image defined in your code as a static array.Usually one would use an XPM image to use inline images, but XPMs have limitations (such as only 1 bit alpha). With Fl_RGB_Image you have access to full RGBA image data.
Here we create a simple small grayscale using Fl_RGB_Image to show it on the screen. We use a grayscale to keep the example simple, but one could just as easily use full RGBA data by changing the depth value to 4 and supplying a larger data array of 4 bytes per pixel.
Inline Grayscale Image using Fl_RGB_Image. #include <FL/Fl.H> #include <FL/Fl_Window.H> #include <FL/Fl_Box.H> #include <FL/Fl_Shared_Image.H> #include <FL/Fl_RGB_Image.H> // // Demonstrate using the Fl_RGB_Image class to display inline image data in FLTK. // -erco 6/13/12 // // Grayscale image data, width=16, height=10, depth=1 unsigned char gray_data[16*10*1] = { 0x00, 0x10, 0x20, 0x30, 0x40, 0x50, 0x60, 0x70, 0x80, 0x90, 0xa0, 0xb0, 0xc0, 0xd0, 0xe0, 0xf0, // line #1 0x00, 0x10, 0x20, 0x30, 0x40, 0x50, 0x60, 0x70, 0x80, 0x90, 0xa0, 0xb0, 0xc0, 0xd0, 0xe0, 0xf0, // line #2 0x00, 0x10, 0x20, 0x30, 0x40, 0x50, 0x60, 0x70, 0x80, 0x90, 0xa0, 0xb0, 0xc0, 0xd0, 0xe0, 0xf0, // line #3 0x00, 0x10, 0x20, 0x30, 0x40, 0x50, 0x60, 0x70, 0x80, 0x90, 0xa0, 0xb0, 0xc0, 0xd0, 0xe0, 0xf0, // line #4 0x00, 0x10, 0x20, 0x30, 0x40, 0x50, 0x60, 0x70, 0x80, 0x90, 0xa0, 0xb0, 0xc0, 0xd0, 0xe0, 0xf0, // line #5 0x00, 0x10, 0x20, 0x30, 0x40, 0x50, 0x60, 0x70, 0x80, 0x90, 0xa0, 0xb0, 0xc0, 0xd0, 0xe0, 0xf0, // line #6 0x00, 0x10, 0x20, 0x30, 0x40, 0x50, 0x60, 0x70, 0x80, 0x90, 0xa0, 0xb0, 0xc0, 0xd0, 0xe0, 0xf0, // line #7 0x00, 0x10, 0x20, 0x30, 0x40, 0x50, 0x60, 0x70, 0x80, 0x90, 0xa0, 0xb0, 0xc0, 0xd0, 0xe0, 0xf0, // line #8 0x00, 0x10, 0x20, 0x30, 0x40, 0x50, 0x60, 0x70, 0x80, 0x90, 0xa0, 0xb0, 0xc0, 0xd0, 0xe0, 0xf0, // line #9 0x00, 0x10, 0x20, 0x30, 0x40, 0x50, 0x60, 0x70, 0x80, 0x90, 0xa0, 0xb0, 0xc0, 0xd0, 0xe0, 0xf0, // line #10 }; int main() { fl_register_images(); // initialize image library Fl_Window win(200,200); // make a window Fl_Box box(10,10,200-20,200-20); // make a box inside the window Fl_RGB_Image gray(gray_data,16,10,1); // create the rgb image as a grayscale box.image(gray); // attach image to box win.show(); return(Fl::run()); }
| Demonstrate how to make a hexdump of PNG image data in hex |
Sometimes it's useful to get a hexdump of a PNG image so that it can be included within a program, instead of having to be loaded off disk.Normally one would use a .pixmap, but they are limted to one-bit alpha. PNGs support full 8 bit alpha, allowing one to make antialiased, smooth overlays.
Just run this program with the png filename as the only argument, eg:
./png2hex /tmp/foo.png > foo.cxx
..and it will dump a C++ style program that declares an unsigned char array with the entire image's raw pixel contents as a 'hex dump', eg:
Sample PNG Hex Dump Output const unsigned char a_png[] = { /* W=18 H=13 D=4 */ /* Y=0 */ 0x3f,0x3f,0x3f,0x4b, 0x3f,0x3f,0x3f,0x4b, 0x3f,0x3f,0x3f,0x29, 0x3f,0x3f,0x3f,0x29, /* X=0-3 */ 0x3f,0x3f,0x3f,0x29, 0x3f,0x3f,0x3f,0x29, 0x3f,0x3f,0x3f,0x29, 0x3f,0x3f,0x3f,0x29, /* X=4-7 */ 0x3f,0x3f,0x3f,0x29, 0x3f,0x3f,0x3f,0x29, 0x3f,0x3f,0x3f,0x29, 0x3f,0x3f,0x3f,0x29, /* X=8-11 */ 0x3f,0x3f,0x3f,0x29, 0x3f,0x3f,0x3f,0x29, 0x3f,0x3f,0x3f,0x29, 0x3f,0x3f,0x3f,0x29, /* X=12-15 */ 0x3f,0x3f,0x3f,0x29, 0x3f,0x3f,0x3f,0x29, /* X=16-17 */ /* Y=1 */ 0x2a,0x2a,0x2a,0xff, 0x2a,0x2a,0x2a,0xff, 0x2a,0x2a,0x2a,0xff, 0x2a,0x2a,0x2a,0xff, /* X=0-3 */ 0x2a,0x2a,0x2a,0xff, 0x2a,0x2a,0x2a,0xff, 0x2a,0x2a,0x2a,0xff, 0x2a,0x2a,0x2a,0xff, /* X=4-7 */ 0x2a,0x2a,0x2a,0xff, 0x2a,0x2a,0x2a,0xff, 0x2a,0x2a,0x2a,0xff, 0x2a,0x2a,0x2a,0xff, /* X=8-11 */ 0x2a,0x2a,0x2a,0xff, 0x2a,0x2a,0x2a,0xff, 0x2a,0x2a,0x2a,0xff, 0x2a,0x2a,0x2a,0xff, /* X=12-15 */ 0x2a,0x2a,0x2a,0xff, 0x2a,0x2a,0x2a,0xff, /* X=16-17 */ /* Y=2 */ 0x00,0x00,0x00,0xff, 0x00,0x00,0x00,0xff, 0x00,0x00,0x00,0xff, 0x00,0x00,0x00,0xff, /* X=0-3 */ 0x00,0x00,0x00,0xff, 0x00,0x00,0x00,0xff, 0x00,0x00,0x00,0xff, 0x00,0x00,0x00,0xff, /* X=4-7 */ [..] 0x6c,0x6c,0x6c,0xff, 0x6c,0x6c,0x6c,0xff, 0x6c,0x6c,0x6c,0xff, 0x6c,0x6c,0x6c,0xff, /* X=12-15 */ 0x6c,0x6c,0x6c,0xff, 0x6c,0x6c,0x6c,0xff, /* X=16-17 */ /* Y=12 */ 0x3f,0x3f,0x3f,0x0c, 0x3f,0x3f,0x3f,0x0c, 0x3f,0x3f,0x3f,0x06, 0x3f,0x3f,0x3f,0x06, /* X=0-3 */ 0x3f,0x3f,0x3f,0x06, 0x3f,0x3f,0x3f,0x06, 0x3f,0x3f,0x3f,0x06, 0x3f,0x3f,0x3f,0x06, /* X=4-7 */ 0x3f,0x3f,0x3f,0x06, 0x3f,0x3f,0x3f,0x06, 0x3f,0x3f,0x3f,0x06, 0x3f,0x3f,0x3f,0x06, /* X=8-11 */ 0x3f,0x3f,0x3f,0x06, 0x3f,0x3f,0x3f,0x06, 0x3f,0x3f,0x3f,0x06, 0x3f,0x3f,0x3f,0x06, /* X=12-15 */ 0x3f,0x3f,0x3f,0x06, 0x3f,0x3f,0x3f,0x06, /* X=16-17 */ };The output includes a comment showing the width/height/depth, and will include alpha channel data, if any was present in the input image.
The resulting code can either be #include'ed into an application, similar to a .pixmap, or copy/pasted into an existing C/C++ program.
Dump a PNG file in hex. #include <stdio.h> #include <string.h> #include <FL/Fl.H> #include <FL/Fl_Window.H> #include <FL/Fl_Shared_Image.H> #include <FL/Fl_PNG_Image.H> // // Dump the pixel data of a PNG image in C/C++ parsable hex -erco 1.00 07/12/2012 // int main(int argc, char *argv[]) { if (argc < 2 ) { printf("Usage: %s file.png\n", argv[0]); return(1); } const char *filename = argv[1]; fl_register_images(); Fl_PNG_Image img(filename); // Make a 'safe' filename to show as the C variable char *safe_filename = strdup(filename); for ( char *s=safe_filename; *s; s++ ) if ( strchr("-_.",*s) ) *s = '_'; // Print C/C++ style variable declaration printf("const unsigned char %s[] = {\n", safe_filename); printf("/* W=%d H=%d D=%d */\n", img.w(), img.h(), img.d()); const unsigned char *p = img.array; int mod = img.d()==1 ? 16 : img.d()==2 ? 8 : 4; // Walk the scanlines for ( int Y=0; Y<img.h(); Y++ ) { printf("/* Y=%d */\n", Y); // Walk the pixels int X; for ( X=0; X<img.w(); X++ ) { if ( X % mod == 0 ) printf("\t"); // Walk the channels for ( int D=0; D<img.d(); D++ ) { printf("0x%02x,", *p++); } if ( (X % mod) == (mod-1) ) printf(" /* X=%d-%d */\n", X-(mod-1), X); else printf(" "); } if ( (--X % mod) != (mod-1) ) printf(" /* X=%d-%d */\n", ((X/mod)*mod),X); } printf("};\n"); return(0); }
| A multicolored bargraph widget |
Demonstrate how to use inline representations of alpha channel images to draw nice widgets with antialiased curved lines with simple FLTK drawing techniques. In this case, a multicolored bar graph widget.
This shows several things in one example; how to construct a simple shape using an image of fixed color with just the alpha channel to define the shape (in this case a disk, but it could be anything). Also, how to make a 'modern looking widget' using simple image manipulation techniques to get antialiased 'see through' edges. And finally, how to make a multiple bar graph widget with overlapping bars.
Our goal is to draw a bar graph that can have multiple overlapping bars, similar to a CPU usage bar that shows separate 'user' and 'system' cpu use in the same bargraph, but using round-ended 'bars' instead of flat rectangles. This is done by taking just the alpha channel of a circle or disk (saved from a paint program, e.g. Gimp), encoding the data as inline code.
Multicolored bargraph widget example #include <FL/Fl.H> #include <FL/Fl_Double_Window.H> #include <FL/Fl_Box.H> #include <FL/Fl_Shared_Image.H> #include <FL/Fl_RGB_Image.H> #include <FL/fl_draw.H> #include <vector> // DEMONSTRATE HOW TO MAKE A MULTICOLOR BAR GRAPH // v1.0 02/27/13 erco@seriss.com // // COMPILE: fltk-config --use-images --compile multicolor-bar-graph.cxx // // CLASS FOR A MULTICOLORED BAR GRAPH WIDGET // Example: // _______________________________ // (______________)_____)__)_______) // | | | | // Bar#0 | | Trough // Bar#1 | // Bar#2 // class MulticolorBarGraph : public Fl_Box { // A PRIVATE CLASS TO HANDLE DRAWING A PROGRESS METER class ProgressBarDraw { std::vector<uchar*> bufs; // image data buffer std::vector<Fl_RGB_Image*> disks; // pre-allocated colored disks std::vector<Fl_Color> colors; // different colors // RETURN THE Fl_RGB_Image FOR COLOR 'c' // Returns NULL if not found. // Fl_RGB_Image *FindImage(Fl_Color c) { for ( int t=0; t<colors.size(); t++ ) if ( colors[t] == c ) return disks[t]; return(0); } public: ProgressBarDraw() { } ~ProgressBarDraw() { Clear(); } // Clear all buffered bars void Clear() { int t; for ( t=0; t<disks.size(); t++ ) delete disks[t]; for ( t=0; t<bufs.size(); t++ ) free((void*)bufs[t]); bufs.clear(); disks.clear(); colors.clear(); } // ADD A NEW COLOR // Each color bar has to be pre-allocated. // Return the allocated image for this color. // Fl_RGB_Image *AddColorBar(Fl_Color c) { // // The alpha channel for a 10x10 pixel disk shape. This way we can // fill the entire 10x10 square of RGB values with the color value, // and the alpha channel handles defining the disk with a nice falloff // at the edges for antialiasing. We use this as the 'brush' for // drawing the antialiased bars in the graph. This was saved from // gimp; started with an empty alpha image, plotted a single dot // using gimp's antialiased 10 pixel disk brush, then isolated just // the alpha channel in hex. (If you squint your eyes at the hex // below, you can see the 'disk' in the 0xff's) // static unsigned char disk[10*10] = { 0x00, 0x13, 0x5f, 0xcc, 0xff, 0xff, 0xcc, 0x5f, 0x13, 0x00, 0x0c, 0x72, 0xe5, 0xff, 0xff, 0xff, 0xff, 0xe5, 0x72, 0x0c, 0x4c, 0xcc, 0xff, 0xff, 0xff, 0xff, 0xff, 0xff, 0xcc, 0x4c, 0x7f, 0xff, 0xff, 0xff, 0xff, 0xff, 0xff, 0xff, 0xff, 0x7f, 0x7f, 0xff, 0xff, 0xff, 0xff, 0xff, 0xff, 0xff, 0xff, 0x7f, 0x7f, 0xff, 0xff, 0xff, 0xff, 0xff, 0xff, 0xff, 0xff, 0x7f, 0x73, 0xf3, 0xff, 0xff, 0xff, 0xff, 0xff, 0xff, 0xf3, 0x73, 0x4c, 0xcc, 0xff, 0xff, 0xff, 0xff, 0xff, 0xff, 0xcc, 0x4c, 0x0c, 0x72, 0xe5, 0xff, 0xff, 0xff, 0xff, 0xe5, 0x72, 0x0c, 0x00, 0x13, 0x5f, 0xcc, 0xff, 0xff, 0xcc, 0x5f, 0x13, 0x00, }; // Isolate the RGB values uchar r = (c >> 24) & 0xff; uchar g = (c >> 16) & 0xff; uchar b = (c >> 8 ) & 0xff; // Fill the RGB values of color into the disk image. // Leave the opacities alone, as these define the disk. // uchar *buf = (uchar*)malloc(10*10*4); // make new RGBA image buffer uchar *out = buf; // Fill the buffer: // Insert the rgb values, and copy just the alpha frmo the disk[] buffer. // for ( int t=0; t<10*10; t++ ) { *out++ = r; *out++ = g; *out++ = b; *out++ = disk[t]; } // Make an instance of new colored disk Fl_RGB_Image *img = new Fl_RGB_Image(buf,10,10,4); bufs.push_back(buf); disks.push_back(img); // add modified image to disks[] colors.push_back(c); // add color to colors[] return(img); } // DRAW PROGRESS BAR IN COLOR 'c' AT POSITION X,Y OF WIDTH W void DrawBar(Fl_Color c, int X, int Y, int W) { Fl_RGB_Image *img = FindImage(c); if ( ! img ) img = AddColorBar(c); // define an image for this bar's color if ( (W-2) > 0) fl_rectf(X+6,Y,W-2,10,c); // draw center part of bar // Draw bar's end caps img->draw(X,Y); img->draw(X+W,Y); } }; ProgressBarDraw mdraw; // instance of private class to handle drawing bar(s) std::vector<float> barvalues; // size of each bar (0.0 ~ 1.0) std::vector<Fl_Color> barcolors; // array of colors for each bar public: // CTOR MulticolorBarGraph(int X,int Y,int W,int H, const char *L=0) : Fl_Box(X,Y,W,H,L) { } // Add a new bar of value 'val', color 'col', return bar count. int AddBar(float val, Fl_Color col) { val = (val < 0.0) ? 0.0 : (val > 1.0) ? 1.0 : val; barvalues.push_back(val); barcolors.push_back(col); return(int(barvalues.size())); } // Return the number of bars defined int GetTotalBars() const { return int(barvalues.size()); } // Clear all bars // Deallocates memory that manages bar colors, values and icons. // Use AddBar() to create new ones. // void Clear() { barvalues.clear(); barcolors.clear(); mdraw.Clear(); } // Set the value of a bar at 'index' to 'val' void SetBarValue(int index, float val) { val = (val < 0.0) ? 0.0 : (val > 1.0) ? 1.0 : val; barvalues[index] = val; } // Return the value of bar at 'index' float GetBarValue(int index) const { return(barvalues[index]); } // Set the color of a bar at 'index' to color 'col' void SetBarColor(int index, Fl_Color col) { barcolors[index] = col; } // Return the color of bar at 'index' Fl_Color GetBarColor(int index) const { return(barcolors[index]); } // Draw the widget // Let the box draw itself, then draw all the bars in the graph void draw() { Fl_Box::draw(); int bary = y() + (h()/2) - 5; // center the bar vertically mdraw.DrawBar(color(), x(), bary, w()-10); // draw bar "trough" // Draw left-justified bars // To overlap properly, draw them right-to-left // int t; for ( t=barvalues.size()-1; t>=0; t-- ) { int width = int(barvalues[t] * w() + .5) - 10; if ( width < 0 ) width = 0; mdraw.DrawBar(barcolors[t], x(), bary, width); } } }; /////////////////////////////////////////////////////////////////// // TEST THE MULTICOLOR BAR GRAPH WIDGET // The following code is used just to verify the widget works, // and shows how to use it. /////////////////////////////////////////////////////////////////// std::vector<MulticolorBarGraph*> G_mbgs; // TIMER CALLBACK TO HANDLE CHANGING THE BAR SIZES // We randomly change the bar's sizes so they bounce around.. // static void UpdateBars(void*) { for ( int t=0; t<G_mbgs.size(); t++ ) { // Randomize the positions of the bars. // Sizes must be set in ascending order. // float rval = ((float)rand() / RAND_MAX) * .80; float gval = ((float)rand() / RAND_MAX) * ( 1.0 - rval ) + rval; float bval = ((float)rand() / RAND_MAX) * ( 1.0 - gval ) + gval; if ( gval > 1.0 ) gval = 1.0; if ( bval > 1.0 ) bval = 1.0; G_mbgs[t]->SetBarValue(0, rval); G_mbgs[t]->SetBarValue(1, gval); G_mbgs[t]->SetBarValue(2, bval); G_mbgs[t]->redraw(); } Fl::repeat_timeout(1.0, UpdateBars); } #define WIDTH 250 #define HEIGHT 210 int main() { fl_register_images(); Fl_Double_Window win(WIDTH, HEIGHT, "test MulticolorBarGraph"); win.color(0x3d3e4200); // dark gray // Make several instances of the bar graph widget vertically in window. // Each instance will have three bars; red, grn and blu. // Each bar's 'value' is in the range 0.0 ~ 1.0. // Sizes of each bar must be in ascending order, // as the bars are drawn right to left to overlap properly. // char name[10]; for ( int Y=10; Y<(HEIGHT-20); Y+=20 ) { // CREATE INSTANCE OF MULTICOLOR BAR GRAPH WIDGET MulticolorBarGraph *mbg = new MulticolorBarGraph(30,Y,WIDTH-40,20); mbg->color(0x28282800); // trough color (very dark gray) // Create the r/g/b bars within bar graph mbg->AddBar(0.0, 0xf0595900); // red mbg->AddBar(0.0, 0x72cc6b00); // grn mbg->AddBar(0.0, 0x10579300); // blu // Label each bar.. sprintf(name, "%d:", int(G_mbgs.size()+1)); mbg->copy_label(name); mbg->labelcolor(0x79797900); mbg->align(FL_ALIGN_LEFT); // Add to global array for UpdateBars() to manipulate on a timer G_mbgs.push_back(mbg); } // SET UP A TIMER TO "BOUNCE" THE BARS AROUND Fl::add_timeout(1.0, UpdateBars); win.resizable(win); win.show(); return(Fl::run()); }

| Show how to synchronize two (or more) volume knobs |
Demonstrate how to derive a class that lets one synchronize knobs of the same name, even if in different windows. (Like an audio mixing console).
Our goal is to make a widget that can be instanced all over the place, and any widgets named the same are locked together; changing one changes the others if they have the same name.
The widget keeps an internal static array of instances of itself so that when one is changed, it changes all the other instances that have the same label() name.
Show how to synchronize two (or more) volume knobs #include <string.h> #include <FL/Fl.H> #include <FL/Fl_Window.H> #include <FL/Fl_Slider.H> #include <vector> // Demonstrate how to connect volume knobs to each other by name - erco 1.0 03/06/13 // CLASS TO HANDLE CONNECTING VOLUME KNOBS class VolumeKnob : public Fl_Slider { static void Adjust_CB(Fl_Widget *w, void *data); public: VolumeKnob(int X,int Y,int W,int H, const char *L=0); ~VolumeKnob(); }; static std::vector<VolumeKnob*> G_knobs; // global array of all vol knob instances // HANDLE VOLUME ADJUSTMENT void VolumeKnob::Adjust_CB(Fl_Widget *w, void *data) { VolumeKnob *knob = (VolumeKnob*)data; printf("KNOB '%s' CHANGED: %.2f\n", knob->label(), knob->value()); // Real work here: cause current knob's value to affect others for ( unsigned t=0; t<G_knobs.size(); t++ ) { // walk thru all knobs created so far if ( knob == G_knobs[t] ) continue; // skip ourself if ( strcmp(G_knobs[t]->label(), knob->label()) != 0 ) continue; // skip knobs of different name G_knobs[t]->value(knob->value()); // adjust other knob of same name } } // CTOR VolumeKnob::VolumeKnob(int X,int Y,int W,int H, const char *L):Fl_Slider(X,Y,W,H,L) { type(FL_VERT_NICE_SLIDER); // type of slider align(FL_ALIGN_BOTTOM); // (labels on bottom) selection_color(FL_RED); // nicer looking knob callback(Adjust_CB, (void*)this); // setup callback G_knobs.push_back(this); // save pointer to self } // DTOR VolumeKnob::~VolumeKnob() { // Remove from our global array for ( unsigned t=0; t<G_knobs.size(); t++ ) { if ( G_knobs[t] == this ) { G_knobs.erase(G_knobs.begin()+t); // stl, why u so fugly break; } } } int main(int argc, char* argv[]) { Fl::scheme("gtk+"); Fl_Window *w1 = new Fl_Window(0,0,100,120,"Win #1"); w1->begin(); new VolumeKnob(10+0 ,10,20,80,"T1"); new VolumeKnob(10+30,10,20,80,"T2"); new VolumeKnob(10+60,10,20,80,"T3"); w1->end(); w1->show(); Fl_Window *w2 = new Fl_Window(200,0,100,120,"Win #2"); w2->begin(); new VolumeKnob(10+0 ,10,20,80,"T1"); new VolumeKnob(10+30,10,20,80,"T2"); new VolumeKnob(10+60,10,20,80,"T3"); w2->end(); w2->show(); return Fl::run(); }

| Demonstrate how to make a resizer bar that can be dragged to resize widgets |
Demonstrate how to make horizontal separators between widgets, allowing the user to interactively adjust the separator vertically to reveal or hide the widget above inside an Fl_Scroll, causing other widgets below to be moved accordingly to accommodate the size changes.
The 'ResizerBar' class is what you would use in your app. The main() below it shows how to utilize it as a container for child widgets.
The example main() creates ten Fl_Multiline_Output widgets with a resizer below each. You can drag the resizers around to change the size of the 'output' widget above; the widgets below are moved around inside the scroller to accommodate. Scrollbars will appear when widgets move off-screen.
A horizontal bar resizer widget for vertical adjustment. #include <FL/Fl.H> #include <FL/Fl_Double_Window.H> #include <FL/Fl_Scroll.H> #include <FL/Fl_Box.H> #include <FL/fl_draw.H> // // Demonstrate a resizer class for widgets in an Fl_Scroll // erco 1.0 ??/??/04 - original test program // erco 1.1 04/21/13 - modernized // // CLASS FOR A 'RESIZER BAR' BETWEEN WIDGETS IN AN Fl_Scroll // // > Shows a resize cursor when hovered over // > Assumes: * Parent is an Fl_Scroll // * All children of Fl_Scroll are vertically arranged // * The widget above us has a bottom edge touching our top edge // ie. (w->y()+w->h() == this->y()) // // > When this widget is dragged: // * The widget above us (with a common edge) will be /resized/ vertically // * All children below us will be /moved/ vertically // class ResizerBar : public Fl_Box { int orig_h; int last_y; int min_h; // min height for widget above us void HandleDrag(int diff) { Fl_Scroll *grp = (Fl_Scroll*)parent(); int top = y(); int bot = y()+h(); // First pass: find widget directly above us with common edge // Possibly clamp 'diff' if widget would get too small.. // for ( int t=0; t<grp->children(); t++ ) { Fl_Widget *w = grp->child(t); if ( (w->y()+w->h()) == top ) { // found widget directly above? if ( (w->h()+diff) < min_h ) diff = w->h() - min_h; // clamp w->resize(w->x(), w->y(), w->w(), w->h()+diff); // change height break; // done with first pass } } // Second pass: find widgets below us, move based on clamped diff for ( int t=0; t<grp->children(); t++ ) { Fl_Widget *w = grp->child(t); if ( w->y() >= bot ) // found widget below us? w->resize(w->x(), w->y()+diff, w->w(), w->h()); // change position } // Change our position last resize(x(),y()+diff,w(),h()); grp->init_sizes(); grp->redraw(); } public: ResizerBar(int X,int Y,int W,int H) : Fl_Box(X,Y,W,H,"///////") { orig_h = H; last_y = 0; min_h = 10; align(FL_ALIGN_CENTER|FL_ALIGN_INSIDE); labelfont(FL_COURIER); labelsize(H); visible_focus(0); box(FL_FLAT_BOX); } void SetMinHeight(int val) { min_h = val; } int GetMinHeight() const { return min_h; } int handle(int e) { int ret = 0; int this_y = Fl::event_y_root(); switch (e) { case FL_FOCUS: ret = 1; break; case FL_ENTER: ret = 1; fl_cursor(FL_CURSOR_NS); break; case FL_LEAVE: ret = 1; fl_cursor(FL_CURSOR_DEFAULT); break; case FL_PUSH: ret = 1; last_y = this_y; break; case FL_DRAG: HandleDrag(this_y-last_y); last_y = this_y; ret = 1; break; default: break; } return(Fl_Box::handle(e) | ret); } void resize(int X,int Y,int W,int H) { Fl_Box::resize(X,Y,W,orig_h); // height of resizer stays constant size } }; // Demonstrate the ResizerBar class above // Creates 10 Fl_Multiline_Output widgets with a resizer below each. // User can drag the resizers around to change the size of the widget above it. // The other widgets below will be moved around inside the scroller to accommodate. // #include <FL/Fl_Multiline_Output.H> int main(int argc, char** argv) { Fl_Double_Window win(220,400); win.begin(); Fl_Scroll scr(0,0,220,400); scr.begin(); int resize_h = 5; // Create 10 boxes with resizer between each for ( int i=0; i<10; i++ ) { // Create a multiline output Fl_Multiline_Output *o = new Fl_Multiline_Output(0,i*(40+resize_h),200,40); o->value("Line one\nLine two\nLine three"); // And put a Resizer directly below it with a common edge. (The common edge is important) new ResizerBar(0,o->y()+o->h(),200,resize_h); } scr.end(); win.end(); win.resizable(scr); win.show(); return(Fl::run()); }
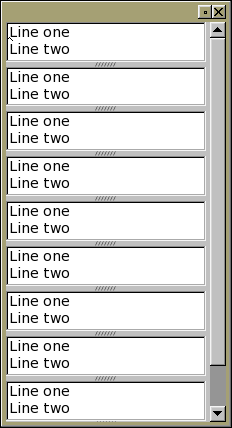
| Demonstrate how to use FLTK timers |
Demonstrate how to use FLTK timer callbacks.
FLTK timers are useful to have events happen at certain times, such as advancing the second hand on a clock, or to blink colors, or poll state of hardware at various intervals, advance through animation, etc.
This example shows how to print 10 messages to stdout at 1/2 second intervals, then turns the timer off. (Under windows, compile this example as a /subsystem:console application, or you won't see any output)
Demonstrate FLTK timers #include <FL/Fl.H> #include <FL/Fl_Window.H> // // Demonstrate FLTK timers - erco 10/12/13 // static void Timer_CB(void *data) { // timer callback static int count = 0; // keep count of timer ticks printf("Timer! #%d\n", ++count); // print a message each timer tick if ( count >= 10 ) { // After 10 timer ticks, turn timer off Fl::remove_timeout(Timer_CB, data); printf("Timer turned off.\n"); } else { // less than 10 timer ticks? Keep running Fl::repeat_timeout(.50, Timer_CB, data); } } int main() { Fl_Window win(200,200,"Timer Example"); win.show(); Fl::add_timeout(.5, Timer_CB); // setup a timer return Fl::run(); }
| Demonstrate an input widget that supports various justifications |
Demonstrates an input widget that can support various justifications.
Demonstrate an Fl_Input widget with various justifications #include <FL/Fl.H> #include <FL/Fl_Window.H> #include <FL/Fl_Box.H> #include <FL/Fl_Input.H> #include <FL/Fl_Button.H> // // Demonstrate an input widget that can support various justifications - erco 12/16/13 // class Fl_Justify_Input : public Fl_Group { Fl_Input *inp; Fl_Box *box; public: // Ctor Fl_Justify_Input(int X,int Y,int W,int H,const char *L=0):Fl_Group(X,Y,W,H,L) { Fl_Group::box(FL_NO_BOX); box = new Fl_Box(X,Y,W,H); box->color(FL_WHITE); box->box(FL_DOWN_BOX); inp = new Fl_Input(X,Y,W,H); inp->hide(); inp->color(FL_WHITE); end(); } // Set text justification. Expects one of: // FL_ALIGN_LEFT, FL_ALIGN_CENTER, FL_ALIGN_RIGHT. // void justify(Fl_Align val) { box->align(val|FL_ALIGN_INSIDE); } // Returns text justification Fl_Align justify() const { return box->align(); } // Sets the text value void value(const char *val) { box->copy_label(val); inp->value(val); } // Gets the text value const char *value() const { return inp->value(); } int handle(int e) { switch (e) { case FL_PUSH: case FL_FOCUS: if (!inp->visible()) { // Make input widget 'appear' in place of the box box->hide(); inp->show(); inp->value(box->label()); redraw(); } break; case FL_UNFOCUS: if (inp->visible()) { // Replace input widget with justified box box->show(); inp->hide(); box->label(inp->value()); redraw(); } break; default: break; } return(Fl_Group::handle(e)); } }; // Test the above Fl_Justify_Input widget int main(int argc, char** argv) { Fl::scheme("gtk+"); Fl_Window *win = new Fl_Window(220,200,"Fl_Justify_Input Widget"); win->begin(); Fl_Justify_Input *fji; fji = new Fl_Justify_Input(10,30,200,25,"Left"); fji->justify(FL_ALIGN_LEFT); fji->value("123"); fji = new Fl_Justify_Input(10,90,200,25,"Center"); fji->justify(FL_ALIGN_CENTER); fji->value("456"); fji = new Fl_Justify_Input(10,150,200,25,"Right"); fji->justify(FL_ALIGN_RIGHT); fji->value("789"); win->end(); win->show(); return(Fl::run()); }
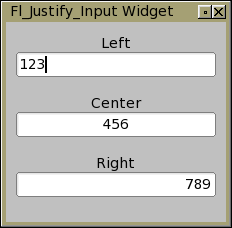
| Spreadsheet editor demo includes editing row/col headers |
Demonstrates a simple spreadsheet editor that includes editing row/col headers as well as table cells.
Some trickery is needed to edit the cells in the row and column headers, because by default Fl_Table (1.3.2 and older, anyway) parents children to an internal Fl_Scroll that will clip widgets outside the cell area (e.g. the headers), so we have to re-parent the Fl_Input widget to the parent window when editing the row/col headers.
This is a modified version of examples/table-spreadsheet.cxx; that example's summing logic was ripped out (to simplify), and replaced Fl_Int_Input with a regular Fl_Input, and added some text arrays to manage the cell content. Made necessary changes to keep track of the table context for editing purposes, so that one can edit both the cells and headers.
The '***' comment markers indicate where the re-parenting trick is used.
Fl_Table spreadsheet with editable row/col headers #include <stdio.h> #include <stdlib.h> #include <FL/Fl.H> #include <FL/Fl_Double_Window.H> #include <FL/Fl_Table.H> #include <FL/Fl_Input.H> #include <FL/fl_draw.H> // Demonstrate simple spreadsheet editor that includes editing row/col headers as well as table cells // erco 5/23/14 const int MAX_COLS = 10; const int MAX_ROWS = 10; class Spreadsheet : public Fl_Table { Fl_Input *input; // single instance of Fl_Int_Input widget int row_edit, col_edit; // row/col being modified TableContext context_edit; // context being edited (row head/col head/cell) // Buffer for spreadsheet content char row_values[MAX_ROWS+1][20]; // one dimensional array of strings char col_values[MAX_COLS+1][20]; // one dimensional array of strings char cell_values[MAX_ROWS+1][MAX_COLS+1][20]; // two dimensional array of strings protected: void draw_cell(TableContext context,int=0,int=0,int=0,int=0,int=0,int=0); void event_callback2(); // table's event callback (instance) static void event_callback(Fl_Widget*,void *v) { // table's event callback (static) ((Spreadsheet*)v)->event_callback2(); } static void input_cb(Fl_Widget*,void* v) { // input widget's callback ((Spreadsheet*)v)->set_value_hide(); } public: Spreadsheet(int X,int Y,int W,int H,const char* L=0) : Fl_Table(X,Y,W,H,L) { callback(&event_callback, (void*)this); when(FL_WHEN_NOT_CHANGED|when()); // Create input widget that we'll use whenever user clicks on a cell input = new Fl_Input(W/2,H/2,0,0); input->hide(); input->callback(input_cb, (void*)this); input->when(FL_WHEN_ENTER_KEY_ALWAYS); // callback triggered when user hits Enter input->maximum_size(5); input->color(FL_YELLOW); end(); context_edit = CONTEXT_NONE; row_edit = col_edit = 0; set_selection(0,0,0,0); int r,c; for ( r=0; r<=MAX_ROWS; r++ ) for ( c=0; c<=MAX_COLS; c++ ) sprintf(cell_values[r][c], "%d/%d",r,c); for ( r=0; r<=MAX_ROWS; r++ ) sprintf(row_values[r], "%03d", r); for ( c=0; c<=MAX_COLS; c++ ) sprintf(col_values[c], "%c", 'A'+c); } ~Spreadsheet() { } // Apply value from input widget to values[row][col] array and hide (done editing) void set_value_hide() { switch (context_edit) { case CONTEXT_ROW_HEADER: sprintf(row_values[row_edit], "%.19s", input->value()); break; case CONTEXT_COL_HEADER: sprintf(col_values[col_edit], "%.19s", input->value()); break; case CONTEXT_CELL: sprintf(cell_values[row_edit][col_edit], "%.19s", input->value()); break; default: break; } input->hide(); window()->cursor(FL_CURSOR_DEFAULT); // if we don't do this, cursor can disappear! } // Start editing a new cell: move the Fl_Int_Input widget to specified row/column // Preload the widget with the cell's current value, // and make the widget 'appear' at the cell's location. // If R==-1, indicates column C is being edited // If C==-1, indicates row R is being edited // void start_editing(TableContext context, int R, int C) { // Keep track of cell being edited context_edit = context; row_edit = R; col_edit = C; // Clear any previous multicell selection if ( R<0 || C<0 ) set_selection(0,0,0,0); else set_selection(R,C,R,C); // Find X/Y/W/H of cell int X,Y,W,H; find_cell(context, R,C, X,Y,W,H); input->resize(X,Y,W,H); // Move Fl_Input widget there switch ( context ) { case CONTEXT_ROW_HEADER: Fl_Group::add(*input); // *** parent to nonscrollable group input->value(row_values[R]); break; case CONTEXT_COL_HEADER: Fl_Group::add(*input); // *** parent to nonscrollable group input->value(col_values[C]); break; case CONTEXT_CELL: table->add(*input); // *** parent to scrollable table input->value(cell_values[R][C]); break; default: // shouldn't happen input->value("?"); break; } input->position(0,strlen(input->value())); // Select entire input field input->show(); // Show the input widget, now that we've positioned it input->take_focus(); } // Tell the input widget it's done editing, and to 'hide' void done_editing() { if (input->visible()) { // input widget visible, ie. edit in progress? set_value_hide(); // Transfer its current contents to cell and hide } } }; // Handle drawing all cells in table void Spreadsheet::draw_cell(TableContext context, int R,int C, int X,int Y,int W,int H) { switch ( context ) { case CONTEXT_STARTPAGE: // table about to redraw break; case CONTEXT_COL_HEADER: // table wants us to draw a column heading (C is column) // don't draw this cell if it's being edited if ( context_edit == context && C == col_edit && input->visible()) { return; } fl_font(FL_HELVETICA | FL_BOLD, 14); // set font for heading to bold fl_push_clip(X,Y,W,H); // clip region for text { fl_draw_box(FL_THIN_UP_BOX, X,Y,W,H, col_header_color()); fl_color(FL_BLACK); fl_draw(col_values[C], X,Y,W,H, FL_ALIGN_CENTER); } fl_pop_clip(); return; case CONTEXT_ROW_HEADER: // table wants us to draw a row heading (R is row) // don't draw this cell if it's being edited if ( context_edit == context && R == row_edit && input->visible()) { return; } fl_font(FL_HELVETICA | FL_BOLD, 14); // set font for row heading to bold fl_push_clip(X,Y,W,H); { fl_draw_box(FL_THIN_UP_BOX, X,Y,W,H, row_header_color()); fl_color(FL_BLACK); fl_draw(row_values[R], X,Y,W,H, FL_ALIGN_CENTER); } fl_pop_clip(); return; case CONTEXT_CELL: { // table wants us to draw a cell // don't draw this cell if it's being edited if ( context_edit == context && R == row_edit && C == col_edit && input->visible()) return; // Background int highlight = is_selected(R,C) && context==context_edit; fl_draw_box(FL_THIN_UP_BOX, X,Y,W,H, highlight ? FL_YELLOW : FL_WHITE); // Text fl_push_clip(X+3, Y+3, W-6, H-6); { fl_color(FL_BLACK); fl_font(FL_HELVETICA, 14); // ..in regular font fl_draw(cell_values[R][C], X+3,Y+3,W-6,H-6, FL_ALIGN_RIGHT); } fl_pop_clip(); return; } case CONTEXT_RC_RESIZE: // table resizing rows or columns if ( input->visible() ) { find_cell(context_edit, row_edit, col_edit, X, Y, W, H); input->resize(X,Y,W,H); init_sizes(); } return; default: return; } } // Callback whenever someone clicks on different parts of the table void Spreadsheet::event_callback2() { int R = callback_row(); int C = callback_col(); TableContext context = callback_context(); switch ( context ) { case CONTEXT_ROW_HEADER: case CONTEXT_COL_HEADER: case CONTEXT_CELL: { // A table event occurred on a cell switch (Fl::event()) { // see what FLTK event caused it case FL_PUSH: // mouse click? done_editing(); // finish editing previous start_editing(context, R, C); return; case FL_KEYBOARD: // key press in table? if ( Fl::event_key() == FL_Escape ) exit(0); // ESC closes app done_editing(); // finish any previous editing if (C==cols()-1 || R==rows()-1) return; // no editing of totals column switch ( Fl::e_text[0] ) { case '0': case '1': case '2': case '3': // any of these should start editing new cell case '4': case '5': case '6': case '7': case '8': case '9': case '+': case '-': start_editing(context, R, C); input->handle(Fl::event()); // pass typed char to input break; case '\r': case '\n': // let enter key edit the cell start_editing(context, R, C); break; } return; } return; } case CONTEXT_TABLE: // A table event occurred on dead zone in table done_editing(); // done editing, hide return; default: return; } } int main() { Fl_Double_Window *win = new Fl_Double_Window(862, 322, "Fl_Table Spreadsheet"); Spreadsheet *table = new Spreadsheet(10, 10, win->w()-20, win->h()-20); #if FLTK_ABI_VERSION >= 10303 table->tab_cell_nav(1); // enable tab navigation of table cells (instead of fltk widgets) #endif table->tooltip("Use keyboard to navigate cells:\n" "Arrow keys or Tab/Shift-Tab"); // Table rows table->row_header(1); table->row_header_width(70); table->row_resize(1); table->rows(MAX_ROWS+1); // +1: leaves room for 'total row' table->row_height_all(25); // Table cols table->col_header(1); table->col_header_height(25); table->col_resize(1); table->cols(MAX_COLS+1); // +1: leaves room for 'total column' table->col_width_all(70); table->box(FL_THIN_UP_FRAME); // Show window win->end(); win->resizable(table); win->show(); return Fl::run(); }
| A resizable thumbnail viewer |
This demonstrates a browser of thumbnails with text, such that the thumbnails auto-wrap as the main window gets resized. Like the icon view of the Control Panel in Windows.
CAVEAT: The 'XXX' comments show workaround code I needed to make the thumbnails start in the right positions when the program opens. These hacks shouldn't be needed, but I couldn't figure out what exactly the issue was.. was too lazy to dive into Fl_Scroll/Fl_Group's internals to figure it out.
A resizable thumbnail viewer #include <FL/Fl.H> #include <FL/Fl_Double_Window.H> #include <FL/Fl_Scroll.H> #include <FL/Fl_Box.H> #include <FL/Fl_Pixmap.H> #include <FL/fl_ask.H> #include <stdio.h> // // Demonstrate simple scrollable thumbnail browser // erco@netcom.com 08/06/02 -- "Draggable Boxes on Scrollable Desk" demo // erco@seriss.com 06/29/16 -- Rewritten as thumbnail viewer // static const char *cat_xpm[] = { // XPM "50 34 4 1", " c black", "o c #ff9900", "@ c #ffffff", "# c None", "##################################################", "### ############################## ####", "### ooooo ########################### ooooo ####", "### oo oo ######################### oo oo ####", "### oo oo ####################### oo oo ####", "### oo oo ##################### oo oo ####", "### oo oo ################### oo oo ####", "### oo oo oo oo ####", "### oo oo ooooooooooooooo oo oo ####", "### oo ooooooooooooooooooooo oo ####", "### oo ooooooooooooooooooooooooooo ooo ####", "#### oo ooooooo ooooooooooooo ooooooo oo #####", "#### oo oooooooo ooooooooooooo oooooooo oo #####", "##### oo oooooooo ooooooooooooo oooooooo oo ######", "##### o ooooooooooooooooooooooooooooooo o ######", "###### ooooooooooooooooooooooooooooooooooo #######", "##### ooooooooo ooooooooo ooooooooo ######", "##### oooooooo @@@ ooooooo @@@ oooooooo ######", "##### oooooooo @@@@@ ooooooo @@@@@ oooooooo ######", "##### oooooooo @@@@@ ooooooo @@@@@ oooooooo ######", "##### oooooooo @@@ ooooooo @@@ oooooooo ######", "##### ooooooooo ooooooooo ooooooooo ######", "###### oooooooooooooo oooooooooooooo #######", "###### oooooooo@@@@@@@ @@@@@@@oooooooo #######", "###### ooooooo@@@@@@@@@ @@@@@@@@@ooooooo #######", "####### ooooo@@@@@@@@@@@ @@@@@@@@@@@ooooo ########", "######### oo@@@@@@@@@@@@ @@@@@@@@@@@@oo ##########", "########## o@@@@@@ @@@@@ @@@@@ @@@@@@o ###########", "########### @@@@@@@ @ @@@@@@@ ############", "############ @@@@@@@@@@@@@@@@@@@@@ #############", "############## @@@@@@@@@@@@@@@@@ ###############", "################ @@@@@@@@@ #################", "#################### #####################", "##################################################", }; // Manage arranging thumbnails in a viewer // Assumes thumbnails are all the same size. // class MyThumbnailViewer : public Fl_Scroll { int xsep; int ysep; // Rearrange the children based on new xywh void RearrangeChildren(int X, int Y, int W, int H) { int nchildren = children() - 2; // -2: ignore Fl_Scroll's two child scrollbars if ( nchildren < 1 ) return; int sw = ( scrollbar.visible() ) ? scrollbar.w() : 0; // Figure out how many thumbnails we can arrange horizontally int thumb_w = (child(0)->w() + xsep); // overall width of thumbnail, including separation int thumb_h = (child(0)->h() + ysep); // overall height of thumbnail, including separation int nw = (W - sw - xsep) / thumb_w; // max # thumbnails we can arrage horizontally before wrapping int remain = (W - sw - xsep) % thumb_w; // remainder of division if ( nw < 2 ) nw = 2; // minimum number of thumbs int left = X + xsep + (remain/2); // left edge of thumb arrangement int top = Y + ysep; // top edge of thumb arrangement // Now walk the children, moving them around int tx = left; int ty = top; for ( int i=0; i<nchildren; i++ ) { Fl_Widget *w = child(i); w->position(tx,ty); if ( (i % nw) == (nw - 1) ) { // wrap? ty += thumb_h; // advance to next row tx = left; // reset to left } else { // no wrap? tx += thumb_w; // just advance to next right position } } } void resize(int X, int Y, int W, int H) { RearrangeChildren(X,Y,W,H); // move children around to fit new size Fl_Scroll::resize(X,Y,W,H); // let Fl_Scroll handle the new arrangement } public: MyThumbnailViewer(int X, int Y, int W, int H, const char *L=0) : Fl_Scroll(X,Y,W,H,L) { xsep = 5; ysep = 5; } // Set the x/y separation between thumbnails void separation(int X, int Y) { xsep = X; ysep = Y; autoarrange(); } // Force auto-arrangement of children void autoarrange() { RearrangeChildren(x(),y(),w(),h()); // init_sizes(); // XXX: doesn't help Fl_Scroll::redraw(); } void draw() { // XXX: this trick shouldn't be needed, but without it // children initially start in really strange positions static int first = 1; if ( first ) { autoarrange(); first = 0; } Fl_Scroll::draw(); } }; Fl_Double_Window *G_win = NULL; MyThumbnailViewer *G_thumbview = NULL; static Fl_Pixmap G_cat(cat_xpm); // A THUMBNAIL WITH AN IMAGE IN IT class Thumbnail : public Fl_Box { int handle(int event) { int ret = 0; switch ( event ) { case FL_PUSH: if ( Fl::event_button() == 1 ) { ret = 1; } break; case FL_RELEASE: if ( Fl::event_button() == 1 && Fl::event_inside(x(),y(),w(),h()) ) { ret = 1; fl_alert("thumbnail '%s' clicked", label()); } break; } return Fl_Box::handle(event) | ret; } public: Thumbnail(int X, int Y, int W, int H, const char *L=0) : Fl_Box(X,Y,W,H,L) { image(G_cat); box(FL_UP_BOX); color(FL_GRAY); } }; /// MAIN int main() { G_win = new Fl_Double_Window(600,400); G_thumbview = new MyThumbnailViewer(10,10,G_win->w()-20,G_win->h()-20); G_thumbview->separation(30,30); // set separation between thumbnails G_thumbview->box(FL_FLAT_BOX); G_thumbview->color(Fl_Color(46)); G_thumbview->begin(); { // CREATE A BUNCH OF NEW BOXES // We'll let the thumb viewer position them on x/y, // so we can create them all in the same x/y position.. // char s[20]; for ( int t=0; t<40; t++ ) { // create 30 instances Thumbnail *tn = new Thumbnail(0,0,80,50); sprintf(s, "%04d", t); // label each instance e.g. "0000" tn->copy_label(s); } } G_thumbview->end(); G_thumbview->autoarrange(); // XXX: should set initial positions, but doesn't? G_win->end(); G_win->resizable(G_win); G_win->show(); return(Fl::run()); }

| Drag and drop reordering of Fl_Browser items |
Demonstrates an Fl_Browser that allows drag and dropping single items to reorder them.
Necessarily, this disables "click-and-drag" selections in a multi-browser, but you can still use "ctrl-click-and-drag" to make selections, and "shift-click" can be used to extend selections.
All modifier behaviors are preserved (Alt/Shift/Ctrl/Meta + click). Only non-modifier "left-click-drag" is used for DND reordering.
The important bits are shown in green.
Drag and drop reordering of Fl_Browser items #include <FL/Fl.H> #include <FL/Fl_Double_Window.H> #include <FL/Fl_Browser.H> #include <FL/fl_draw.H> #include <string.h> // sprintf() // // Demonstrate draggable Fl_Browser item reordering - erco@seriss.com 07/01/16 // class MyBrowser : public Fl_Browser { void *dragitem; char was_moved; void change_cursor(Fl_Cursor newcursor) { fl_cursor(newcursor, FL_BLACK, FL_WHITE); } void *item_under_mouse() { int X,Y,W,H; bbox(X,Y,W,H); if (!Fl::event_inside(X,Y,W,H)) return 0; // probably scrollbar return find_item(Fl::event_y()); } int handle(int event) { switch ( event ) { case FL_PUSH: { // See if left mouse click might be starting an item drag.. int modifiers = FL_SHIFT|FL_CTRL|FL_ALT|FL_META; if ( Fl::event_button() == 1 && // left button? ((Fl::event_state() & modifiers) == 0) // no modifiers? ) { if ( (dragitem = item_under_mouse()) ) { // find item clicked on Fl_Browser_::select_only(dragitem,0); // select item (for visibility) change_cursor(FL_CURSOR_HAND); // change cursor was_moved = 0; return(1); // prevent Fl_Browser from seeing event } } break; } case FL_DRAG: { if ( dragitem ) { void *dst_item = item_under_mouse(); if ( dst_item != dragitem ) { item_swap(dragitem, dst_item); Fl_Browser_::select(dragitem, 1, 0); // (keeps focus box on dragged item) was_moved = 1; redraw(); } return(1); // prevent Fl_Browser from seeing event } break; } case FL_RELEASE: { if ( dragitem ) { change_cursor(FL_CURSOR_DEFAULT); // ensure normal cursor if ( was_moved ) { Fl_Browser_::select(dragitem,0,0); // deselect dragged item redraw(); } dragitem = 0; // disable item drag mode was_moved = 0; return(1); // prevent Fl_Browser from seeing event } break; } } return Fl_Browser::handle(event); } public: MyBrowser(int X,int Y,int W,int H) : Fl_Browser(X,Y,W,H) { dragitem = 0; was_moved = 0; } ~MyBrowser() { } }; int main(int argc, char **argv) { char s[80]; Fl_Double_Window *win = new Fl_Double_Window(300,600); win->begin(); MyBrowser *brow = new MyBrowser(10,10,win->w()-20,win->h()-20); brow->type(FL_MULTI_BROWSER); // test multi-browser widget.. for ( int t=0; t<50; t++ ) // Add 50 numbered items { sprintf(s, "item %d", t); brow->add(s); } win->end(); win->resizable(brow); win->show(); return Fl::run(); }
| A commercial aircraft altimeter FLTK widget |
Demonstrate simulating a mechnical commercial aircraft altimeter with analog needle and rolling digits using FLTK.
OpenGL is /not/ used here; only simple FLTK drawing calls are used.
Makes use of real time compositing PNG files with alpha channels to approach realism to simulate a mechanical instrument. The rolling drum tape image, altimeter dial image, and faceplate image are composited together in real time to form the complete instrument.
The rolling drum numbers are done with a long thin 'tape' image that is scrolled up or down to form the digit display. The 10k digit tape has a special tape roll with red/white hash marks for '9' (indicating below sea level), and black/white hash marks for '0'. Shadows over the digits are done with alpha channels in the 'dial' image.
Note: To run this demo, you'll need to have these four altimeter PNG images in the same directory as the executable.
Caveats: Would have liked to have rendered the needle as an image, but to date, FLTK's simple image drawing routines don't yet support fine degrees of rotation. [EDIT 04/19/2018: Hey, now that fltk includes nanosvg, this would actually be very easy. Too bad I wrote the demo before svg was added to fltk, as I'd probably do a lot differently and more easily. Maybe someday I'll retool the demo to use svg, which provides not only rotation/translation, but antialiased lines which will make the spinning needle look a lot nicer] Spent a few hours on this demo, and most of that time was spent painting the images.
Mechanical Aircraft Altimeter FLTK Widget #include <stdio.h> #include <string.h> #include <FL/Fl.H> #include <FL/Fl_Double_Window.H> #include <FL/Fl_Shared_Image.H> #include <FL/Fl_PNG_Image.H> #include <FL/fl_draw.H> #include <math.h> #define ABS(v) (((v)>0)?(v):(-(v))) //#define SCREEN_RECORD 1 /* uncomment to record animation on linux */ // // FLTK Altimeter widget - erco@seriss.com 07/23/16 // // Includes main() to test the widget. // class Altimeter : public Fl_Group { int alt; // altitude in feet Fl_PNG_Image *drum000; Fl_PNG_Image *drum10k; Fl_PNG_Image *dial; Fl_PNG_Image *face; public: Altimeter(int X,int Y,int W, int H) : Fl_Group(X,Y,W,H) { alt = 0; // Assume these images are in the same dir as executable drum000 = new Fl_PNG_Image("alt-drumtape.png"); // 0-9 normal drum10k = new Fl_PNG_Image("alt-drumtape-10k.png"); // 0=blk/wht hash, 9=red/wht hash dial = new Fl_PNG_Image("alt-dial.png"); // dial with window for digits face = new Fl_PNG_Image("alt-faceplate.png"); // face plate / glass / baro knob } void SetAltitude(int val) { alt = val; } int GetAltitude() const { return alt; } // Draw pointer with center at xc,yc, radius, and pointer rotary position 'f', // where 'f' is a fractional value between 0.0 and 1.0: // 0.0 -- top position ("12 o'clock") // 0.5 -- bottom position ("6 o'clock") // void draw_pointer(int xc, int yc, int radius, float f) { const float ang = M_PI - (f * (M_PI*2)); const float xa = sin(ang), ya = cos(ang); int x1 = xc + xa * (radius*.40); // blk thin needle / wht thin needle int y1 = yc + ya * (radius*.40); int x2 = xc + xa * (radius*.75); // wht thin needle / wht fat pointer int y2 = yc + ya * (radius*.75); int x3 = xc + xa * (radius*.96); // wht fat pointer / taper.. int y3 = yc + ya * (radius*.96); int x4 = xc + xa * (radius*.98); int y4 = yc + ya * (radius*.98); int x5 = xc + xa * (radius*1.0); int y5 = yc + ya * (radius*1.0); // Draw black part of needle fl_line_style(FL_SOLID,2,0); fl_color(FL_BLACK); fl_line(xc,yc,x1,y1); // Draw white part of needle fl_line_style(FL_SOLID,3,0); fl_color(0xdbd6c700); fl_line(x1,y1,x2,y2); fl_line_style(FL_SOLID,8,0); fl_color(0xdbd6c700); fl_line(x2,y2,x3,y3); fl_line_style(FL_SOLID,4,0); fl_color(0xdbd6c700); fl_line(x3,y3,x4,y4); fl_line_style(FL_SOLID,2,0); fl_color(0xdbd6c700); fl_line(x4,y4,x5,y5); fl_line_style(0); } void draw() { Fl_Group::draw(); fl_push_clip(x(),y(),w(),h()); // clip masks out drum tape { // Digits are 25 pixels high // When a digit is 9 -> 0, next digit should start rolling // and be done by the time 0 shows up. // // TAPE YPOS TAPE YPOS // - -- 0 : // 0 - -- 200 // - -- 25 8 // 1 - -- 225 // - -- 50 9 // 2 - -- 250 // - -- 75 0 // : // int a = (alt > 0) ? alt : 100000+alt; // handle below sealevel int off = ((a/4) % 25); // offset used to roll drum int d100 = 253 - ((a/100) % 10) * 25 - off; int d1000 = 253 - ((a/1000) % 10) * 25; int d10000 = 253 - ((a/10000) % 10) * 25; if ( a % 1000 >= 900 ) d1000 -= off; // rollover 1k digit during 100's 9->0 if ( a % 10000 >= 9900 ) d10000 -= off; // rollover 10k digit during 1000's 9->0 // Draw drum tape numbers first drum10k->draw(x()+65+25*0, y()+115-d10000); // +65: offset of drum window from left drum000->draw(x()+65+25*1, y()+115-d1000); // +115: offset of drum window from top drum000->draw(x()+65+25*2, y()+115-d100); // 25: height of digits on tape // Draw dial mask over drum tape dial->draw(x(), y()); // Draw pointer over dial float f = (a%1000) / 1000.0; // 0-1000 -> 0.0 - 1.0 draw_pointer(x()+153, y()+150, 115, f); // Draw face plate and glass over everything face->draw(x(), y()); } fl_pop_clip(); } }; Altimeter *G_alt = 0; // Timeout callback to animate pointer for testing void ChangeAltitudeCallback(void*) { #ifdef SCREEN_RECORD // OPTIONAL SCREEN GRABBER CODE: I used this to screengrab // the altimeter as an animation, ensuring I got every frame. // Another way to do this would be to screen record from outside the app using: // ffmpeg -f x11grab -r 25 -s 320x320 -i :0.0+0,24 -vcodec libvpx -b 512k output.webm { static int count = 0; char cmd[400]; Fl::wait(.25); sprintf(cmd, "import -window %ld /tmp/alt-%04d.png; " "ls -la /tmp/alt-%04d.png", long(fl_xid(G_alt->window())), count, count); system(cmd); ++count; if ( G_alt->GetAltitude() >= 12000 ) { // stop at particular altitude system("echo Creating animation..; " // and create mp4/ogg movies, exit "ffmpeg -y -f image2 -loop_output 0 -i /tmp/alt-%04d.png /tmp/alt-anim.mp4;" "ffmpeg -y -f image2 -loop_output 0 -i /tmp/alt-%04d.png /tmp/alt-anim.ogg;" "echo CREATED: ; ls -la /tmp/alt-anim.{mp4,ogg}"); exit(0); } } #endif static int delta = 5; // current speed delta if ( G_alt->GetAltitude() >= 14500 ) delta = -5; // when reached, change to descending altitude if ( G_alt->GetAltitude() <= -2500 ) delta = +5; // when reached, change to ascending altitude G_alt->SetAltitude(G_alt->GetAltitude() + delta); G_alt->redraw(); Fl::repeat_timeout(.02, ChangeAltitudeCallback); } int main() { fl_register_images(); Fl_Double_Window win(320,320,"Altimeter"); G_alt = new Altimeter(10,10,300,300); G_alt->SetAltitude(0); // starting altitude win.show(); Fl::add_timeout(.02, ChangeAltitudeCallback); return(Fl::run()); }
| Mandelbox viewer |
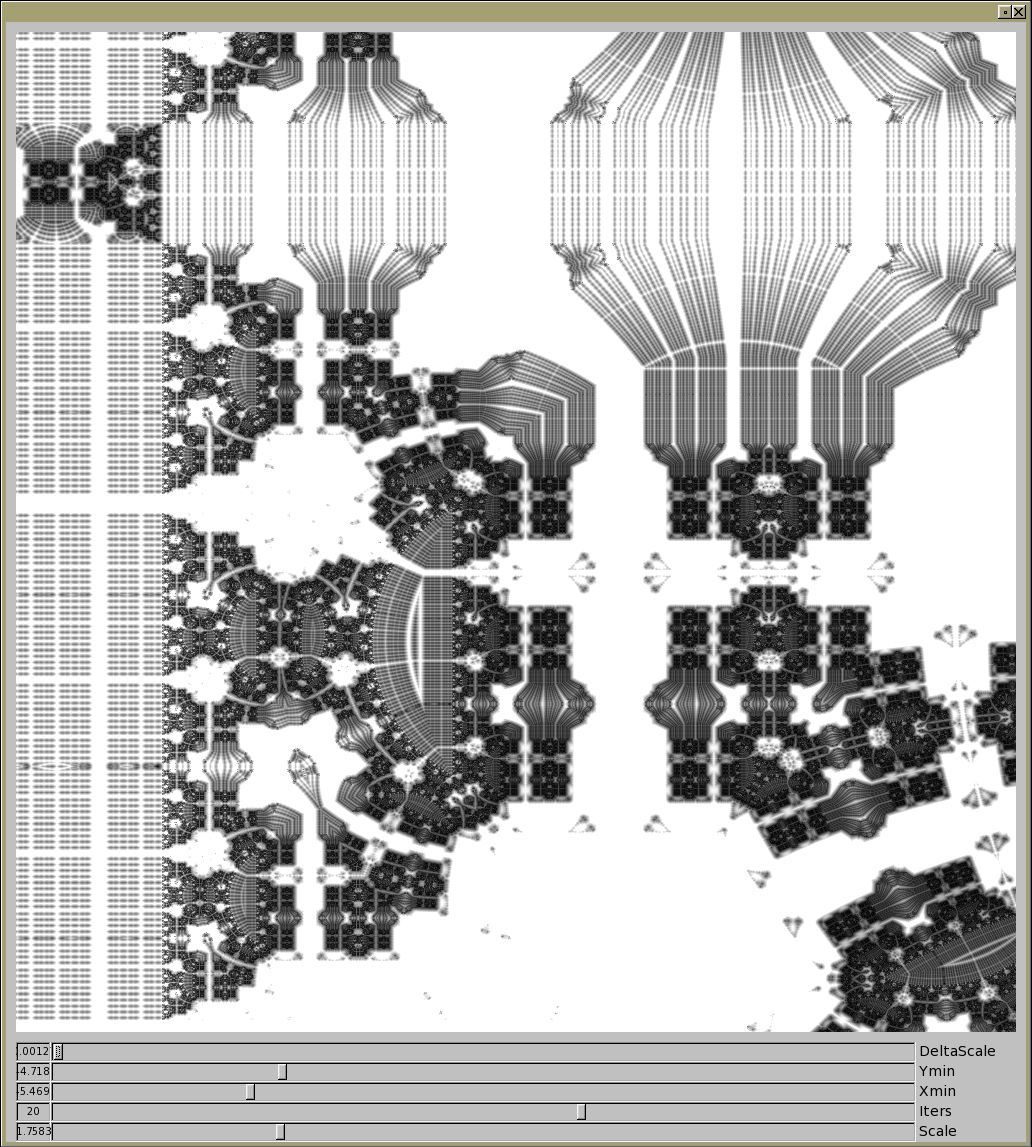
A very simple 2D Mandelbox viewer.
Even in 2D and black and white, this thing's more fun than a barrel of monkeys!
Mandelbox Viewer #include <FL/Fl.H> #include <FL/Fl_Window.H> #include <FL/Fl_Box.H> #include <FL/Fl_Value_Slider.H> #include <FL/fl_draw.H> #include <math.h> // // 2d Mandelbox browser - erco 8/23/16 // // v1.0 - 08/23/2016 - Initial implementation // v1.1 - 09/12/2023 - Fix resizing bug // // Reference: http://www.fractalforums.com/programming/mandelbox-2d-vs-3d-and-bailing/ // // Build with: fltk-config --use-images --compile mandelbox.cxx // #define WIDTH 1000 #define HEIGHT 1000 class Mandelbox : public Fl_Box { int _w, _h; float _scale; int _maxIterations; float _xoff; float _yoff; float _zoom; unsigned char *_pixels; public: Mandelbox(int X,int Y,int W,int H):Fl_Box(X,Y,W,H) { _w = W; _h = H; _scale = 2.0; _maxIterations = 20; _xoff = -8.0; _yoff = -8.0; _zoom = 1.0; _pixels = new unsigned char[3 * _w * _h]; // rgb box(FL_FLAT_BOX); } void draw(); void SetScale(float val) { _scale = val; redraw(); } float GetScale() { return _scale; } void SetMaxIterations(float val) { _maxIterations = val; redraw(); } float GetMaxIterations() { return _maxIterations; } void SetXoff(float val) { _xoff = val; redraw(); } float GetXoff() { return _xoff; } void SetYoff(float val) { _yoff = val; redraw(); } float GetYoff() { return _yoff; } void SetZoom(float val) { _zoom = val; redraw(); } float GetZoom() { return _zoom; } }; void Mandelbox::draw() { // First see if window has been resized. If so, adjust size of _pixels[] array if ( _w != w() || _h != h() ) { delete _pixels; _w = w(); _h = h(); // update size change _pixels = new unsigned char[3 * _w * _h]; // rgb } float delta = (16.0 * _zoom)/fmax(w(), h()); float colorMap = 1.0/delta*255.0; float xStart = _xoff-fmin((w()-h())*0.5*delta, 0.0); float yStart = _yoff-fmin((h()-w())*0.5*delta, 0.0); unsigned char *pixel = _pixels; float cx = xStart; float maxval = 0; float cy = yStart; for (int j = 0; j < h(); j++) { cx = xStart; for (int i = 0; i < w(); i++) { float zx = cx; float zy = cy; float d = 1.0; for (int k = 0; k < _maxIterations; k++) { if (zx > 1.0) zx = 2.0-zx; else if (zx < -1.0) zx = -2.0-zx; if (zy > 1.0) zy = 2.0-zy; else if (zy < -1.0) zy = -2.0-zy; float dot = zx*zx+zy*zy; if (dot < 0.5) { zx *= 2.0; zy *= 2.0; d *= 2.0; } else if (dot < 1.0) { float inversion = 1.0/dot; zx *= inversion; zy *= inversion; d *= inversion; } zx = _scale*zx+cx; zy = _scale*zy+cy; d = d*_scale+1.0; } float dist = sqrt(zx*zx+zy*zy)/d; int val = fmin((int)(dist*colorMap), 255); //DEBUG if ( val > maxval ) maxval = val; *pixel++ = val; // r *pixel++ = val; // g *pixel++ = val; // b cx += delta; } cy += delta; } fl_draw_image(_pixels, x(), y(), w(), h(), 3); // rgb //DEBUG printf("delta=%f maxval=%f scale=%f\n", delta, maxval, _scale); } Mandelbox *G_mbox; void SliderCallback(Fl_Widget *w, void *data) { Fl_Value_Slider *slider = (Fl_Value_Slider*)w; if ( strcmp(slider->label(), "Scale")==0) G_mbox->SetScale(slider->value()); if ( strcmp(slider->label(), "Iters")==0) G_mbox->SetMaxIterations(slider->value()); if ( strcmp(slider->label(), "Xoff" )==0) G_mbox->SetXoff(slider->value()); if ( strcmp(slider->label(), "Yoff" )==0) G_mbox->SetYoff(slider->value()); if ( strcmp(slider->label(), "Zoom" )==0) G_mbox->SetZoom(slider->value()); } int main() { const int vwidth = 80; Fl_Window win(WIDTH+20,HEIGHT+120); G_mbox = new Mandelbox(10,10,WIDTH,HEIGHT); Fl_Value_Slider delta(10,win.h()-100,WIDTH-100,20,"Zoom"); delta.align(FL_ALIGN_RIGHT); delta.type(FL_HORIZONTAL); delta.value(G_mbox->GetZoom()); delta.bounds(0.0,8.0); delta.step(.00001); delta.value_width(vwidth); delta.callback(SliderCallback); Fl_Value_Slider xoff(10,win.h()-80,WIDTH-100,20,"Xoff"); xoff.align(FL_ALIGN_RIGHT); xoff.type(FL_HORIZONTAL); xoff.value(G_mbox->GetXoff()); xoff.bounds(-10,10); xoff.step(.001); xoff.value_width(vwidth); xoff.callback(SliderCallback); Fl_Value_Slider yoff(10,win.h()-60,WIDTH-100,20,"Yoff"); yoff.align(FL_ALIGN_RIGHT); yoff.type(FL_HORIZONTAL); yoff.value(G_mbox->GetYoff()); yoff.bounds(-10,10); yoff.step(.001); yoff.value_width(vwidth); yoff.callback(SliderCallback); Fl_Value_Slider iters(10,win.h()-40,WIDTH-100,20,"Iters"); iters.align(FL_ALIGN_RIGHT); iters.type(FL_HORIZONTAL); iters.value(G_mbox->GetMaxIterations()); iters.bounds(4,30); iters.step(1); iters.value_width(vwidth); iters.callback(SliderCallback); Fl_Value_Slider scale(10,win.h()-20,WIDTH-100,20,"Scale"); scale.align(FL_ALIGN_RIGHT); scale.type(FL_HORIZONTAL); scale.value(G_mbox->GetScale()); scale.bounds(-.1,7); scale.step(.0001); scale.value_width(vwidth); scale.callback(SliderCallback); win.end(); win.resizable(win); win.show(); return Fl::run(); }
| Fl_SVG_Image: A simple example |
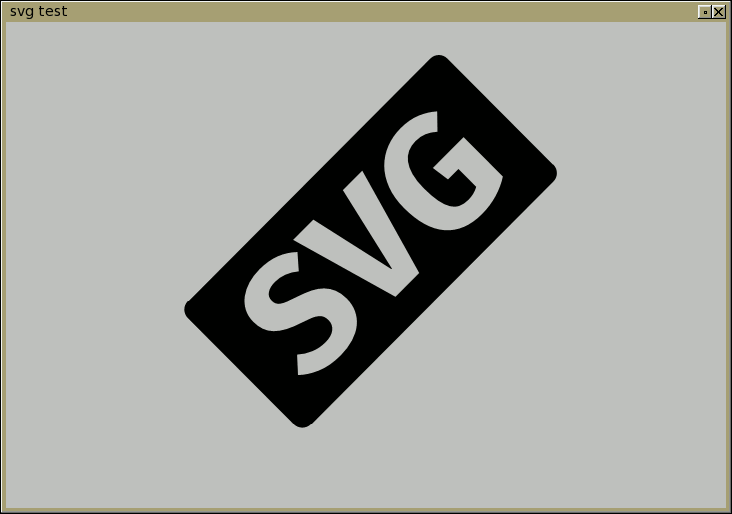
A simple example of how to load and display an SVG image.
This demonstrates how to display an in-code SVG image using FLTK's built in nanosvg support (in FLTK 1.4.0 and up). SVG images are great in that they're ASCII vector format images that are easy to edit in a text editor, support shapes and full transforms including rotation, complete with curves and antialiasing. Perfect for icons and widget scheming.
Simple example to display an SVG image #include <FL/Fl.H> #include <FL/Fl_Window.H> #include <FL/Fl_Box.H> #include <FL/Fl_SVG_Image.H> #include <FL/Fl_Shared_Image.H> // // Demonstrate how to use FLTK's nanosvg support (new in 1.4.0) --erco 10/29/2017 // To build this program w/fltk 1.4 (or higher): // fltk-config --use-images --compile thisdemo.cxx // // The svg logo with 'rotate(-45 320 240) added to rotate it around its center const char *svg_logo = "<?xml version=\"1.0\" encoding=\"utf-8\"?>\n" "<!-- Generator: Adobe Illustrator 13.0.0, SVG Export Plug-In . SVG Version: 6.00 Build 14948) -->\n" "<!DOCTYPE svg PUBLIC \"-//W3C//DTD SVG 1.1//EN\" \"http://www.w3.org/Graphics/SVG/1.1/DTD/svg11.dtd\">\n" "<svg version=\"1.1\" id=\"Layer_1\" xmlns=\"http://www.w3.org/2000/svg\" xmlns:xlink=\"http://www.w3.org/1999/xlink\" x=\"0px\" y=\"0px\"\n" " width=\"640px\" height=\"480px\" viewBox=\"0 0 640 480\" enable-background=\"new 0 0 640 480\" xml:space=\"preserve\">\n" "<path transform=\"rotate(-45 320 240)\" d=\"M282.658,250.271c0,5.31-1.031,10.156-3.087,14.543c-2.059,4.387-4.984,8.152-8.774,11.293\n" " c-3.793,3.144-8.477,5.58-14.055,7.312c-5.581,1.731-11.836,2.601-18.767,2.601c-9.968,0-18.605-1.572-25.917-4.713\n" " s-13.299-6.986-17.955-11.536l13.812-15.111c4.116,3.684,8.584,6.499,13.405,8.449c4.819,1.95,9.993,2.925,15.518,2.925\n" " c5.525,0,9.856-1.219,12.999-3.656c3.141-2.438,4.712-5.769,4.712-9.993c0-2.056-0.3-3.844-0.894-5.361\n" " c-0.596-1.517-1.653-2.925-3.168-4.226c-1.518-1.3-3.549-2.519-6.093-3.655c-2.546-1.138-5.768-2.301-9.668-3.494\n" " c-6.5-2.056-11.943-4.25-16.33-6.58c-4.387-2.328-7.937-4.9-10.643-7.719c-2.709-2.815-4.659-5.931-5.849-9.343\n" " c-1.193-3.412-1.788-7.23-1.788-11.455c0-5.2,1.082-9.831,3.25-13.893c2.166-4.062,5.144-7.5,8.937-10.318\n" " c3.791-2.815,8.178-4.956,13.162-6.418c4.981-1.462,10.343-2.193,16.086-2.193c8.449,0,15.842,1.247,22.179,3.737\n" " c6.337,2.493,11.997,6.121,16.98,10.887l-12.674,14.624c-7.583-6.281-15.655-9.424-24.21-9.424c-4.875,0-8.721,0.95-11.537,2.844\n" " c-2.818,1.896-4.225,4.578-4.225,8.043c0,1.843,0.297,3.412,0.894,4.712c0.594,1.3,1.65,2.519,3.168,3.656\n" " c1.516,1.137,3.656,2.249,6.418,3.331c2.763,1.084,6.309,2.33,10.643,3.736c5.306,1.734,10.046,3.631,14.218,5.688\n" " c4.169,2.06,7.662,4.524,10.48,7.394c2.815,2.871,4.981,6.174,6.5,9.911C281.898,240.603,282.658,245.071,282.658,250.271z\n" " M335.953,260.833l20.637-90.181h27.46l-32.011,112.604h-33.634l-32.173-112.604h28.598l20.311,90.181H335.953z M437.832,286.019\n" " c-16.357,0-28.896-5.01-37.615-15.03c-8.722-10.019-13.081-24.779-13.081-44.278c0-9.531,1.407-17.98,4.225-25.348\n" " c2.815-7.366,6.688-13.54,11.618-18.524c4.928-4.981,10.668-8.747,17.223-11.293c6.555-2.544,13.568-3.818,21.043-3.818\n" " c8.23,0,15.436,1.3,21.611,3.899c6.174,2.6,11.537,5.959,16.086,10.075l-14.137,14.624c-3.467-3.032-6.906-5.281-10.318-6.744\n" " s-7.393-2.193-11.941-2.193c-4.01,0-7.693,0.731-11.051,2.193s-6.256,3.793-8.691,6.987c-2.438,3.196-4.334,7.287-5.688,12.268\n" " c-1.355,4.984-2.031,10.996-2.031,18.037c0,7.367,0.486,13.567,1.463,18.604c0.975,5.037,2.408,9.1,4.305,12.187\n" " c1.895,3.087,4.307,5.309,7.23,6.662c2.926,1.355,6.338,2.031,10.238,2.031c5.631,0,10.613-1.244,14.947-3.737v-25.186h-14.785\n" " l-2.6-18.849h43.547v55.57c-5.85,3.793-12.297,6.718-19.336,8.774C453.051,284.987,445.631,286.019,437.832,286.019z M523.5,151.5\n" " c0-6.627-5.373-12-12-12h-343c-6.627,0-12,5.373-12,12v150c0,6.627,5.373,12,12,12h343c6.627,0,12-5.373,12-12V151.5z\"/>\n" "</svg>\n"; int main(int argc, char **argv) { Fl_SVG_Image *svg = new Fl_SVG_Image(NULL, (char*)strdup(svg_logo)); // XXX: strdup() shouldn't be needed -- see STR #3421 Fl_Window *win = new Fl_Window(720, 486, "svg test"); Fl_Box *box = new Fl_Box(10,10,720-20,486-20); box->image(svg); win->end(); win->show(argc,argv); return(Fl::run()); }
| A working analog Simplex clock using nanoSVG |
This is a fully working analog "Simplex" clock implemented using FLTK's new nanoSVG support (now included in FLTK 1.4.x and up).
This demonstrates how to abuse FLTK's new nanoSVG support to draw nice antialiased lines in a smoothly moving analog clock widget, generating dynamic SVG content to drive the clock's animation.
This is slightly insane, as sprintf() is having to work pretty hard here, generating a large block of ascii text many times a second, but is surprisingly workable, and gives a nice antialiased result.
Due to the slightly large SVG content for the clock face, I'm including a link to the code here, instead of having the code inline on this page.
| Fl_Center - Keeps a fixed sized widget centered |
![]()
Demonstrate how to derive a group that handles keeping its single child of fixed width and height centered.
AFAIK, FLTK doesn't provide a way to do this with either Fl_Pack or resizable()s.
Deriving a class from Fl_Group seems like a simple enough solution, but it only works for a single child.
Fl_Center - Generic container to keep a single fixed-sized child widget centered #include <stdio.h> #include <FL/Fl.H> #include <FL/Fl_Double_Window.H> #include <FL/Fl_Box.H> // A group that can keep a /single child/ centered class Fl_Center : public Fl_Group { int centerx(Fl_Widget *wid) { return x() + (w()/2) - (wid->w()/2); } int centery(Fl_Widget *wid) { return y() + (h()/2) - (wid->h()/2); } public: Fl_Center(int X,int Y,int W,int H,const char *L=0) : Fl_Group(X,Y,W,H,L) { } void resize(int X,int Y,int W,int H) { Fl_Widget::resize(X,Y,W,H); // dont use Fl_Group::resize() if ( children() > 0 ) { // assume one child Fl_Widget *cw = child(0); cw->resize(centerx(cw), centery(cw), cw->w(), cw->h()); // center child } } void end() { Fl_Group::end(); resize(x(), y(), w(), h()); // force resize of child } }; int main(int argc, char **argv) { Fl_Double_Window *win = new Fl_Double_Window(400,300); Fl_Center *grp = new Fl_Center(10,10,400-20,300-20); grp->box(FL_FLAT_BOX); grp->color(FL_DARK1); // make 'center group' visible grp->begin(); { // Your widget (to always be centered) Fl_Box *box = new Fl_Box(1, 1, 100, 80); // x/y will be changed by Fl_Center, w,h will be fixed box->box(FL_FLAT_BOX); box->color(FL_RED); // make widget visible } grp->end(); // must call this win->end(); win->resizable(win); // make window resizable win->show(); return(Fl::run()); }
| TreeWithColumns - Extend Fl_Tree to show columns of hierarchical data |
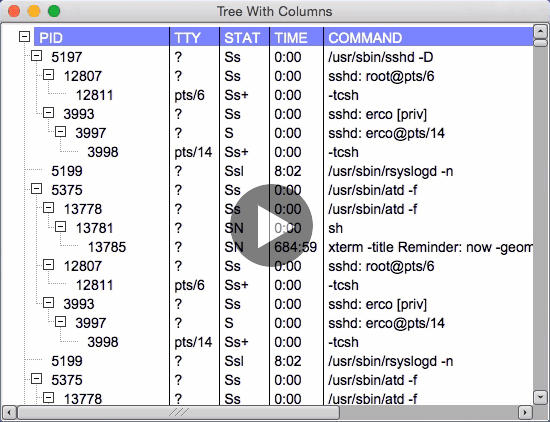
Demonstrates how to extend the Fl_Tree widget to show hierarchical data organized in vertical columns.
TBD:
- Bug if you interactively resize cols while horiz scrollbar is moved to a non-default position
- Some form of this should be added to FLTK as e.g. "Fl_Tree_Columns".
TreeWithColumns - Extend Fl_Tree to include columns of data // vim: autoindent tabstop=8 shiftwidth=2 expandtab softtabstop=2 #include <stdio.h> #include <FL/Fl.H> #include <FL/Fl_Double_Window.H> #include <FL/Fl_Tree.H> // // Demonstrate Fl_Tree with character delimited interactively resizable columns // erco 08/23/2019 // #define LEFT_MARGIN 5 // TBD: Make this a class attribute const char * const tree_open_xpm[] = { "11 11 3 1", ". c #fefefe", "# c #444444", "@ c #000000", "###########", "#.........#", "#.........#", "#....@....#", "#....@....#", "#..@@@@@..#", "#....@....#", "#....@....#", "#.........#", "#.........#", "###########" }; const char * const tree_close_xpm[] = { "11 11 3 1", ". c #fefefe", "# c #444444", "@ c #000000", "###########", "#.........#", "#.........#", "#.........#", "#.........#", "#..@@@@@..#", "#.........#", "#.........#", "#.........#", "#.........#", "###########" }; // DERIVE CUSTOM CLASS FROM Fl_Tree_Item TO SHOW DATA IN COLUMNS class TreeRowItem : public Fl_Tree_Item { public: TreeRowItem(Fl_Tree *tree, const char *text) : Fl_Tree_Item(tree) { this->label(text); } int draw_item_content(int render); }; // Small convenience class to handle adding columns. // TreeRowItem does most of the work. // class TreeWithColumns : public Fl_Tree { bool colseps_flag; // enable/disable column separator lines bool resizing_flag; // enable/disable interactive resizing char col_char; // column delimiter character int *col_widths; // array of column widths (supplied by application) int first_col_minw; // minimum width of first column int drag_col; // internal: column being FL_DRAG'ed Fl_Cursor last_cursor; // internal: last mouse cursor value protected: int column_near_mouse() { // Event not inside browser area? (eg. scrollbar) Early exit if ( !Fl::event_inside(_tix,_tiy,_tiw,_tih) ) return(-1); int mousex = Fl::event_x() + hposition(); int colx = x() + first_col_minw; for ( int t=0; col_widths[t]; t++ ) { colx += col_widths[t]; int diff = mousex - colx; // Mouse near column? Return column # if ( diff >= -4 && diff <= 4 ) return(t); } return(-1); } // Change the mouse cursor // Does nothing if cursor already set to same value. // void change_cursor(Fl_Cursor newcursor) { if ( newcursor == last_cursor ) return; window()->cursor(newcursor); last_cursor = newcursor; } public: TreeWithColumns(int X,int Y,int W,int H,const char *L=0) : Fl_Tree(X,Y,W,H,L) { colseps_flag = true; resizing_flag = true; col_char = '\t'; col_widths = 0; first_col_minw = 80; drag_col = -1; last_cursor = FL_CURSOR_DEFAULT; // We need the default tree icons on all platforms. // For some reason someone made Fl_Tree have different icons on the Mac, // which doesn't look good for this application, so we force the icons // to be consistent with the '+' and '-' icons and dotted connection lines. // connectorstyle(FL_TREE_CONNECTOR_DOTTED); openicon(new Fl_Pixmap(tree_open_xpm)); closeicon(new Fl_Pixmap(tree_close_xpm)); } // The minimum width of column #1 in pixels. // During interactive resizing, don't allow first column to be smaller than this. // int first_column_minw() { return first_col_minw; } void first_column_minw(int val) { first_col_minw = val; } // Enable/disable the vertical column lines void column_separators(bool val) { colseps_flag = val; } bool column_separators() const { return colseps_flag; } // Enable/disable the vertical column lines void resizing(bool val) { resizing_flag = val; } bool resizing() const { return resizing_flag; } // Change the column delimiter character void column_char(char val) { this->col_char = val; } char column_char() const { return col_char; } // Set the column array. // Make sure the last entry is zero. // User allocated array must remain allocated for lifetime of class instance. // Must be large enough for all columns in data! // void column_widths(int *val) { this->col_widths = val; } int *column_widths() const { return col_widths; } TreeRowItem *AddRow(const char *s, TreeRowItem *parent_item=0) { TreeRowItem *item = new TreeRowItem(this, s); // create new item if ( parent_item == 0 ) { // wants root item as parent? if ( strcmp(root()->label(), "ROOT")==0 ) { // default root item? this->root(item); // make this item the new root // Special colors for root item -- this is the "header" item->labelfgcolor(0xffffff00); item->labelbgcolor(0x8888ff00); return item; } else { parent_item = (TreeRowItem*)root(); // use root as parent } } parent_item->add(prefs(), "", item); // add item to hierarchy return item; // return the new item } // Manage column resizing int handle(int e) { if ( !resizing_flag ) return Fl_Tree::handle(e); // resizing off? early exit // Handle column resizing int ret = 0; switch ( e ) { case FL_ENTER: ret = 1; break; case FL_MOVE: change_cursor( (column_near_mouse() >= 0) ? FL_CURSOR_WE : FL_CURSOR_DEFAULT); ret = 1; break; case FL_PUSH: { int whichcol = column_near_mouse(); if ( whichcol >= 0 ) { // Clicked on resizer? Start dragging that column drag_col = whichcol; change_cursor(FL_CURSOR_DEFAULT); return 1; // eclipse event from Fl_Tree's handle() } break; } case FL_DRAG: if ( drag_col != -1 ) { // Sum up column widths to determine position int mousex = Fl::event_x() + hposition(); int newwidth = mousex - (x() + first_column_minw()); for ( int t=0; col_widths[t] && t<drag_col; t++ ) { newwidth -= col_widths[t]; } // Apply new width, redraw interface col_widths[drag_col] = newwidth; if ( col_widths[drag_col] < 2 ) col_widths[drag_col] = 2; // XXX: 2 should be a class member recalc_tree(); redraw(); return 1; // eclipse event from Fl_Tree's handle() } break; case FL_LEAVE: case FL_RELEASE: change_cursor(FL_CURSOR_DEFAULT); // ensure normal cursor if ( drag_col != -1 && e == FL_RELEASE ) { // release during drag mode? drag_col = -1; // disable drag mode return 1; // eclipse event from base class; we handled it } drag_col = -1; ret = 1; break; } return(Fl_Tree::handle(e) ? 1 : ret); } // Hide these base class methods from the API; we don't want app using them, // as we expect all items in the tree to be TreeRowItems, not Fl_Tree_Items. private: using Fl_Tree::add; }; // Handle custom drawing of the item // // All we're responsible for is drawing the 'label' area of the item // and it's background. Fl_Tree gives us a hint as to what the // foreground and background colors should be via the fg/bg parameters, // and whether we're supposed to render anything or not. // // The only other thing we must do is return the maximum X position // of scrollable content, i.e. the right most X position of content // that we want the user to be able to use the horizontal scrollbar // to reach. // int TreeRowItem::draw_item_content(int render) { TreeWithColumns *treewc = (TreeWithColumns*)tree(); Fl_Color fg = drawfgcolor(); Fl_Color bg = drawbgcolor(); const int *col_widths = treewc->column_widths(); // Show the date and time as two small strings // one on top of the other in a single item. // // Our item's label dimensions int X = label_x(), Y = label_y(), W = label_w(), H = label_h(), RX = treewc->x() - treewc->hposition() + treewc->first_column_minw(), // start first column at a fixed position RY = Y+H-fl_descent(); // text draws here // Render background if ( render ) { if ( is_selected() ) { fl_draw_box(prefs().selectbox(),X,Y,W,H,bg); } else { fl_color(bg); fl_rectf(X,Y,W,H); } fl_font(labelfont(), labelsize()); } if ( render ) fl_push_clip(X,Y,W,H); // Render columns // ⚠️ Be sure to conditionally call fl_pop_clip() before return() from this section // { // Draw each column // ..or if not rendering, at least calculate width of row so we can return it. // int t=0; const char *s = label(); char delim_str[2] = { treewc->column_char(), 0 }; // strcspn() wants a char[] while ( *s ) { int n = strcspn(s, delim_str); // find index to next delimiter char in 's' (or eos if none) if ( n>0 && render ) { // renderable string with at least 1 or more chars? int XX = ( t==0 ) ? X : RX; // TBD: Rename XX to something more meaningful // Don't clip last column. // See if there's more columns after this one; if so, clip the column. // If not, let column run to edge of widget // int CW = col_widths[t]; // clip width based on column width // If first column, clip to 2nd column's left edge if ( t==0 ) { CW = (RX+col_widths[0])-XX; } // If last column, clip to right edge of widget if ( *(s+n) == 0 ) { CW = (x()+w()-XX); } // Draw the text // We want first field (PID) indented, rest of fields fixed column. // fl_color(fg); fl_push_clip(XX, Y, CW, H); // prevent text from running into next column fl_draw(s, n, XX+LEFT_MARGIN, RY); fl_pop_clip(); // clip off // Draw vertical lines for all columns except first if ( t>0 && treewc->column_separators() ) { fl_color(FL_BLACK); fl_line(RX,Y,RX,Y+H); } } if ( *(s+n) == treewc->column_char() ) { s += n+1; // skip field + delim RX += col_widths[t++]; // keep track of fixed column widths for all except right column continue; } else { // Last field? Return entire length of unclipped field RX += fl_width(s) + LEFT_MARGIN; s += n; } } } if ( render ) fl_pop_clip(); return RX; // return right most edge of what we've rendered } int main(int argc, char *argv[]) { Fl::scheme("gtk+"); Fl_Double_Window *win = new Fl_Double_Window(550, 400, "Tree With Columns"); win->begin(); { static int col_widths[] = { 80, 50, 50, 50, 0 }; // Create the tree TreeWithColumns *tree = new TreeWithColumns(0, 0, win->w(), win->h()); tree->selectmode(FL_TREE_SELECT_MULTI); // multiselect tree->column_widths(col_widths); // set column widths array tree->resizing(true); // enable interactive resizing tree->column_char('\t'); // use tab char as column delimiter tree->first_column_minw(100); // minimum width of first column // Add some items in a hierarchy: // // 5197 ? Ss 0:00 /usr/sbin/sshd -D // 12807 ? Ss 0:00 \_ sshd: root@pts/6 // 12811 pts/6 Ss+ 0:00 | \_ -tcsh // 3993 ? Ss 0:00 \_ sshd: erco [priv] // 3997 ? S 0:00 \_ sshd: erco@pts/14 // 3998 pts/14 Ss+ 0:00 \_ -tcsh // 5199 ? Ssl 8:02 /usr/sbin/rsyslogd -n // 5375 ? Ss 0:00 /usr/sbin/atd -f // 13778 ? Ss 0:00 \_ /usr/sbin/atd -f // 13781 ? SN 0:00 | \_ sh // 13785 ? SN 684:59 | \_ xterm -title Reminder: now -geometry 40x6-1+1 -fg white -bg #cc0000 -hold -font // TreeRowItem *top; // top of hierarchy // First row is header top = tree->AddRow("PID\tTTY\tSTAT\tTIME\tCOMMAND"); // first row is always the "header" // Add the hierarchical rows of data.. top = tree->AddRow("5197\t?\tSs\t0:00\t/usr/sbin/sshd -D"); // top level // Add 200 copies of data to tree to test performance for ( int t=0; t<200; t++ ) { { TreeRowItem *child1 = tree->AddRow("12807\t?\tSs\t0:00\tsshd: root@pts/6", top); { tree->AddRow("12811\tpts/6\tSs+\t0:00\t-tcsh", child1); } child1 = tree->AddRow("3993\t?\tSs\t0:00\tsshd: erco [priv]", top); { TreeRowItem *child2 = tree->AddRow("3997\t?\tS\t0:00\tsshd: erco@pts/14", child1); { tree->AddRow("3998\tpts/14\tSs+\t0:00\t-tcsh", child2); } } } top = tree->AddRow("5199\t?\tSsl\t8:02\t/usr/sbin/rsyslogd -n"); top = tree->AddRow("5375\t?\tSs\t0:00\t/usr/sbin/atd -f"); { TreeRowItem *child1 = tree->AddRow("13778\t?\tSs\t0:00\t/usr/sbin/atd -f", top); { TreeRowItem *child2 = tree->AddRow("13781\t?\tSN\t0:00\tsh", child1); { tree->AddRow("13785\t?\tSN\t684:59\txterm -title Reminder: now -geometry 40x6-1+1 -fg white -bg #cc0000 -hold -font", child2); } } } } // tree->show_self(); } win->end(); win->resizable(win); win->show(argc, argv); return(Fl::run()); }
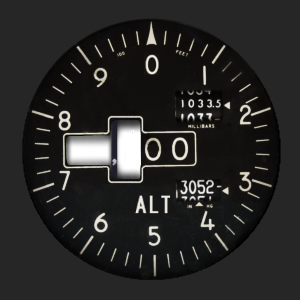
| Tree with right justified clickable custom icons |
In github issue #298, someone asked how to use Fl_Tree to make a right justified clickable icons in custom tree items.In the example, two blue "eyeball" icons can be clicked in each item, and individually toggled. The screenshot shows the MyItem-002 right hand eye having been clicked, toggling it "off".
The Q+A went something like this (paraphrased):
          Q: Are you saying there's another way to achieve custom clickable icons without embedding a widget in
             the item? Can you elaborate more on this approach?  If I draw an icon in the item, from within draw_item_content(),
             how would I be able to detect a push event on this icon without an embedded widget?

          A: There's a few ways to parse events for items:

                * The tree's callback
                * The tree's handle() method

             The callback approach is perhaps easier, saves a little work by avoiding having to derive a class
             from Fl_Tree and do any event handle() stuff.

             So to do that, I expect you'd configure a callback for the tree, and set it up so the callback is
             invoked whenever there's a click, e.g.

                Fl_Tree *tree = new Fl_Tree(..);
                tree->callback(MyTree_CB);                           // tree callback (userdata optional)
                tree->when(FL_WHEN_CHANGED|FL_WHEN_RELEASE);         // when to invoke callback
                tree->item_reselect_mode(FL_TREE_SELECTABLE_ALWAYS); // callback even when reselected

             Then in the callback you can get the item clicked with tree->callback_item(), and the reason for the
             callback with tree->callback_reason() (e.g. 'selected', 'reselected', 'deselected', etc), and then
             using the item returned by callback_item(), invoke your own custom Fl_Tree_Item's method, e.g.
             MyTreeItem::my_handle(), so the item can handle click events on it.

             From there you should be able to use e.g. Fl::event_x() to determine where on the item the click
             occurred and if it happened over one of your drawn indicators (e.g. the eyeball icon), and toggle
             the icon's xpm to affect its state and how it draws, and use Fl::event() to determine if it was a
             push or release, etc.
What follows is the example code demonstrating that technique.
Tree with clickable custom icons + right justification #include <stdio.h> #include <string.h> #include <FL/Fl.H> #include <FL/Fl_Double_Window.H> #include <FL/Fl_Tree.H> #include <FL/Fl_Group.H> #include <FL/Fl_Button.H> // // Fl_Tree clickable custom item icons with right justification // erco 11/28/21 // const char * const eye_open_xpm[] = { "18 12 5 1", " c None", ". c #5B90E9", "+ c #87ABE5", "@ c #B2D2FD", "# c #F5FEFE", "########@@########", "#####@++++++@#####", "####+........+####", "###+...+##+...+###", "#@....+####+....@#", "#+....@#@@#@....+#", "@.....##++##.....@", "#+....@####@....+#", "##+....####....+##", "###@....++....@###", "####@+......+@####", "######@@++@@######"}; const char * const eye_close_xpm[] = { "18 12 5 1", " c None", ". c #5B90E9", "+ c #87ABE5", "@ c #B2D2FD", "# c #F5FEFE", "########@@####+.@#", "#####@++++++@..+##", "####+.....+@..+###", "###+...+##@...+@##", "#@....+##@.+....@#", "#+....@#+.++....+#", "@.....#+.+##.....@", "#+...@+.+##@....+#", "##+.@..+###....+##", "###@....++....@###", "##@.++......+@####", "#@.@##@@++@@######"}; static Fl_Pixmap eye_open_pixmap(eye_open_xpm); static Fl_Pixmap eye_close_pixmap(eye_close_xpm); // Custom item to force child widget to be full size class MyTreeItem : public Fl_Tree_Item { // XPM XPM xywh area // ------------ ------------- Fl_Pixmap *xpm1; int xp1[4]; Fl_Pixmap *xpm2; int xp2[4]; int event_inside(int v[4]) { return Fl::event_inside(v[0],v[1],v[2],v[3]); } public: MyTreeItem(Fl_Tree *tree, const char *name) : Fl_Tree_Item(tree) { label(name); labelsize(14); // Initialize two 'clickable' pixmap icons xpm1 = &eye_open_pixmap; xpm2 = &eye_open_pixmap; } // Handle custom drawing of the item int draw_item_content(int render) { // Show the date and time as two small strings // one on top of the other in a single item. // // Our item's label dimensions int X = label_x(), Y = label_y(), W = label_w(), H = label_h(); // Render background + label if ( render ) { fl_color(FL_WHITE); fl_rectf(X,Y,W,H); fl_color(FL_BLACK); if ( label() ) fl_draw(label(), X,Y,W,H, FL_ALIGN_LEFT); } int lw=0, lh=0; if ( label() ) { lw=0; lh=0; fl_measure(label(), lw, lh); } X += lw + 8; { // Calculate xpm's xywh draw area int yoff = (H - xpm1->h()) / 2; xp1[0] = X; xp1[1] = Y+yoff; xp1[2] = xpm1->w(); xp1[3] = xpm1->h(); X = label_x()+label_w()-xpm2->w()-10; // right justify xpm2 w/10 pix margin xp2[0] = X; xp2[1] = Y+yoff; xp2[2] = xpm2->w(); xp2[3] = xpm2->h(); X += xpm2->w(); // Draw the xpms if ( render ) { xpm1->draw(xp1[0], xp1[1], xp1[2], xp1[3]); xpm2->draw(xp2[0], xp2[1], xp2[2], xp2[3]); } } return X; // return right most edge of what we've rendered } // Our own event handler void my_handle() { printf("item clicky: %s\n", label()); // Toggle xpms if event inside it if ( event_inside(xp1) ) xpm1 = (xpm1 == &eye_open_pixmap) ? &eye_close_pixmap : &eye_open_pixmap; if ( event_inside(xp2) ) xpm2 = (xpm2 == &eye_open_pixmap) ? &eye_close_pixmap : &eye_open_pixmap; } }; // Return callback reason as a string (demo) static const char* reason_str(Fl_Tree_Reason reason) { switch (reason) { case FL_TREE_REASON_NONE: return "none"; case FL_TREE_REASON_SELECTED: return "selected"; case FL_TREE_REASON_DESELECTED: return "deselected"; case FL_TREE_REASON_RESELECTED: return "reselected"; case FL_TREE_REASON_OPENED: return "opened"; case FL_TREE_REASON_CLOSED: return "closed"; case FL_TREE_REASON_DRAGGED: return "dragged"; } return "???"; } static void MyTree_CB(Fl_Widget *w, void *userdata) { char itempath[256]; Fl_Tree *tree = (Fl_Tree*)w; Fl_Tree_Item *item = tree->callback_item(); if ( !item ) return; if ( tree->item_pathname(itempath, sizeof(itempath)-1, item) != 0 ) return; printf("callback: itempath='%s' reason=%s event_x,y=%d,%d\n", itempath, reason_str(tree->callback_reason()), Fl::event_x(), Fl::event_y()); // One of our custom items? if ( strstr(itempath, "MyItem") ) { // cheap/dirty type detection MyTreeItem *myitem = (MyTreeItem*)item; // transform item type switch ( tree->callback_reason() ) { case FL_TREE_REASON_SELECTED: case FL_TREE_REASON_RESELECTED: myitem->my_handle(); // let item handle select/reselect events break; default: break; } } } int main(int argc, char *argv[]) { Fl_Double_Window *win = new Fl_Double_Window(350, 400, "Tree Test"); win->begin(); { // Create the tree Fl_Tree *tree = new Fl_Tree(0, 0, win->w(), win->h()); tree->callback(MyTree_CB); // tree callback (userdata optional) tree->when(FL_WHEN_CHANGED|FL_WHEN_RELEASE); // when to invoke callback tree->item_reselect_mode(FL_TREE_SELECTABLE_ALWAYS); // callback even when reselected // Add some items tree->add("Flintstones/Fred"); tree->add("Flintstones/Wilma"); tree->add("Flintstones/Pebbles"); // Add a few custom items { MyTreeItem *i; i = new MyTreeItem(tree, "MyItem-001"); tree->add("Custom Item/MyItem-001", i); i = new MyTreeItem(tree, "MyItem-002"); tree->add("Custom Item/MyItem-002", i); } tree->add("Superjail/Alice"); tree->add("Superjail/Jailbot"); } win->end(); win->resizable(win); win->show(argc, argv); return(Fl::run()); }
| NTSC Waveform Monitor Simulator |
Similar to an Oscilloscope, a Waveform Monitor is a specialized oscilloscope for monitoring NTSC video signals.This program demonstrates how to simulate a waveform monitor with a graticule, realtime controls for scale, zoom, pan
of a several different NTSC signals; "color bars", "multi-burst", and "video black".The purpose of this program is to show an example of how one can implement an oscilloscope using plain FLTK
drawing commands and get very realtime feedback and decent visual results.The code might be a good starting point for someone writing a real oscilloscope application, such as to
model data samples from a digital scope.Source code for this is here.
To build the code, use: fltk-config --compile ntsc-waveform-sim.cxx
| Show image with rounded corners |
An example of how to leverage SVG drawing to create a widget that displays an image with nicely (antialiased) rounded corners. The demo includes a slider to let the user interactively change the size of the corner's radius in pixels.The demo assumes the file "/var/tmp/colorbars.jpg" exists (this image was used for the screenshot demo). Change this filename in the code to show other jpg images. The demo assumes the image is small enough to fit inside the window and allow for the slider to show without overlap.
Show image with rounded corners #include <sstream> #include <FL/Fl_Double_Window.H> #include <FL/Fl_Slider.H> #include <FL/Fl_Box.H> #include <FL/Fl_JPEG_Image.H> #include <FL/Fl_SVG_Image.H> #include <FL/fl_message.H> //// //// Example to display a jpeg image with rounded corners. -erco 07/27/21 //// // Widget to display an image of same size with rounded corners class RoundedImageDisplay : public Fl_Box { int bordercolor_[3]; int radius_; Fl_SVG_Image *svg_image_; protected: // Rebuild SVG image // Do this if radius or bordercolor[] are changed // void rebuild_svg() { std::stringstream s; s << "<?xml version='1.0' encoding='UTF-8' standalone='no'?>\n" << "<svg width='" << w() << "' height='" << h() << "'>\n" // Draw border << " <rect x='" << (0-radius_/2) << "' " << "y='" << (0-radius_/2) << "' " << "rx='" << radius_ << "' " << "ry='" << radius_ << "' " << "width='" << (w()+radius_) << "' " << "height='" << (h()+radius_) << "' " << "fill='none' " << "stroke='rgb(" << bordercolor_[0] << "," << bordercolor_[1] << "," << bordercolor_[2] << ")' " << "stroke-width='" << radius_ << "' />\n" << "</svg>\n"; if ( svg_image_ ) delete svg_image_; svg_image_ = new Fl_SVG_Image(NULL, s.str().c_str()); parent()->redraw(); } public: RoundedImageDisplay(int X,int Y,int W,int H,const char *title=0) : Fl_Box(X,Y,W,H,title) { svg_image_ = 0; radius(20); // default radius bordercolor(0x80,0x80,0x80); // default border color: 50% gray box(FL_FLAT_BOX); } void bordercolor(int R,int G,int B) { bordercolor_[0] = R; bordercolor_[1] = G; bordercolor_[2] = B; rebuild_svg(); } void radius(int val) { radius_ = val; rebuild_svg(); } void draw() { // Let box draw image Fl_Box::draw(); // Then draw our SVG border with rounded corners over that if ( svg_image_ ) svg_image_->draw(x(), y()); } }; // Callback to handle slider changing the corner radius static void Slider_CB(Fl_Widget *w, void *data) { Fl_Slider *slider = (Fl_Slider*)w; RoundedImageDisplay *rimage = (RoundedImageDisplay*)data; rimage->radius(slider->value()); } int main() { Fl::scheme("gtk+"); // Border color int border[3] = { 0x80, 0xa0, 0x80 }; // gray green // Make window with the border color Fl_Double_Window *win = new Fl_Double_Window(1000,800,"Rounded Corners"); win->color(fl_rgb_color(border[0], border[1], border[2])); // Load a JPEG image const char *jpgfile = "/var/tmp/colorbars.jpg"; Fl_JPEG_Image *jpg = new Fl_JPEG_Image(jpgfile); if ( jpg->fail() ) { fl_alert("can't open %s", jpgfile); return(1); } // Create instance of our rounded image display class that is // the same size as the image so our border draws around its edge correctly // RoundedImageDisplay *rimage = new RoundedImageDisplay(10,10,jpg->w(),jpg->h()); rimage->bordercolor(border[0], border[1], border[2]); // use same border color as window rimage->radius(50); // use a large radius rimage->image(jpg); // assign jpg image to our display widget // Slider for border radius Fl_Slider *slider = new Fl_Slider(1000-50,10,20,200,"border\nradius"); slider->align(FL_ALIGN_BOTTOM); slider->callback(Slider_CB, (void*)rimage); slider->bounds(0,200); slider->value(20); // initial value 20 slider->do_callback(); // apply slider value to border radius slider->color(fl_rgb_color(border[0]/1.5, border[1]/1.5, border[2]/1.5)); win->end(); win->show(); return Fl::run(); }